|
PRIMECLUSTER Installation and Administration Guide 4.1 (for Solaris(TM) Operating System)
|
Contents
Index
 
|
8.1.3.2 Changing the Attributes Used by a Resource or a Resource Interface
Change the attributes used by a resource or a resource interface according to the following procedure.
 Operation Procedure:
Use the "userApplication Configuration Wizard" screen to change a resource used by the cluster application.
- Stop RMS.
If RMS is running, see "Stopping RMS" and stop RMS.
- Select the resource.
Return to the "Global Cluster Services" screen, and select userApplication Configuration Wizard.
From the tree on the left of the "userApplication Configuration Wizard" screen, select the resource to be changed, right-click the mouse to display the pop-up menu, and select Edit userApplication or Resource.

To change the attributes used by the resource or an interface of the resource, you can also select Edit userApplication or Resource from the top menu of the userApplication Configuration Wizard, and then select Next.
 Cmdline
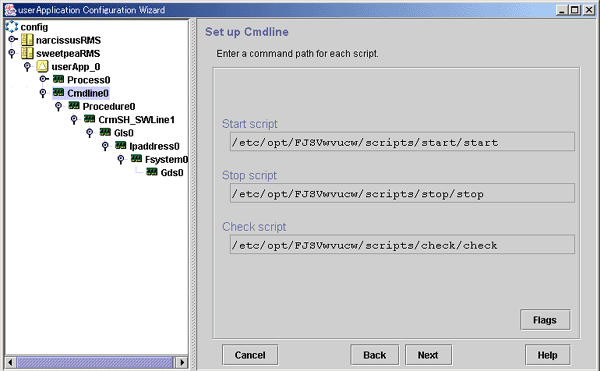
- Flags button
- Click this button to change the script attributes, if necessary.
- A dialog box for setting the attributes of the created script will be displayed. For details, see "Setting up Cmdline Flags" in "Creating Cmdline Resources."
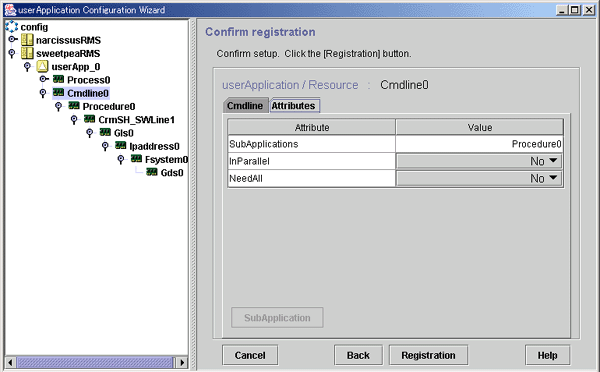
- SubApplication button
- Click this button to associate a previously created Cmdline resource or processing monitoring resource found under the current Cmdline resource. This button cannot be selected if the resource belongs to a userApplication.
Fsystem
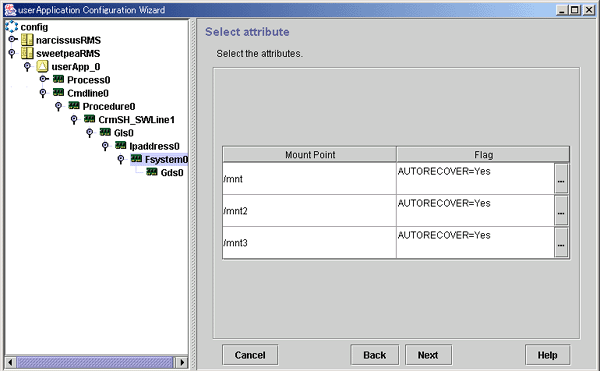
- [...] button
- Select this button to change an attribute that controls management of mount points. If you click this button, the "Change Mount Point Attributes" screen is displayed.

- SubApplication button
- This button is for specifying another resource that depends on the current resource. However, in Fsystem, this button is disabled.
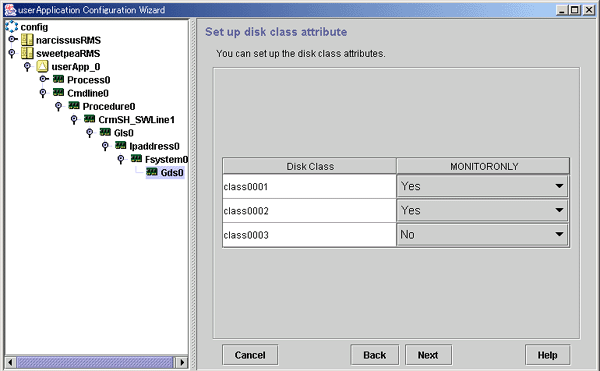
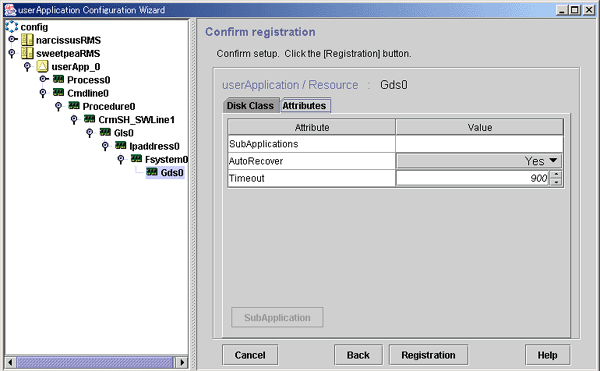
Gds
|
Flag |
Outline |
|
MONITORONLY |
This flag sets whether the Faulted state of a disk class is to be reported to userApplication if the disk class fails. If this flag is set to "Yes" and a failure of the disk class occurs, the disk class is set to Faulted but the Gds resource remains Online and failover of userApplication does not occur. |
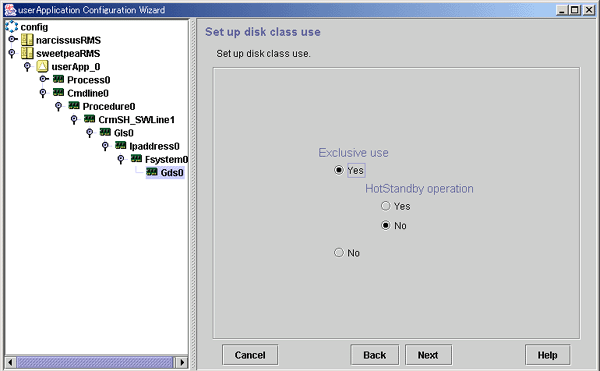
- Exclusive use
- Click "Yes" or "No" for Exclusive use. If you select "Yes", select "Yes" or "No" for Hot-Standby operation.
- For information on the shared disk, see "Shared disk uses" in "Creating Gds Resources." Note that if you change Exclusive use from "No" to "Yes," there is the risk of disk damage if another Gds resource is using the same disk class.
- SubApplication button
- Click this button to associate the other Gds resources with the Gds resource that has been created above. This button cannot be selected if the resource belongs to userApplication.
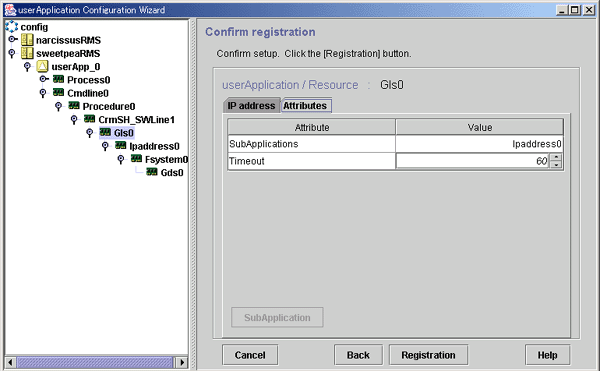
Gls
|
Flag |
Outline |
|
AUTORECOVER |
If this is set to "Yes," RMS attempts to restore the faulted resource to prevent userApplication from being switched to other host.
For GLS, this flag must be set to "No." |
- SubApplication button
- Click this button to associate the other Gls resources with the Gls resource that has been created above. This button cannot be selected if the resource belongs to userApplication.
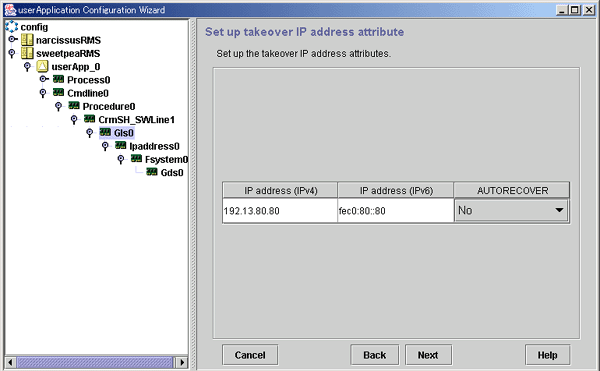
Ipaddress
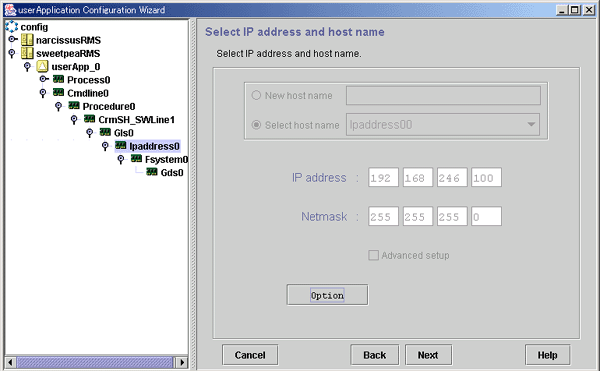
- Options button
- Use this button to change attributes of a takeover IP address. For operation instructions, see "Setting up Takeover IP Address Attributes."

- SubApplication button
- Click this button to associate the other Ipaddress resources with the Ipaddress resource that has been created above. This button cannot be selected if the resource belongs to userApplication.
Procedure
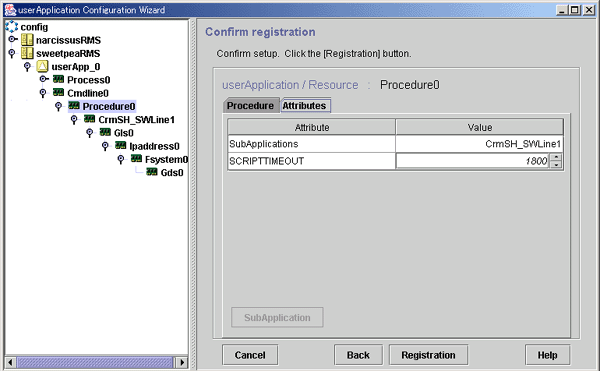
- SubApplication button
- Click this button to associate the other Procedure resources with the Procedure resource that has been created above. This button cannot be selected if the resource belongs to userApplication.
Process
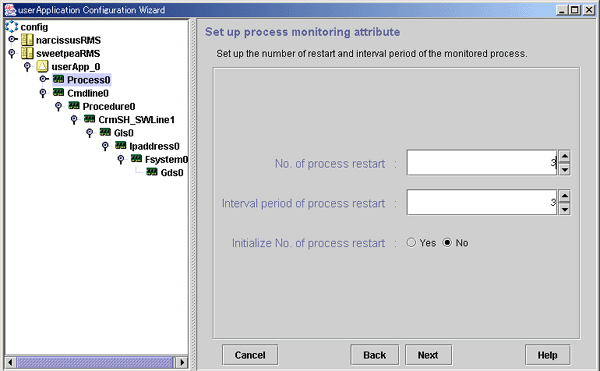
- No. of process restart
- Specify the number of times the monitored process is to be restarted between 0 and 99 (default is 3). If 0 is specified and the monitored process stops, the process is not restarted and becomes Faulted.
- Interval period of process restart
- Specify the interval period when the process monitoring facility determines that the process has stopped until the facility executes restart. The specification range is between 0 and 3600 seconds (default is 3).
- Initialize No. of process restart
- Specify whether or not the counter that has the specified No. of process restart value in the process monitoring facility as its maximum value is to be initialized periodically. If you select "Yes," the counter is initialized every "No. of process restart value 60 seconds." If you select "No," the counter is not initialized periodically.
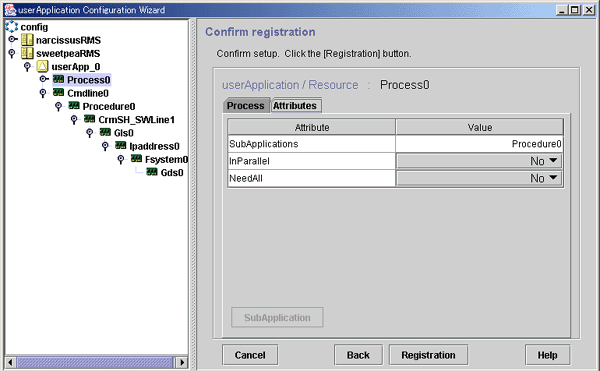
- SubApplication button
- Click this button to associate the Process resources or Cmdline resources with the Process resource that has been created above. This button cannot be selected if the resource belongs to userApplication.
SH_SWLine
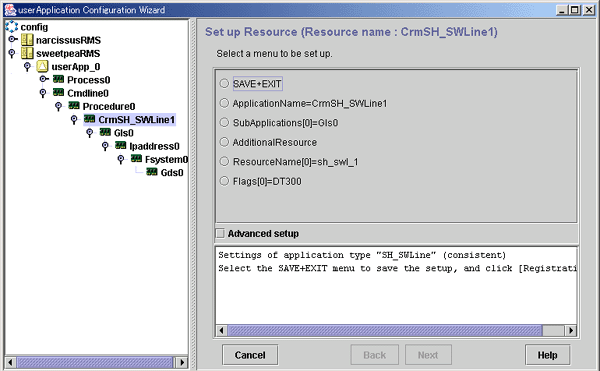
- Advanced setup
- Check this box to display attributes that do not need to be changed, during resource creation. Use this checkbox to display items such as the setup menu for the resource timeout value.

Specify "Application name" of the resource only if the resource is not associated with userApplication. If this resource is associated with userApplication, you must delete and then re-create the resource.
ISV
For information on changing an ISV resource, see the manuals for the product.
Specify "Application name" of the resource only if the resource is not associated with userApplication. If this resource is associated with userApplication, you must delete and then re-create the resource.
 RMS Configuration distribution messages
After you finish changing the operation attributes, click the Registration button on the screen to register the new information to RMS Configuration.
If the system judges that registration to RMS Configuration is completed and RMS Configuration can be distributed, it displays the following message screen:
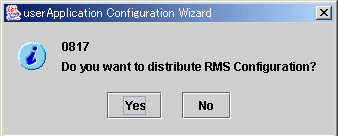
If you have completed making changes, click Yes.
All Rights Reserved, Copyright (C) FUJITSU LIMITED 2005