

| PRIMECLUSTER Installation and Administration Guide 4.1 (for Solaris(TM) Operating System) |
Contents
Index
 
|
| Part 2 Installation | > Chapter 6 Building Cluster Applications | > 6.6 Setting Up Cluster Applications | > 6.6.1 Setting Up Resources |
This section describes the procedure for creating Cmdline resources.
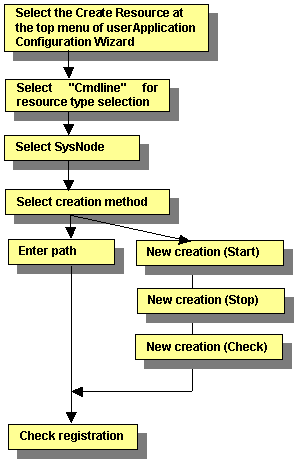
 Creating resources
At the top menu of the "userApplication Configuration Wizard," select Create Resource.
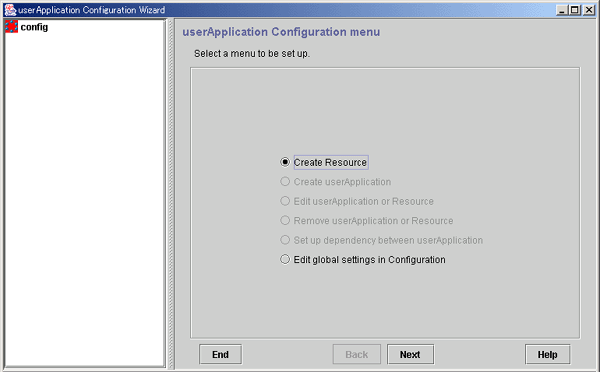
Click Next to go to the "Create Resource" screen.
 Selecting the resource type
Select the type of resource that you want to create.
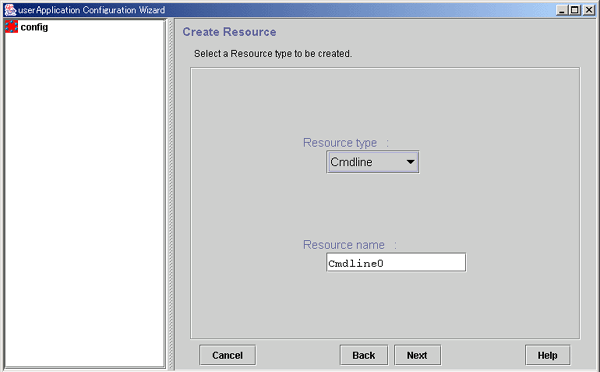
Click Next to go to the "Select SysNode" screen.
 Selecting the SysNode
Select the SysNode in which the resource is to exist. SysNode refers to the CIP node name used by RMS.
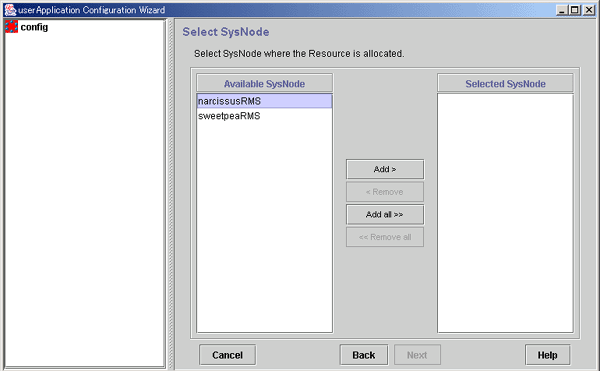
From the Available SysNode, select the SysNode, and then click Add. To add all the listed SysNodes, click Add all.
To delete a SysNode, select the SysNode to be deleted from Selected SysNodes, and then click Remove. To delete all listed SysNodes, click Remove all.
Click Next to go to the "Set up each resource" page.
 Selecting the Cmdline creation method
Cmdline resources are general-purpose resources. By defining three scripts for starting, stopping, and monitoring the user application (program) to be monitored, you can create a resource that matches the purpose.
The scripts correspond to the following processes in RMS
Start script
It starts a program in Online processing.
Stop script
It stops a program in Offline processing.
Check script
This script is started periodically.
It notifies the user program state.
Select a method of configuring the script files and commands as the resource.
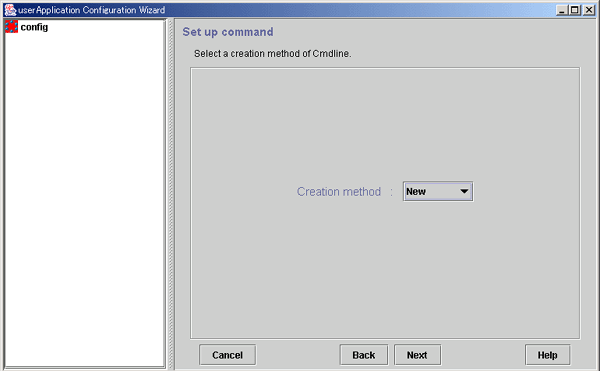
You can create a new script file.
You can specify the existing script or command.
Click Next.
After completing the setup, click Next. This will lead you to the following operation according to the selected item:
New: "Creating new script files"
Path input: "Creating scripts by path input"
 Creating new script files
When you create a script, you must carefully create a script end value, a timeout value, and environmental variable. For details, see "Notes on script creation" in "Setting Up Online/Offline Scripts."
For details on the script sample, see "Sample scripts" in "Setting Up Online/Offline Scripts."
If you specify New for Creation method of Cmdline, the Start script creation screen appears.
 Start script creation
The Cmdline contents can be input directly into the editing area. The text copy, cut, and paste operations are enabled only in the editing area.
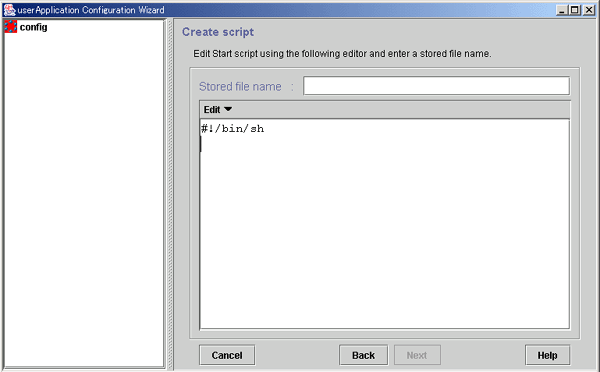

When specifying arguments, separate the arguments with "blank" characters. Since the scripts that can be created in this screen are Bourne shell by default, the following string is displayed at the beginning of the editing area:#!/bin/sh
|
Item |
Operation |
|---|---|
|
Move cursor |
You can move the cursor to any position by placing the mouse pointer at the target position and single-clicking the mouse pointer or by operating the arrow keys on the keyboard in the top, bottom, left, or right directions. |
|
Insert text |
You can input characters at the cursor position. |
|
Delete text |
|
|
Cut text |
Select a string with one or more characters in the editing area and go to Edit -> Cut. |
|
Copy text |
Select a string with one or more characters in the editing area and go to Edit -> Copy. |
|
Paste text |
Position the cursor at the position where the character string that was previously cut or copied within the editing area is to be pasted, and then select Edit -> Paste. |

These script files are not removed even when processing is cancelled during Cmdline creation, or the Cmdline resource or GUI package (FJSVwvucw) is removed. If you want to remove the files, you need to remove the "/opt/FJSVwvcuw/scripts/start" directory. For example, execute the "rm(1)" command to remove one script file as follows:# rm /opt/FJSVwvucw/scripts/start/XXXXXXXX
To remove the directory, specify "/opt/FJSVwvucw/scripts/start" or "/opt/FJSVwvucw."
Note that, when you delete a Stop script or Check script, replace the "start" portion in the above directory with "stop" or "check."
Click Next to go to "Stop script creation."
 Stop script creation
Create a Stop script by using the same procedure as that for the Start script.
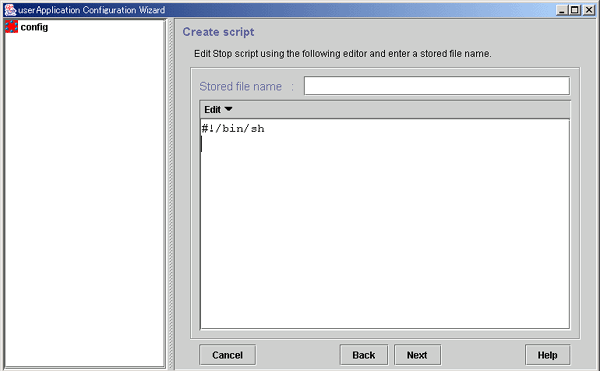
Click Next to go to "Check script creation."

You can omit setup of this script file. Just click Next.
 Check script creation
Create a Check script by using the same procedure as that for the Start script.
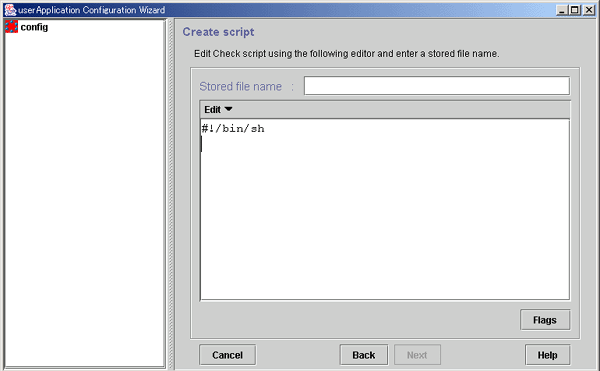

If "NULLDETECTOR" was set to "Yes" at the "Set Cmdline Flag" screen, a Check script does not need to be configured. In this case, the Check script is not configured as resource information because the Check script is not started from RMS.
 Creating scripts by path input
If a script already exists, you can enter a path to select the script.

The following characters cannot be used in the file path or the arguments: back slash ("\"), tilde ("~"), percent sign ("%"), ampersand ("&"), and at sign ("@").
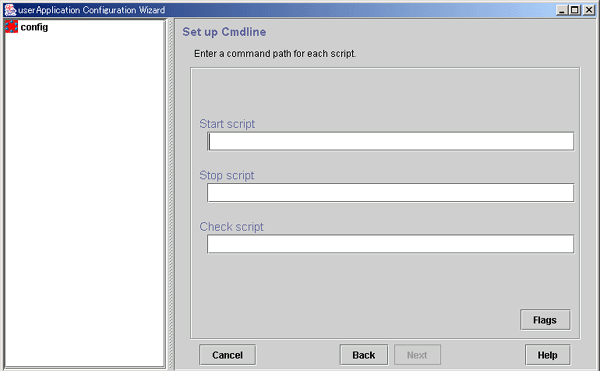
 Setting up Cmdline flags
The method of a controlling script defined to a Cmdline resource can be adjusted by changing the flag values.
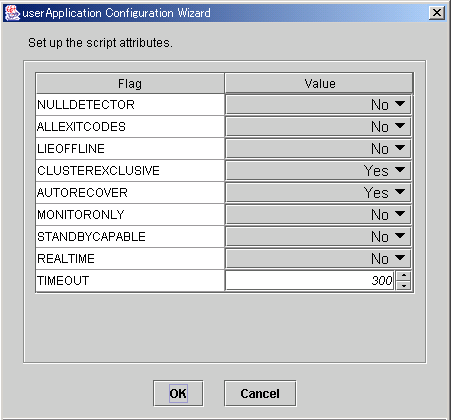
After completing the setup, click OK to return to the "Set up Cmdline" screen.
|
Flag |
Outline |
|---|---|
|
NULLDETECTOR |
If the flag is set to "Yes", the specified Check script will be disabled. Instead, RMS assumes that the resource is Online during Online processing and Offline processing. When RMS is restarted, this resource becomes Offline. |
|
ALLEXITCODES |
If the flag is set to "No", the exit code of the Check script will be interpreted as follows: 0: Online If the flag is set to "Yes", the exit code of the Check script will be interpreted as follows: 0: Online The default value is "No." |
|
LIEOFFLINE |
If this flag is set to "Yes," the resource is notified as being Offline if a Stop script is not specified. If a Stop script is specified, the failure of the script triggers fault processing. |
|
CLUSTEREXCLUSIVE |
If this flag is set to "Yes", the resource becomes Online only on one node in a cluster system. If the resource becomes Online on two or more nodes at the same time because of a script problem, the state of userApplication to which this resource belongs becomes Inconsistent. |
|
AUTORECOVER |
If this flag is set to "Yes," RMS tries to recover the resource if it becomes faulted. In this way, RMS tries to prevent the userApplication from being switched to another host |
|
MONITORONLY |
This flag controls whether the "faulted" condition in the resource makes the userApplication Faulted. If this flag is set to yes, the resource becomes Faulted, but this does not make the userApplication Faulted. |
|
STANDBYCAPABLE |
If this flag is set to "Yes," RMS sets the StandbyCapable attribute to 1 for this resource. For detailed information regarding this attribute, see "9 Appendix -Attributes" in "PRIMECLUSTER Reliant Monitor Service (RMS) with Wizard Tools Configuration and Administration Guide." |
|
REALTIME |
If the flag is set to "No", the Check script will be started in the TS class (time-sharing scheduling) . |
|
TIMEOUT |
This flag sets the timeout interval (seconds) for program start and stop processing. |
 Check Cmdline registration information
You can check a list of the scripts that has been set up previously. You can also configure resource attributes by selecting the Attributes tab and switching the screen.
For information on the resource attributes, see "Attributes."
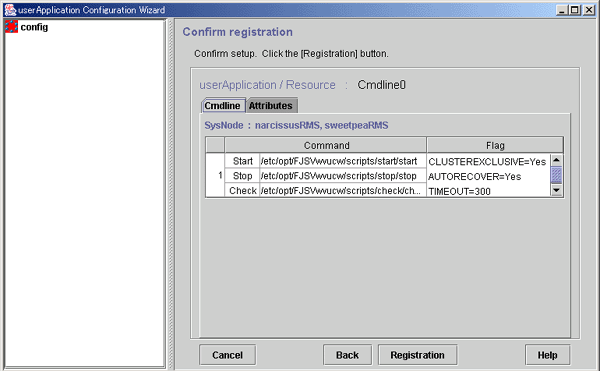
The attributes that are displayed in the "Flag" column are only those Resource attributes for which a value has been set. For example, if No is set for the AUTORECOVER attribute, then it means that AUTORECOVER attribute has not been set, and it is not displayed in the Flag column.
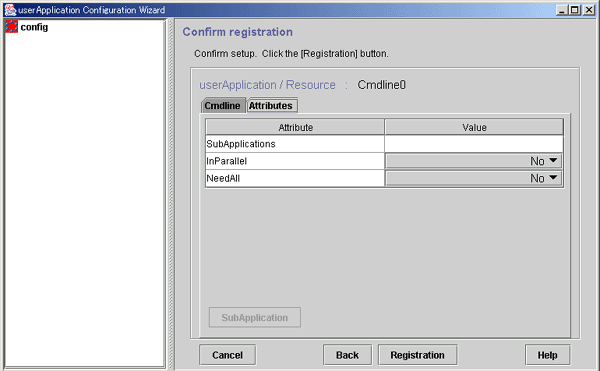
After checking the registration information, click Registration.
 Resource association
Use this function to configure a startup sequence among resources of the same type.
By assigning startup priorities to resources, you can clarify the order in which the resources are to be switched to Online or Offline.
In Online processing, resources that have a high startup priority are switched to Online before resources that have a low startup priority.
Conversely in Offline processing, resources that have a low startup priority are switched to Offline before resources that have a high startup priority.
If a startup priority is not assigned or if resources have the same priority, the sequence is undefined.
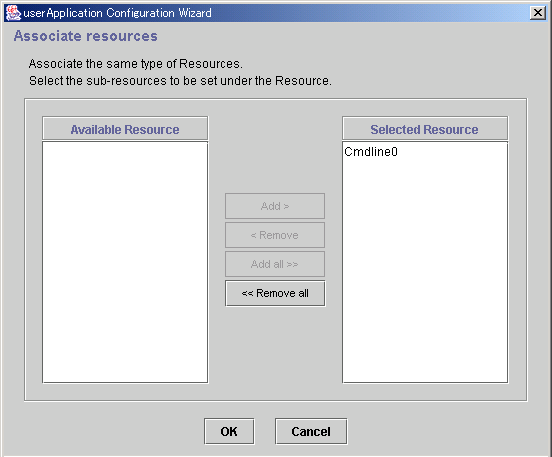
From Available Resource select the resource to be configured under the current resource, and then click Add. To add all listed resources, click Add all. To delete a resource from under the current resource, select the resource to be deleted from the Selected Resource, and then click Remove. To delete all listed resources, click Remove all.
After completing the setup, click OK, and return to the "Confirm Registration Information" screen.

In the configuration shown below, the startup priority has been set to resources of the same type.
To build this configuration, build the resources according to the procedure shown below.
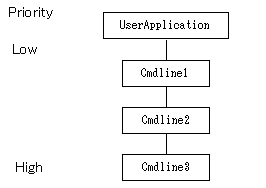
- Create Cmdline3.
- Create Cmdline2, and set Cmdline3 as subApplication.
- Create Cmdline1, and set Cmdline2 as subApplication.
- Create userApplication, and set Cmdline1 as subApplication.
The procedure for building the following configuration is shown below.
- Create Cmdline3.
- Create Cmdline2.
- Create Cmdline1, and set Cmdline2 and Cmdline3 as subApplication.
- Create userApplication, and set Cmdline1 as subApplication.
In the configuration shown below, the other resources were not set as subApplication during the creation of resource.
Contents
Index
 
|