This section explains the procedure for creating a COBOL program.
Point
The "NetCOBOL Getting Started Guide", explains the procedures for importing sample projects to the workspace. Procedures to create a new project called SAMPLE1 are explained here.
3. Create a template by using the COBOL source generation wizard
1. Start NetCOBOL Studio
This section explains how to start NetCOBOL Studio. An executable file is created from a COBOL source program in the project in this example.
Select "Apps" > "Fujitsu NetCOBOL V11 > "NetCOBOL Studio" from the "Start" menu.
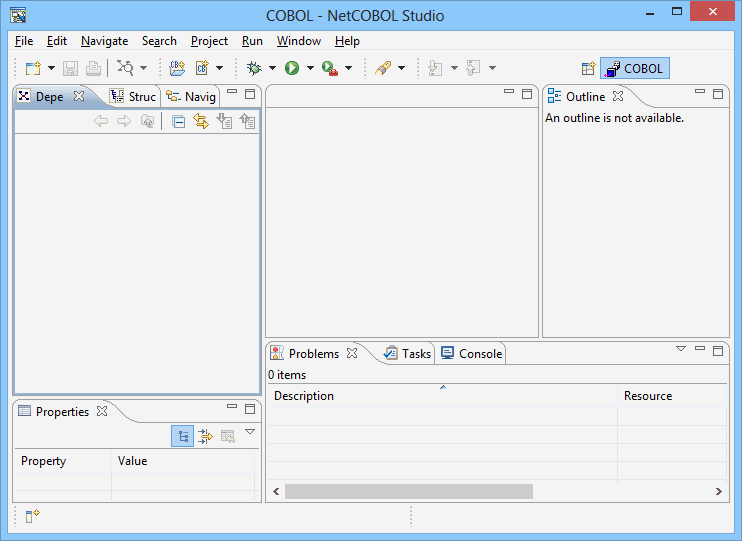
The start screen appears when NetCOBOL Studio is started.

Click the "Setup..." button to set the workspace. For details about setting a workspace, refer to "C.2.1 Setting workspace". When a workspace is not set, the default workspace is used. For details about the default workspace, refer to "C.1 Default workspace".
Click the "Run" button. The NetCOBOL Studio window is displayed.
2. Create a project
To create a COBOL project:
Select "File" > "New" > "COBOL Project" from the menu bar. The new project wizard is displayed.
Specify a project name and a storage folder on the second page.
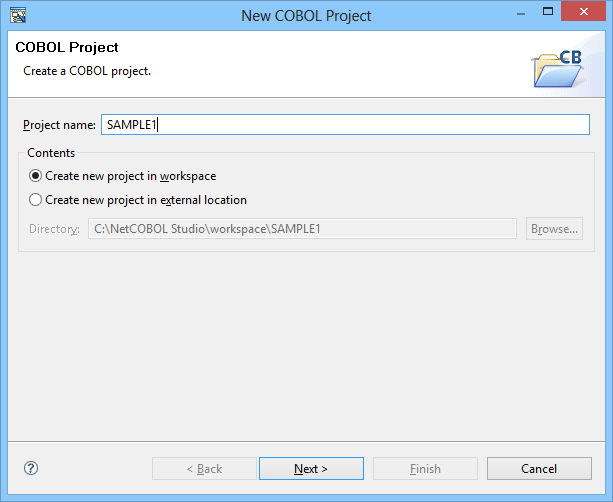
Field | Entry |
|---|---|
Project name | SAMPLE1 |
Contents | Create new project in workspace |
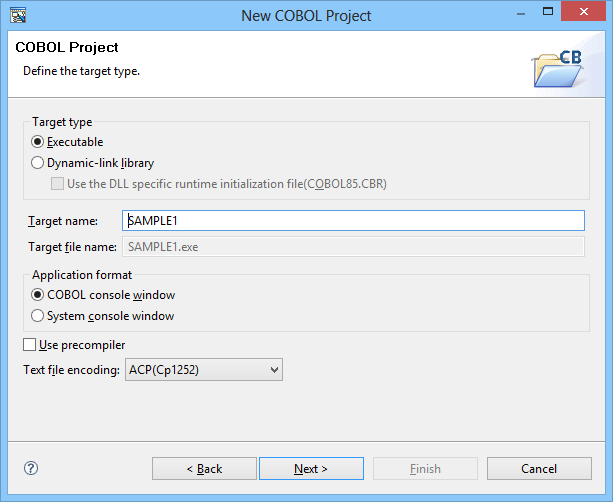
This page is used to specify information on the target. Leave the defaults and click the "Next" button.
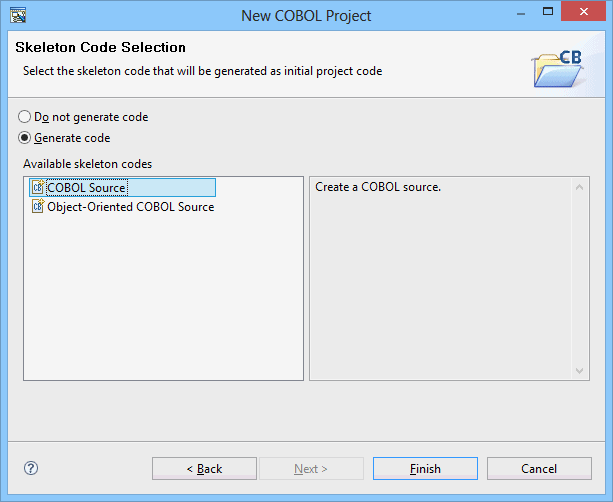
This page is used to select the type of source code to be created. Select "COBOL Source" in the "Available skeleton codes" section, and then click on the "Finish" button.
Note
Projects for 32-bit and 64-bit COBOL applications cannot be created in the same workspace. Separate workspace folders must be specified for 32-bit and 64-bit COBOL projects.
3. Create a template by using the COBOL source generation wizard
Using the COBOL source generation wizard, create a template of a COBOL source file.
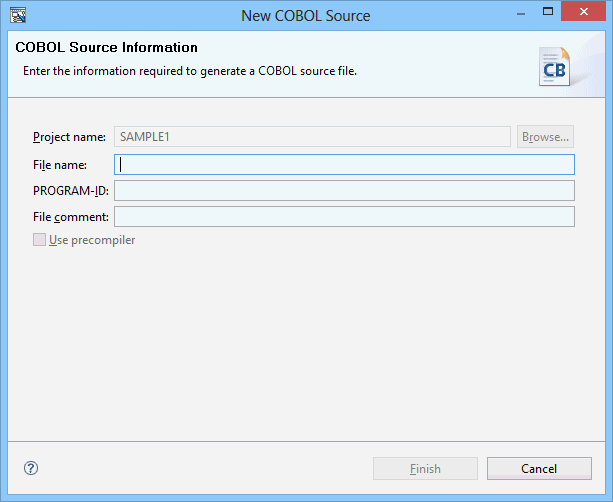
Make the following entries in the fields on this screen:
Field | Entry |
|---|---|
Project name | SAMPLE1 |
File name | SAMPLE1 |
PROGRAM-ID | SAMPLE1 |
File comment | Optional: Enter a comment related to the COBOL source file. |
Click on the "Finish" button. The SAMPLE1.cob file is created and opened in the COBOL editor.
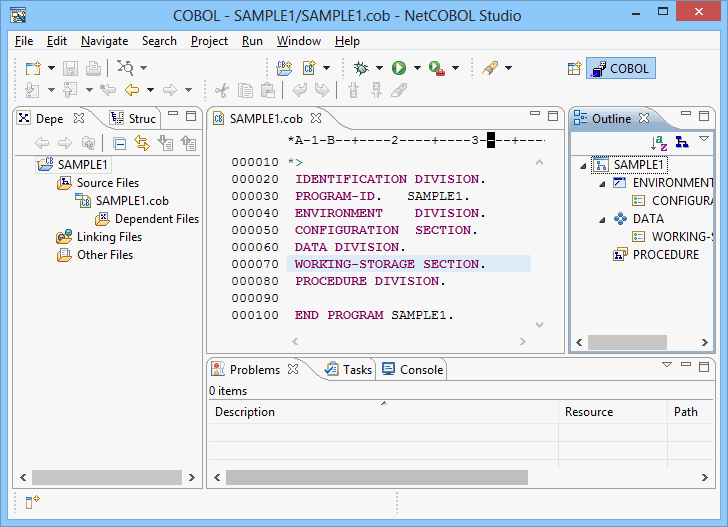
4. Edit the program
Edit the COBOL source file that was created using the wizard. Add and modify data items and procedures as desired.
WORKIGN-STORAGE SECTION
  01  WORD-VALUES.
      02     PIC X(10) VALUE "apple".
      02     PIC X(10) VALUE "black".
      02     PIC X(10) VALUE "cobol".
      02     PIC X(10) VALUE "dog".
      02     PIC X(10) VALUE "eye".
      02     PIC X(10) VALUE "fault".
      02     PIC X(10) VALUE "good".
      02     PIC X(10) VALUE "high".
      02     PIC X(10) VALUE "idea".
      02     PIC X(10) VALUE "junior".
      02     PIC X(10) VALUE "king".
      02     PIC X(10) VALUE "love".
      02     PIC X(10) VALUE "medium".
      02     PIC X(10) VALUE "new".
      02     PIC X(10) VALUE "open".
      02     PIC X(10) VALUE "pig".
      02     PIC X(10) VALUE "queen".
      02     PIC X(10) VALUE "review".
      02     PIC X(10) VALUE "smile".
      02     PIC X(10) VALUE "tomorrow".
      02     PIC X(10) VALUE "understand".
      02     PIC X(10) VALUE "version".
      02     PIC X(10) VALUE "wood".
      02     PIC X(10) VALUE "xylophone".
      02     PIC X(10) VALUE "yesterday".
      02     PIC X(10) VALUE "zoo".
      02     PIC X(10) VALUE "**error**".
  01  WORD-TABLE REDEFINES  WORD-VALUES.
      02  WORD-ITEM OCCURS 27 TIMES.
         03  FIRST-CHARACTER PIC X.
         03                  PIC X(9).
  01  WORD-INDEX          PIC 9(3).
  01  INPUT-CHARACTER     PIC X.
  01  REQUEST-MESSAGE     PIC X(42).
       VALUE  "ENTER ONE CHARACTER OF ALPHABETIC-LOWER.=>".
PROCEDURE DIVISION
  DATA-INPUT  SECTION.
**(1)DISPLAY THE ABOVE MESSAGE
       DISPLAY REQUEST-MESSAGE WITH NO ADVANCING.
**(2)ACCEPT THE INPUT CHARACTER
       ACCEPT  INPUT-CHARACTER.
*
  SEARCH-WORD  SECTION.
**(3)WORDS ARE SEARCHED CORRESPONDING TO THE INPUT CHARACTER
       PERFORM TEST BEFORE
               VARYING WORD-INDEX FROM 1 BY 1
               UNTIL WORD-INDEX > 26
          IF INPUT-CHARACTER = FIRST-CHARACTER (WORD-INDEX)
            THEN EXIT PERFORM
           END-IF
        END-PERFORM.
*
  WORD-OUTPUT  SECTION.
**(4) THE RESULTING WORD MATCH IS DISPLAYED
       DISPLAY WORD-ITEM (WORD-INDEX).
*
       EXIT PROGRAM.
After completing the editing, select "Save" from the COBOL editor menu or click the "Save" icon.
5. Build the project
If "Project" > "Build Automatically" in the menu bar is enabled, the COBOL program will be built automatically when the source program is saved in the previous step. To manually execute the build, or to execute the build if the automatic build was cancelled, select "Project" > "Build Project" from the menu bar.
6. Start the debugger
Before starting the debugger, set breakpoints as follows:
On the vertical ruler at the left edge of the COBOL editor window, position the cursor on the line where a breakpoint is to be set and double-click the left mouse button. A mark indicating a set breakpoint (![]() ) is displayed on the vertical ruler.
) is displayed on the vertical ruler.
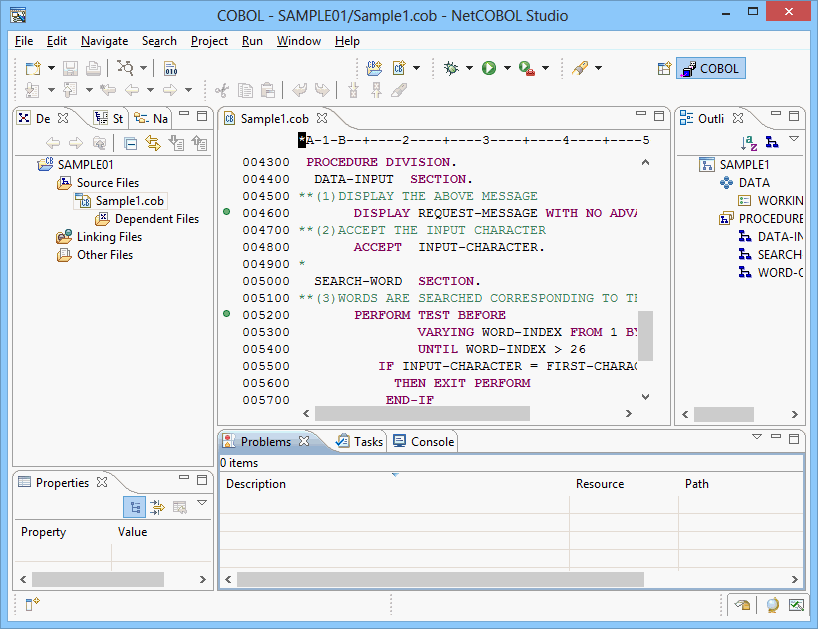
After completing the setting of breakpoints, start the debugger:
Select "Run" > "Debug As" > "COBOL Application" from the menu bar.
A message is displayed to confirm switching to the Debug perspective when the first breakpoint is reached. Click the "Yes" button.
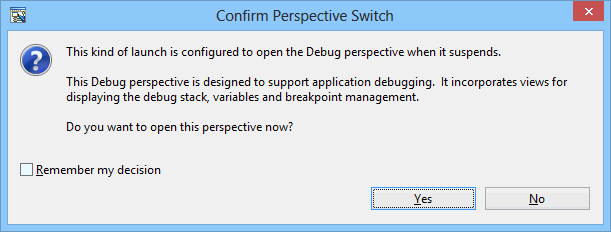
The Debug perspective is displayed, and processing is stopped at the first breakpoint.
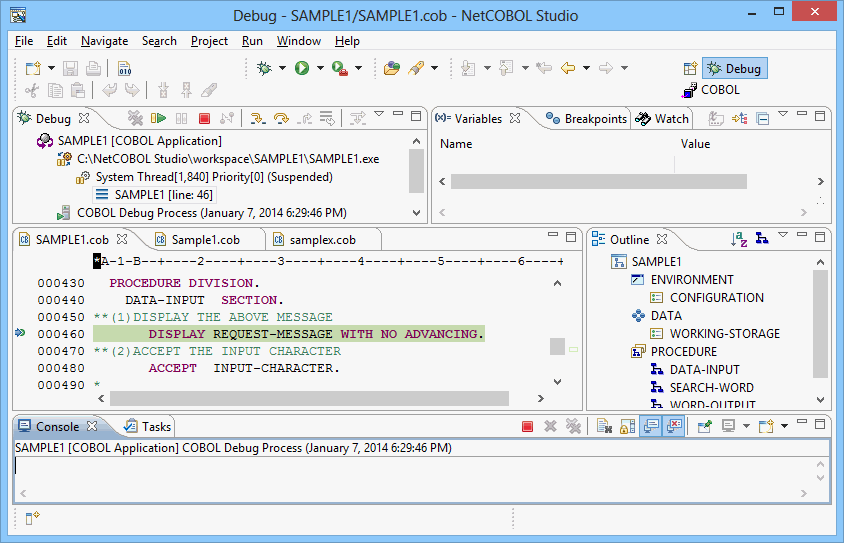
Change a value of the "INPUT-CHARACTER" data item.
Select the "INPUT-CHARACTER" data item in the COBOL editor, and select "Add to Watch View" from the context menu. "INPUT-CHARACTER" is added into the "Watch" view.
Select the "INPUT-CHARACTER" data item in the "Watch" view, and select "Change Value" from the context menu. The "Set Value" dialog box appears.
Change a value in the "Set Value" dialog box appears. Click the "OK" button.
Click either of the following buttons from the "Debug" view and the application is executed.
Resume
Step Into
Step Over
For additional information, refer to "7.2.1 Debug view".
Point
After completing debugging, select "Window" > "Open Perspective" > "COBOL" from the menu bar to return to the COBOL perspective.
7. Execute the COBOL program
To execute the COBOL program you created, select "Run" > "Run As" > "COBOL Application" from the menu bar.