This section describes how to use the "userApplication Configuration Wizard" to register cluster applications (userApplication) to RMS.
Note that the operation procedure varies depending on the topology of the cluster application.
Note
userApplication name
When you create a cluster application, enter a name of the userApplication and then select a topology.
The userApplication name must be a string of 18 or fewer characters starting with an alphabetic letter and consisting of alphanumerics and "_" (underscore) only.
Moreover, for this name, do not use the same name ("generic") as the type of userApplication.
Example: userApp_0
This section explains how to register standby cluster applications to RMS by using the "userApplication Configuration Wizard."
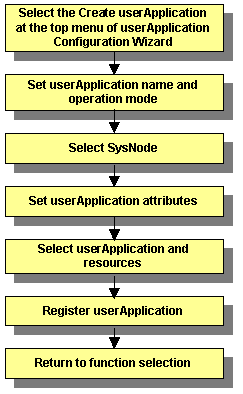
The flow of the process for registering the Standby cluster applications is shown below.
Figure 6.49 Flow of cluster application registration
Starting cluster application creation
At the top menu of the "userApplication Configuration Wizard," select Create userApplication.
Figure 6.50 Top menu of userApplication Configuration Wizard
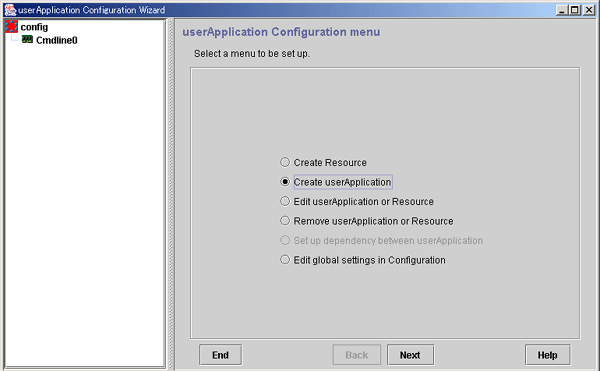
Click Next to go to the "Set up userApplication name and operation method" screen.
Setting the userApplication name and the operation method
Enter the userApplication name and the operation method.
Figure 6.51 Set up userApplication name and operation method
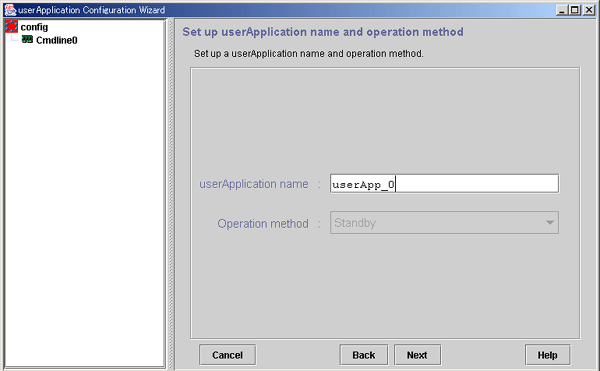
Specify the name of the cluster application.
Specify the input character string using up to 18 characters starting with an alphabetic letter and consisting of only alphanumeric characters and "_" (underscore).
Specify Standby (standby operation) or Scalable (scalable operation) as the operation method of the cluster application.
Standby
This is the default operation method. When multiple SysNode are selected, "priority" values must be set.
Scalable
This is only for the cluster application resources displayed in Resource Selection. The priority does not need to be set even if multiple SysNode are selected.
After completing the setup, click Next to go to the "Select SysNode" screen.
Selecting a SysNode
Select the SysNode in which the cluster application is to be configured.
Figure 6.52 Select SysNode
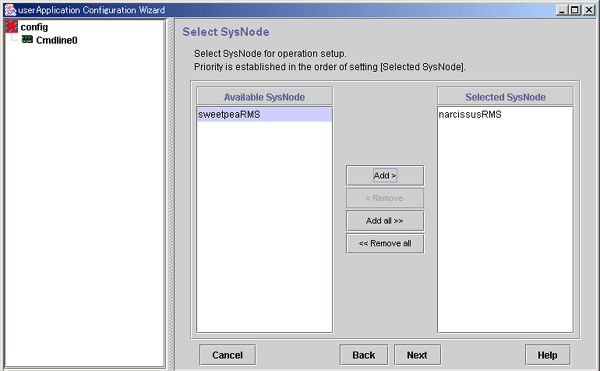
Contains names of available SysNodes that belong to the specified RMS configuration.
The name of the SysNode in which the cluster application is to be operated. The priority of SysNode is determined by the sequence in which SysNode are listed in this box. SysNode displayed at the top of the list becomes the Online SysNode when userApplication is started.
From Available SysNode, select the SysNodes in which the cluster application is to be built, and then click Add. To add all listed SysNodes, click Add all. To remove a SysNode, select the SysNode to be removed from Selected SysNode, and then click Remove. To remove all listed SysNodes, click Remove all.
After completing the setup, click Next to go to the "Set up attribute" screen.
Setting cluster application attributes
Refer to the items below when setting up the cluster application attributes:
To start the cluster application automatically when the cluster is started
Set "AutoStartUp" to "Yes."
Note
If you use a standby cluster application for scalable operation, you must set "AutoStartUp" to "No." Scalable operation controls the startup of a standby cluster application.
Action to take if another error occurs during failover (double failure)
Set "HaltFlag" to "Yes."
Note
To ensure safe operation, be sure to set this item to "Yes."
For Standby operation
To monitor the resource state of the standby node, set "StandbyTransitions" to "ClearFaultRequest|StartUp|SwitchRequest."
Note
If GLS (Redundant Line Control Function) is used, please make sure to set "ClearFaultRequest|StartUp|SwitchRequest" for "StandbyTransitions" so that the Gls resources on a Standby node can be monitored.
For details on attribute, see "6.7.5 Attributes."
Figure 6.53 Set up attribute
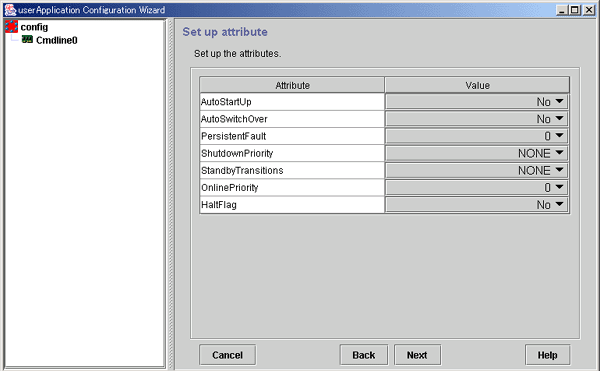
After completing the set up, click Next to go to the "Select Resource" screen.
Selecting resources
Enter the resources to be used by the cluster application.
Figure 6.54 Select Resource
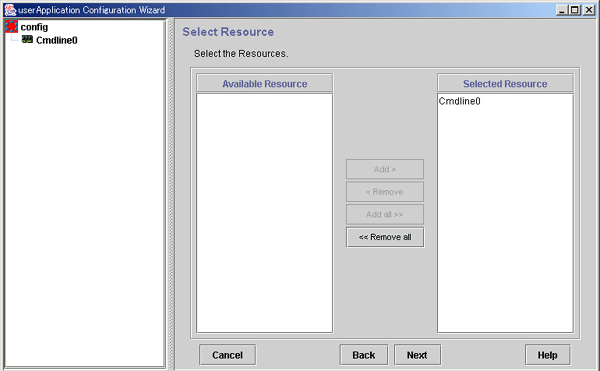
The names of the resources that can be shared among the selected SysNodes are displayed. An available resource is one that was created with the same name in all the SysNodes that are specified by the cluster application.
You cannot share one resource with multiple userApplication. The resource that is used for other userApplication is not displayed.
The resources to be registered to the cluster application are displayed.
From Available Resource, select the resources to be used by the cluster application, and then click Add. To add all listed resources, click Add all. To remove a resource, select the resource to be removed from Selected Resource, and then click Remove. To remove all listed resources, click Remove all.
After completing the setup, click Next to go to the "Confirm registration" screen.
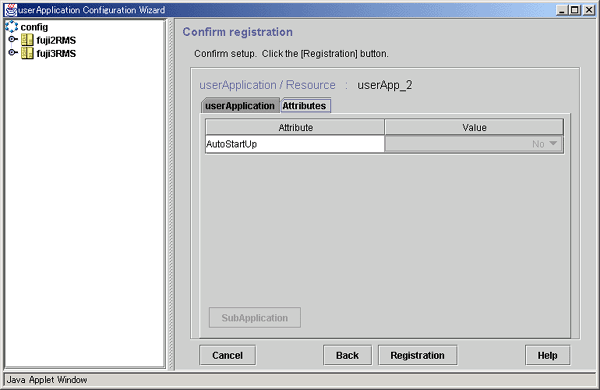
Checking the registration information of a cluster application
Check the registration information of the cluster application.
Figure 6.55 Confirm registration
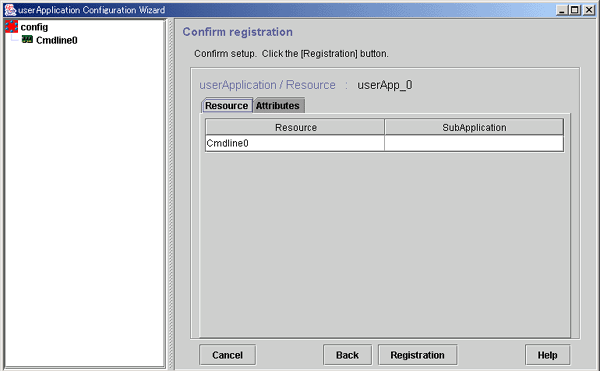
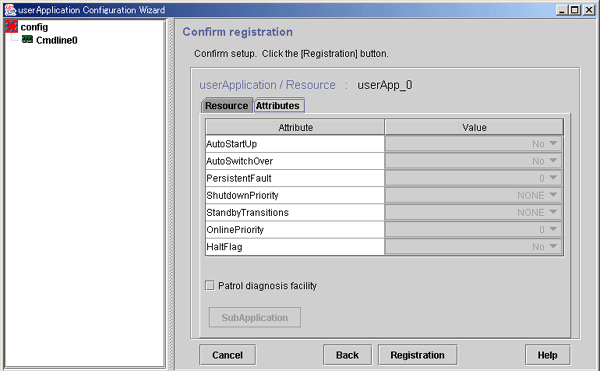
Select this checkbox to enable the patrol diagnosis facility in the cluster application. See "6.9 Setting Up Patrol Diagnosis."
This button is always inactive.
The attributes displayed here cannot be changed. To change the attributes, you must return to "Setting cluster application attributes."
Check the registration information, and then click Registration.
Note
The patrol diagnosis facility can be used in Standby operation. To enable the patrol diagnosis facility, set "ClearFaultRequest|StartUp|SwitchRequest" to "StandbyTransitions" of the cluster application. For details on attributes, see "6.7.5 Attributes."
The resource name of the patrol diagnosis facility is "patrol_" + "cluster application name." This resource name cannot be changed.
This section explains how to register scalable cluster applications to RMS by using the "userApplication Configuration Wizard."
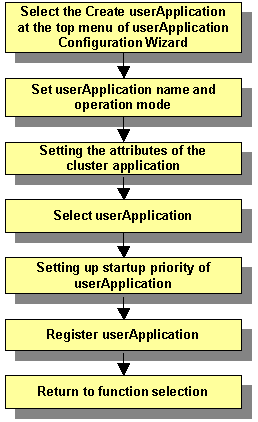
The flow of the procedure for registering a scalable cluster application is shown below:
Figure 6.56 Flow of Scalable cluster application registration
Preparing standby cluster applications
The scalable cluster application performs scalable operation by interconnecting multiple standby cluster applications. Before creating a scalable cluster application, you have to create the standby cluster applications that constitute the components of the scalable cluster application.
Figure 6.57 Preparing Standby cluster applications
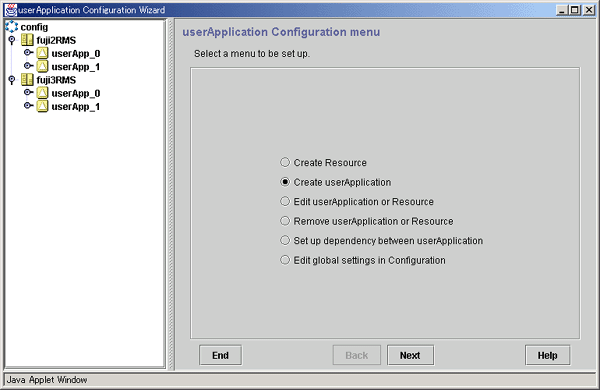
For details on how to create Standby cluster applications, see "6.7.2.1 Creating Standby Cluster Applications."
Starting up Create Cluster Applications
Specify Create userApplication from the top menu of "userApplication Configuration Wizard."
Figure 6.58 userApplication Configuration Wizard top menu
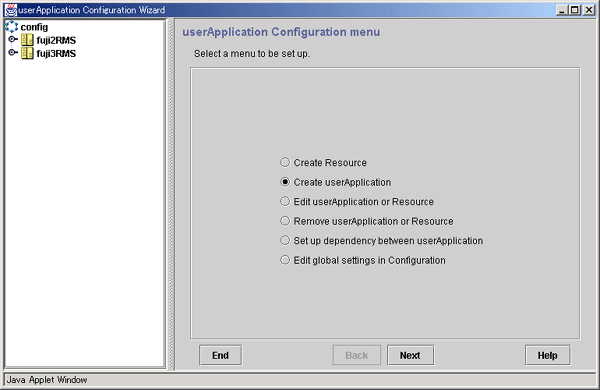
Click Next to go to the "Set up userApplication name and operation method" screen.
Setting userApplication name and the topology
Set up userApplication name and the topology.
Figure 6.59 Setting up userApplication name and the operation method
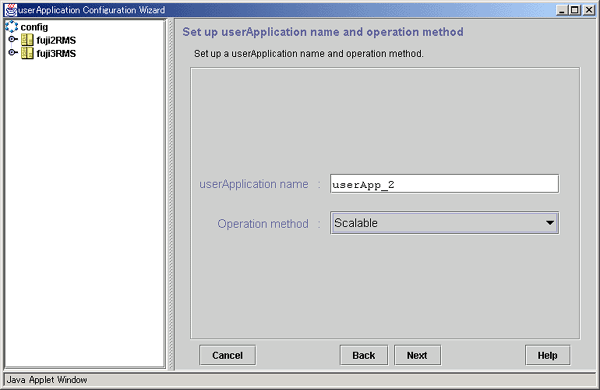
Specify a name for the cluster application that you want to set up.
Specify an input character string
Specify the input character string with up to 18 characters with an alphabetic letter and consisting of only alphanumeric characters and "_" (underscore).
Select Scalable.
After you have made all the necessary settings, click Next to go to the "Set up attribute" screen.
Setting the attributes of the cluster application
Set up the attributes of the cluster application as described below:
Set up automatic start of the scalable cluster application when the cluster starts up.
Set up "AutoStartUp" to "Yes."
For details on this attribute, see "6.7.5 Attributes."
Figure 6.60 Set up attributes
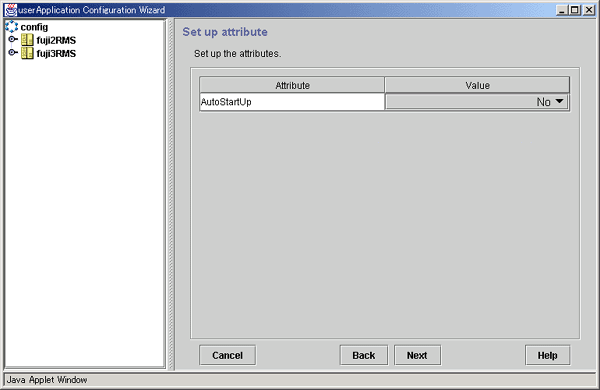
After you have made this setting, click Next to go to the "Select userApplication" screen.
Select userApplication
Select a cluster application for which scalable operation is to be performed.
Figure 6.61 Selecting userApplication
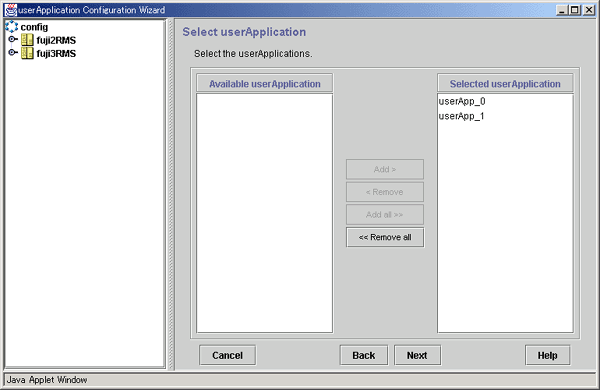
Indicates a standby cluster application that can be used.
Indicates the cluster application that is being used for scalable operation.
Select a cluster application for scalable operation from Available userApplication, and then click Add. If you want to add all the cluster applications, click Add all. To delete a cluster application from scalable operation, select the cluster application to be deleted from [Selected userApplication] and then click Remove. To delete all the cluster applications, click Remove all.
After you have made these settings, click Next and then go to the "Set up startup priority of userApplication" screen.
Setting up startup priority of userApplication
Set up the startup order of the cluster applications.
Figure 6.62 Selecting userApplication
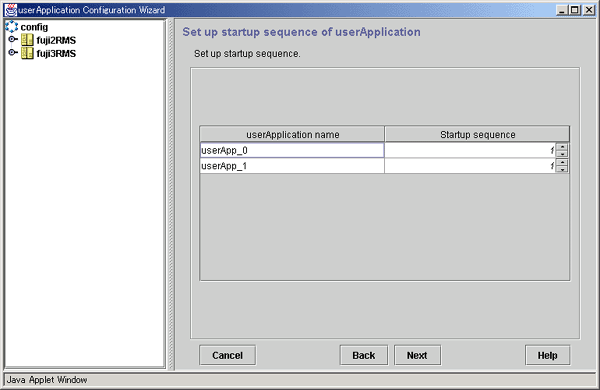
Cluster applications for scalable operation.
Set up a startup priority for the cluster applications. Cluster applications start up in order, starting from the smallest priority number. Conversely, cluster applications stop in order, starting from the greatest startup number. Cluster applications with the same startup priority start or stop in parallel.
After you have made these settings, click Next to go to the "Set up attribute" screen.
Confirming cluster application registration information
Confirm the registration information of the cluster application.
Figure 6.63 Confirm registration
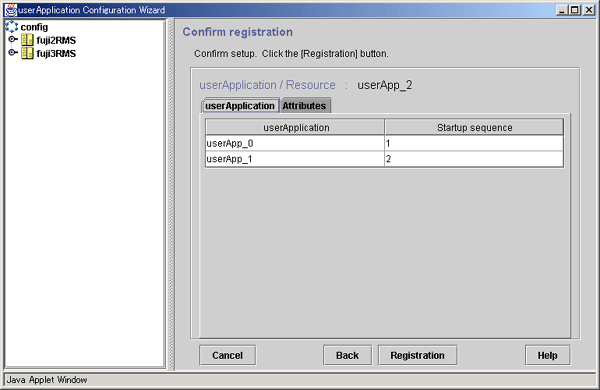
This button is always disabled.
After you have confirmed the registration information, click Registration.