This section explains the procedures for version upgrade through reinstallation for each of the following components:
In case of CS
When performing reinstallation, 800MB available memory capacity is required. Confirm the available memory capacity before reinstallation.
If the available memory capacity is insufficient, add virtual memory of PC and set the available capacity larger than 800MB.
Ensure that there is sufficient disk space for version upgrade.
To upgrade from V12.0L10 or earlier, refer to "Upgrading from V12.0L10 or earlier" in "Required Hardware" in the Systemwalker Desktop Patrol User's Guide for a rough estimate of the space required.
To upgrade from V13.0.0 or later, refer to "Extending the Systemwalker standard database" in "Required Hardware" in the Systemwalker Desktop Patrol User's Guide for a rough estimate of the space required.
If the 32-bit version CS is installed on a 64-bit operating system, the CS cannot be upgraded to a 64-bit version CS.
If you install Systemwalker Desktop Patrol, for version upgrade, to an environment where Systemwalker Desktop Keeper is installed, the service managing iOS devices will be stopped automatically. In this case, the service managing iOS devices will not be available for use until the system is restarted.
The procedure for reinstalling CS is as follows:
Log on to Windows using an account that belongs to the Administrators group.
Besides, you should log on it with Windows login user for constructing the environment or for constructing Symfoware by the means of using Operation Environment Maintenance Guide.
If you are using other applications, close them.
After inserting DVD-ROM of Systemwalker Desktop Patrol into PC, the following window is displayed.
Select "CS Installation".
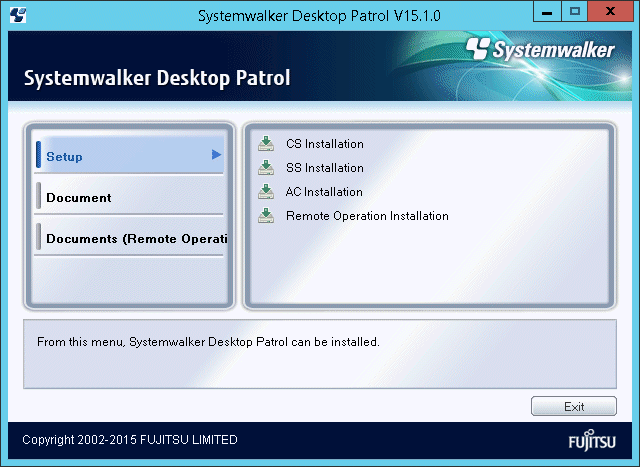
If the Setup above has not been started, start "swsetup.exe" of DVD-ROM drive.
The Welcome to the InstallShield Wizard for Systemwalker Desktop Patrol window is displayed, click the Next button.
The Please Read window is displayed, confirm the content and click the Next button.
In addition, when IT BudgetMGR (INV) service and World Wide Web Publishing service stop, this window will not be displayed.
The Start to Copy Files window is displayed, confirm whether the content displayed in the window is incorrect and then click the Next button.
The Installation Status window is displayed and installation is started.
When the installation completes, the window shown below will be displayed.
Click Finish.
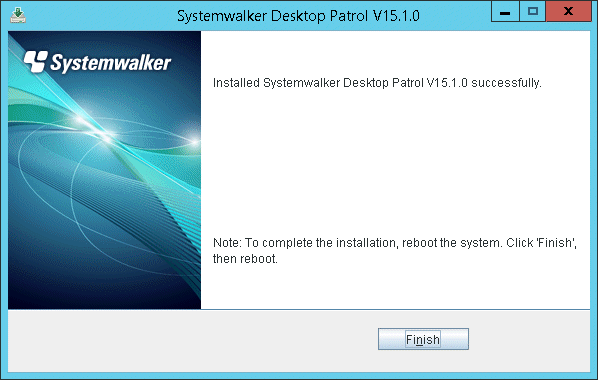
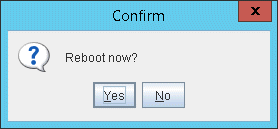
To use the program, the system must be restarted.
Click Yes.
Register the license key.
About the registration of the license key, refer to "2.3.2.4 Register the license key".
Register the latest software dictionary.
Register the latest software dictionary saved in the DVD-ROM before starting an operation.
Copy to local disk temporarily during registration. Besides, because the software dictionary saved in DVD-ROM is read-only, modify as read-write.
Saving target: < DVD-ROM Drive>:\utilities\supportcenter
For details, refer to "AtoolETPGT.exe (Apply Software Dictionary)" in the Systemwalker Desktop Patrol Reference Manual.
Note
About first software dictionary registration after upgrade
After upgrade, it takes time for first software dictionary registration processing.
Wait until AtoolETPGT.exe command processing is completed.
Note
Ensure that Symfoware Server is not being used by other products or applications. Once it is ensured that Symfoware Server is not being used by other products or applications, delete Symfoware Server.
From Control Panel, start Add or Remove Programs, or Programs and Features > Uninstall a program, and select and delete the following products:
"Symfoware Client" or "Symfoware Server Client"
"Symfoware Server" or "Symfoware Server Enterprise Edition"
Upgrade by the following procedure.
Upgrade to Systemwalker Desktop Patrol V14.2.0
Backup data
Upgrade OS by server replace
Recovery data
Upgrade to Systemwalker Desktop Patrol V15.1.0
In case of DS
The procedure for reinstalling DS is as follows.
Log on to Windows using an account that belongs to the Administrators group.
If you are using other applications, close them.
Input the following URL in the Address bar of Web browser.
http://server information (FQDN name or host name or IP address of [Systemwalker Desktop Patrol CS])/DTP/index.html
The login window is displayed, enter User ID and Password and click the Login button.
The main menu is displayed, click CS/DS Settings and Status in the Environment Setup window, the following window is displayed.
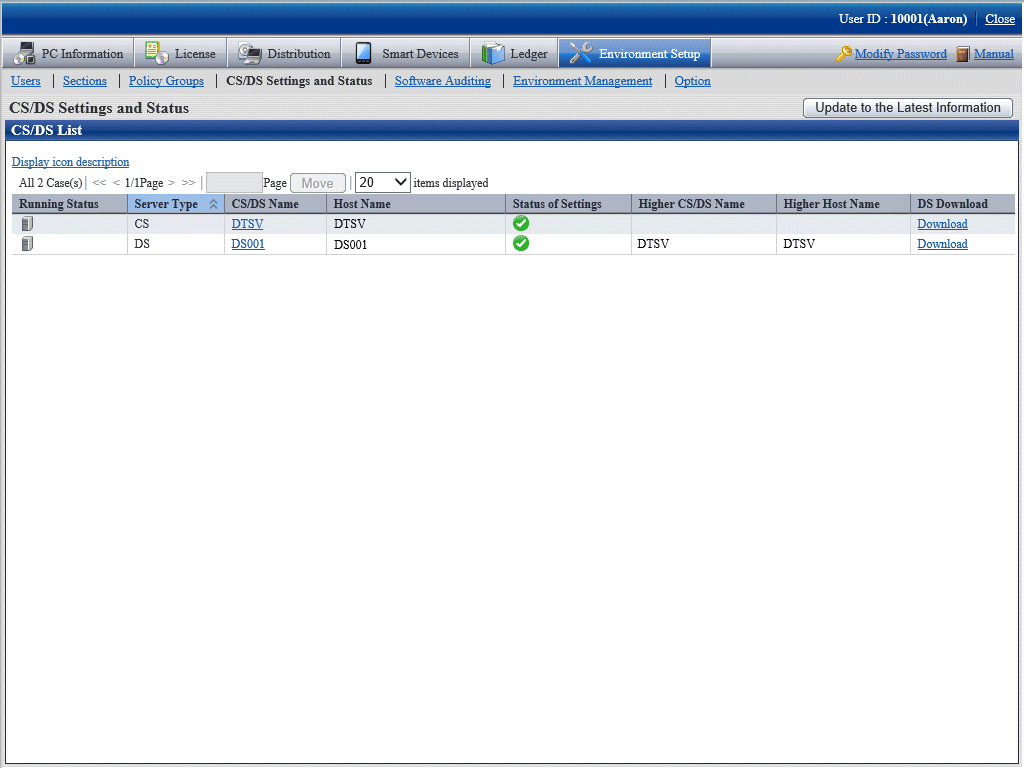
Click Download of PC as the higher server of DS to be reinstalled.
The Download Files dialog box is displayed and message for confirming saving appears. Click the Open button.
The Welcome window is displayed. Click the Next button.
Start to install automatically.
The Installation Completed window is displayed after the processing is completed normally. Click the Finish button.
Systemwalker Desktop Patrol is modified as the available status.
Upgrade by the following procedure.
Backup data
Upgrade OS by server replace
Recovery data
Upgrade to Systemwalker Desktop Patrol V15.1.0
In case of AC
Reinstallation procedure for the AC is shown below:
Log on to Windows using an account that belongs to the Administrators group.
If you are using other applications, close them.
Insert the Systemwalker Desktop Patrol DVD-ROM in the PC.
In the window below, select AC Installation
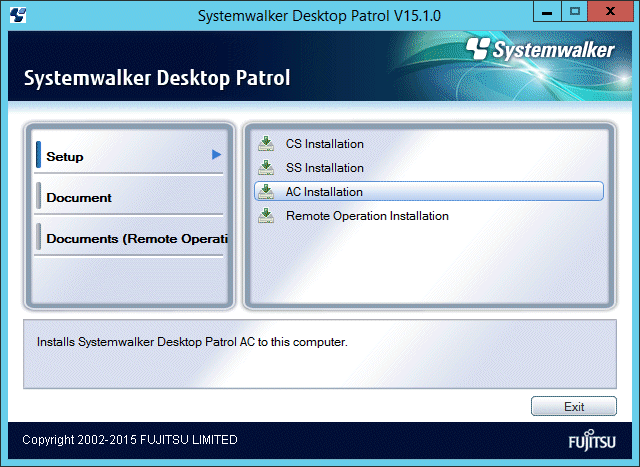
If the above installer window is not displayed, start "swsetup.exe" in the DVD-ROM drive.
The Welcome to the InstallShield Wizard for Systemwalker Desktop Patrol window will be displayed. Click Next.
The Start Copying Files window will be displayed. Ensure that the information displayed in the window is correct, and click Next.
The Installation Status window will be displayed, and installation process will start.
The Setup has been completed normally. window will be displayed. Click Finish.
In case of ADT
Log on to Windows using an account that belongs to the Administrators group.
Enter the following URL in the address bar of your web browser.
http://serverInfo (FQDN name, or host name or IP address of Systemwalker Desktop Patrol CS)/DTP/dwl.htmlTo use a PC that is not connected with Desktop Patrol CS as "ADT", download the ADT module on another PC that is connected with Desktop Patrol CS, and copy the module to the PC on which "ADT" will be installed.
The download menu will be displayed. Click ADT Download, and the following window will be displayed.
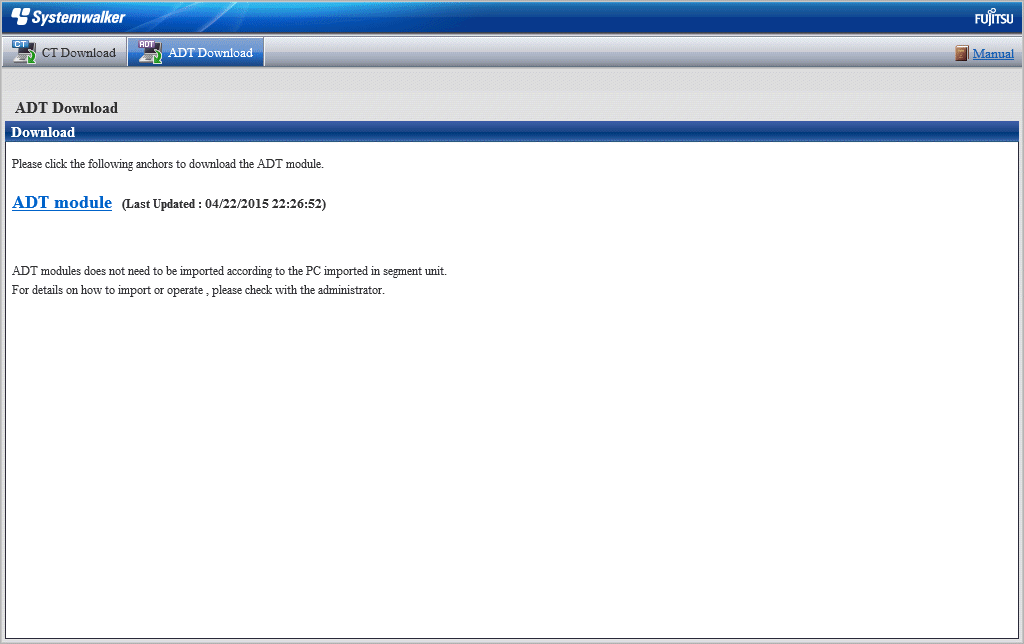
Click ADT module to start downloading.
Place the download module (ADTSetup.exe) in any automatic detection PC directory in each segment, and execute it.
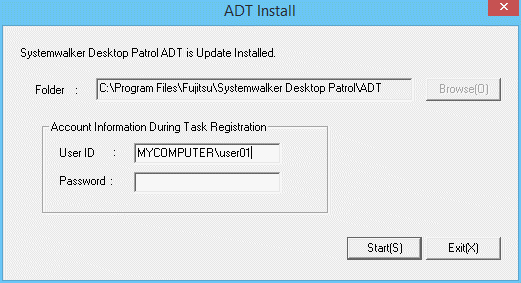
The following installer will start. Set the installation directory and Account Information During Task Registration. Click Start.
[For Windows Vista(R), Windows(R) 7, Windows(R) 8, Windows Server(R) 2008, and Windows Server(R) 2012]
Item | Description | |
|---|---|---|
Folder | ADT module installation directory. | |
Account Information During Task Registration (*1) | User ID | User account used for installation. Specify using the domain\userName format with up to 260 alphanumeric characters or less. |
Password | Password of the specified user ID. Specify up to 260 alphanumeric characters. | |
*1: Displayed for Windows Vista(R), Windows(R) 7, Windows(R) 8, Windows Server(R) 2008, and Windows Server(R) 2012 only.
Before installation completes, the Scheduling of Automatic Detection window will be displayed.
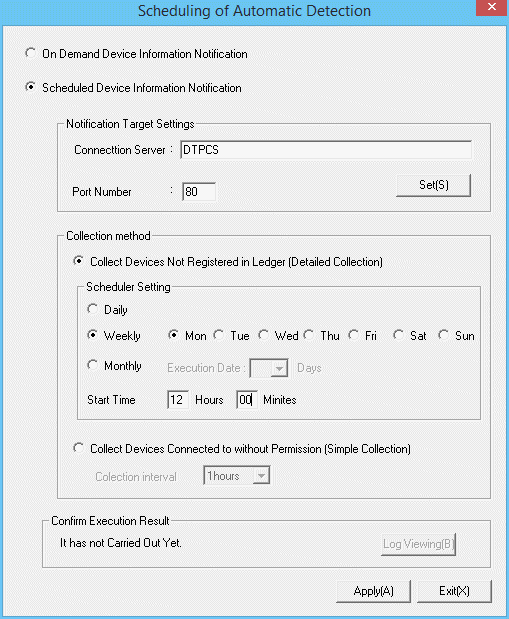
Enter the following information and click Apply.
Item name | Description | |
|---|---|---|
On Demand Device Information Notification | Select this option to send device information detected on the ADT without using schedule. | |
Scheduled Device Information Notification | Select this option to send device information detected on the ADT according to the specified schedule. | |
Notification Target Settings | Connection Server | Name of the notification target server. Note Communication in an IPv6 environment IPv6 IP addresses cannot be specified. If performing communication in an IPv6-only environment, register one of the following beforehand and enter the host name:
|
Port Number | Port number of the notification target. The default value is 80. | |
Set | Sets the proxy. | |
Collect Devices Not Registered in Ledger (Detailed Collection) | Select this option to perform automatic detection and information collection of devices for maintaining the management ledger. This option cannot be selected if Collect Devices Connected to without Permission (Simple Collection) is selected. | |
Scheduler Setting | Daily | Select this option to send device information every day. |
Weekly | Select this option to send device information weekly. Any day(s) between Monday and Sunday can be selected for this setting. | |
Monthly | Select this option to send device information monthly. Set Execution Date to the day when notification will be sent. Note that if the day specified in Execution Date does not exist for a certain month, automatic detection will not be performed for that month. For this reason, if you intend to execute notification at the end of the month, consider setting the execution operation at 0:00 on the first day of each month instead. | |
Start Time | Time at which device information notification will start. If operating the ADT module on a server PC other than those running 24 hours a day, be careful about setting the time because the power for the automatic detection PCs may be turned off during late night/early morning. | |
Collect Devices Connected to without Permission (Simple Collection) | Select this option to perform automatic detection and information collection of devices connected to without permission. This option cannot be selected if Collect Devices Not Registered in Ledger (Detailed Collection) is selected. | |
Collection interval | Specify the interval for collecting device information when detecting devices connected to without permission. Device information will be repeatedly collected at this interval. Select one of the following intervals:
| |
Confirm Execution Result | Settings to display the execution result. | |
Log Viewing | Display the execution result log. | |
Once installation completes, the following tasks will be registered in the Windows task features:
Name:
SWDTPAS_ADT.job
Operation privileges:
For Windows Vista(R), Windows(R) 7, Windows(R) 8, Windows Server(R) 2008, and Windows Server(R) 2012: Specified account
Note that if the ADT module is not started at the set notification time (because the PC power is off, for example), the device information will be sent at the next scheduled start time after the ADT module is started.
When the schedule setting is completed, the following message window will be displayed. Click OK.
Installation of ADT was ended. A setup becomes effective by rebooting system.
Click OK to restart the system.
In case of CT
The procedure for reinstalling CT is as follows:
Log on Windows with Account affiliated Administrators group.
Input the following URL in the Address bar of Web browser.
http://server information (FQDN name or host name or IP address of "Systemwalker Desktop Patrol CS")/DTP/dwl.html
Display the download menu.
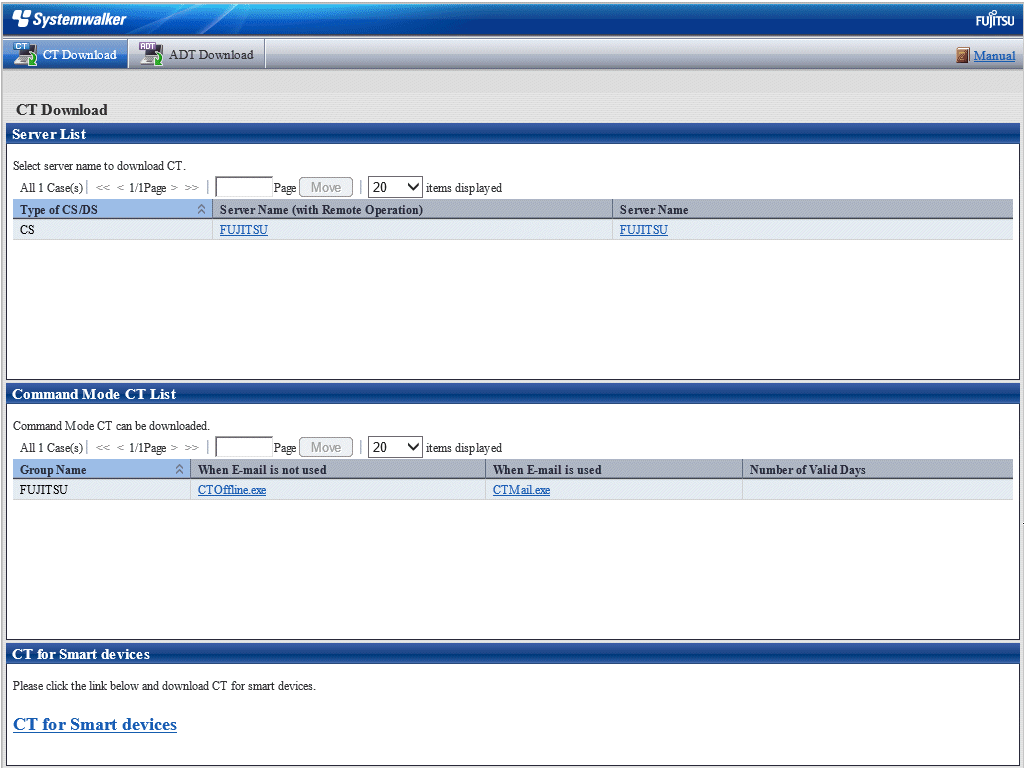
Select Server Name, or Server Name (with Remote Operation) for PC as the higher server, and then the message for confirming saving is displayed in the Download Files dialog.
If the remote operation function is not required, select Server Name.
If the remote operation function is required, select Server Name (with Remote Operation).
Follow the instructions of the administrator to decide which to select.
Click the Execute button to start installation, the Welcome to the InstallShield Wizard for Systemwalker Desktop Patrol CT Program window is displayed. Click the Next button.
Start installation automatically.
Note
When the following security warning window is displayed, select Run.

The Installation Completed window is displayed after the processing is completed normally. Click the Finish button.
Systemwalker Desktop Patrol is modified into available status.
Upgrade by the following procedure.
Uninstall the CT
Upgrade OS
Install the CT of Systemwalker Desktop Patrol V15.1.0
Uninstall the old MC
"MC" cannot be used since V14.2.0.
When upgrading the version of products, uninstall the old "MC" according to the following procedure.
Delete the "Systemwalker Desktop Patrol (MC)" program from Add or Remove Programs.
After deleting the program, some relating folders might have not been deleted. At this time, delete the installation target folder of this product through Explorer after rebooting OS.
Example) Delete the folder C:\Program Files\Fujitsu\Systemwalker Desktop Patrol MC