参考
Managerとの通信方式について
インストール時には、Managerとの通信方式はPush方式で設定されます。
Pull方式を利用したい場合は、インストール後に切り替えを行ってください。切り替え手順については、「第4章 Pull型通信設定」を参照してください。
Enterprise Manager/Manager/Proxy Managerで自身の性能情報を収集したい場合
Enterprise Manager/Manager/Proxy ManagerにAgentをインストールする必要はありません。Enterprise Manager/Manager/Proxy Managerでセットアップ(「A.1 サーバ内リソース情報収集ポリシー作成コマンド」を参照して、収集ポリシーの作成と適用)を実施してください。
Windowsサーバに、Systemwalker Service Quality Coordinatorをインストールする手順について説明します。
■実行に必要な権限
Administratorsグループに所属するユーザー権限が必要です。
■インストーラの起動
WindowsマシンのDVD-ROM装置に本製品のDVD-ROMをセットします。
インストーラが起動します。
ポイント
インストールするマシンの設定によっては、自動的にインストーラが起動しないことがあります。その場合は、以下の操作を行い、手動でインストーラを起動してください。
[スタート]メニューの[ファイル名を指定して実行]をクリックします。
[ファイル名を指定して実行]ウィンドウの[参照]で、以下のファイルを選択し、[OK]をクリックします。
DVD-ROMドライブ:\SwSetup.exe |
コンポーネントの選択
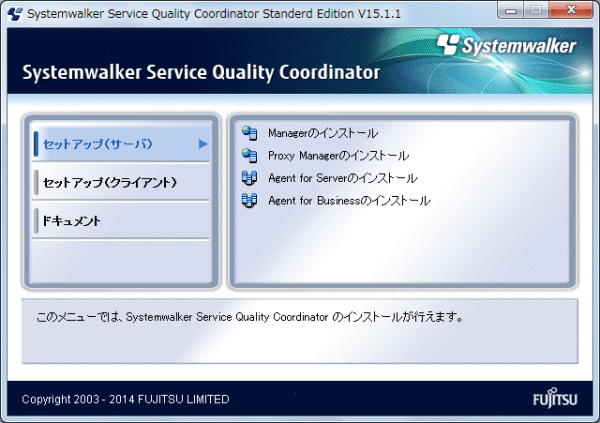
[セットアップ(サーバ)]をクリックし、表示された一覧からインストールするコンポーネントを選択します。
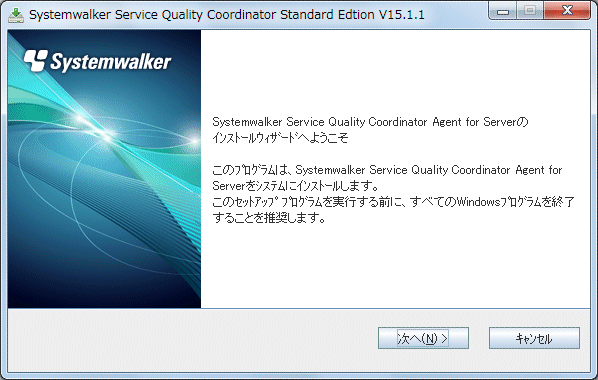
インストール画面(ようこそ画面)
[次へ]を選択します。
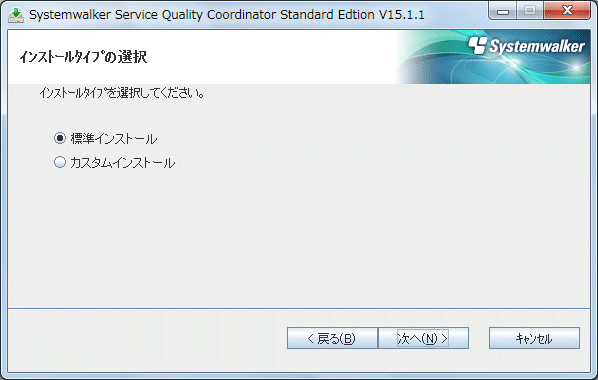
インストールタイプの選択
[標準インストール]または[カスタムインストール]を選択し、[次へ]を選択します。
注意
インストールディレクトリにはNTFS形式のディスクを指定してください。
「\\」で開始するパス、および相対パス表記での指定はできません。
ディレクトリ名に指定可能な文字は、半角英数字、半角空白、「-」(ハイフン)、「_」(アンダースコア)、「(」、「)」です。
■標準インストールの場合
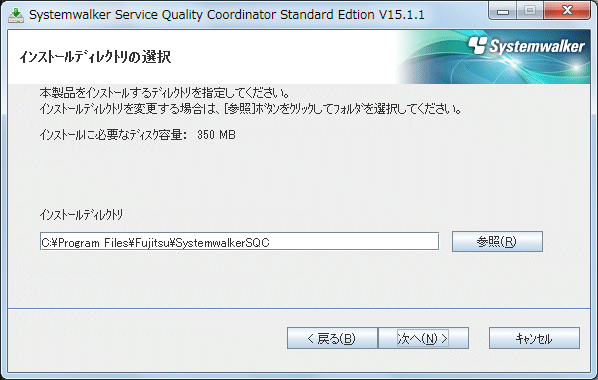
インストールディレクトリの選択
インストールディレクトリを入力し、[次へ]を選択します。
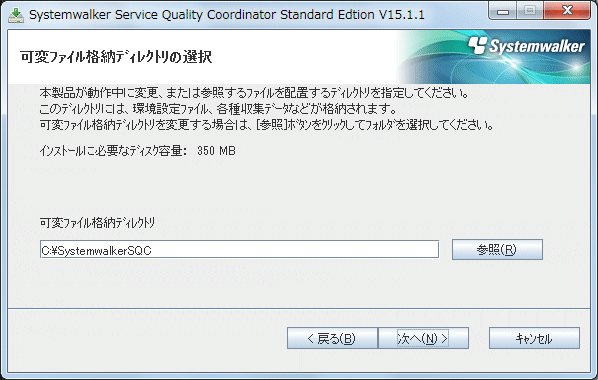
可変ファイル格納ディレクトリの選択
可変ファイル格納ディレクトリを入力し、[次へ]を選択します。
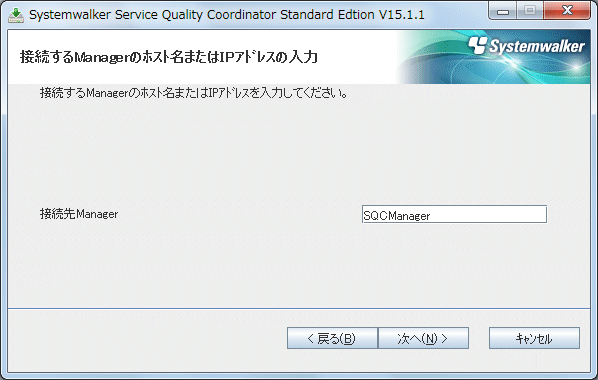
接続先の入力
接続するManagerのホスト名またはIPアドレスの入力し、[次へ] を選択します。
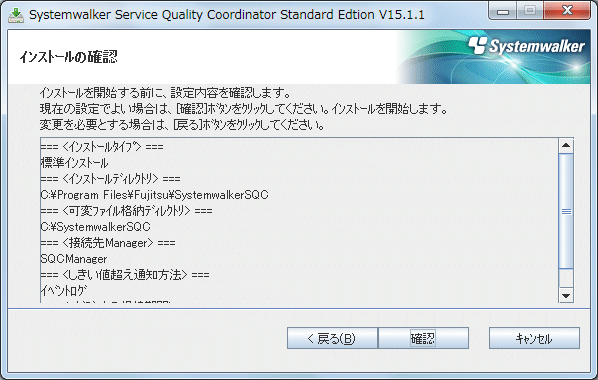
インストールの確認
設定内容を確認し、[確認]を選択します。
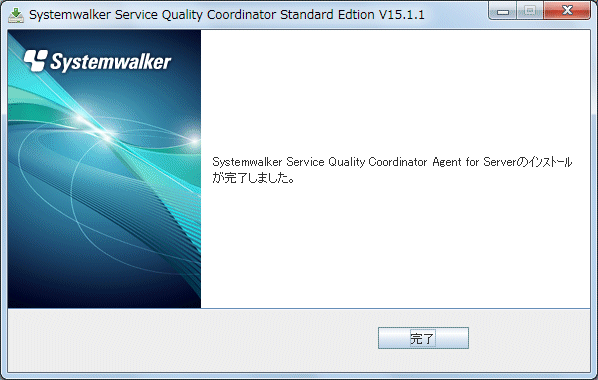
完了
インストールが完了すると以下の画面が表示されます。[完了]を選択し、インストールを終了します。
■カスタムインストールの場合
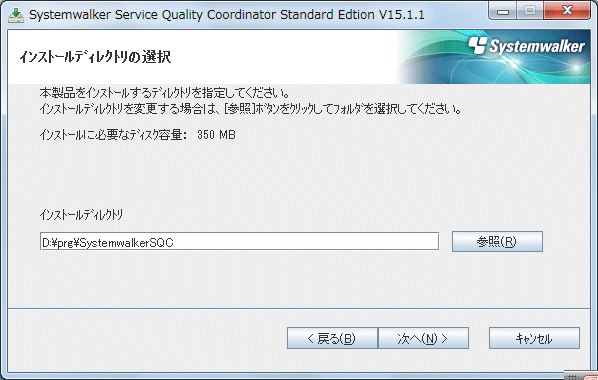
インストールディレクトリの選択
インストールディレクトリを入力し、[次へ]を選択します。
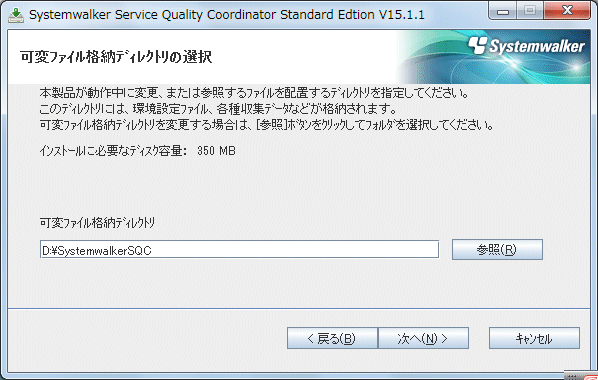
可変ファイル格納ディレクトリの選択
可変ファイル格納ディレクトリを入力し、[次へ]を選択します。
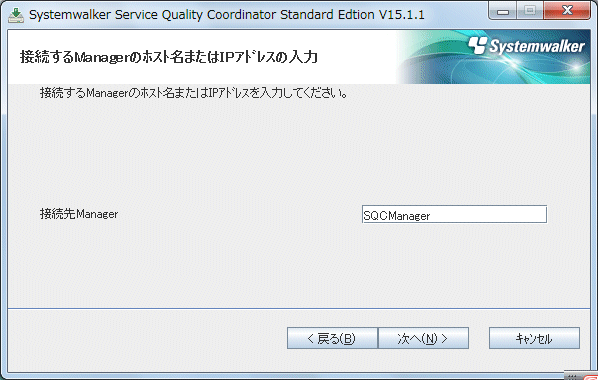
接続先の入力
接続するManagerのホスト名またはIPアドレスの入力し、[次へ] を選択します。
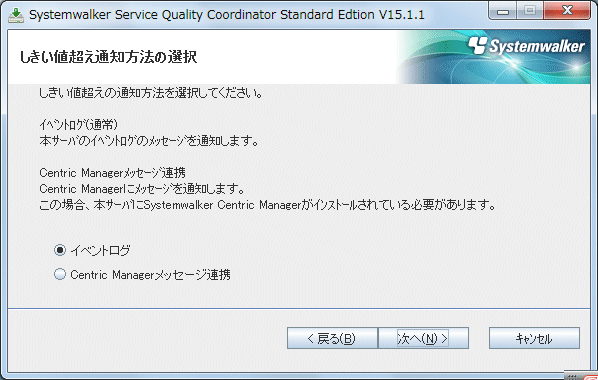
しきい値超え通知方法の選択
しきい値超えの通知方法を選択し、[次へ]を選択します。
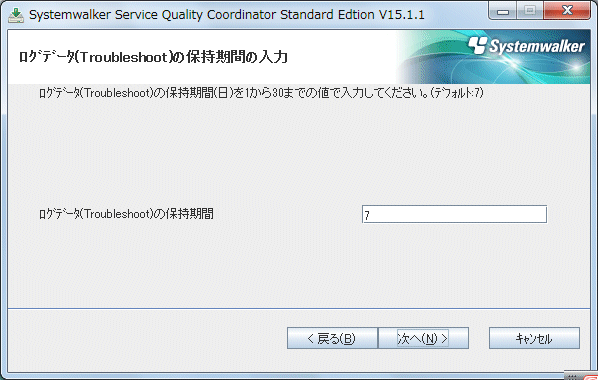
ログデータ(Troubleshoot)の保持期間の入力
ログデータ(Troubleshoot)の保持期間を入力し、[次へ]を選択します。
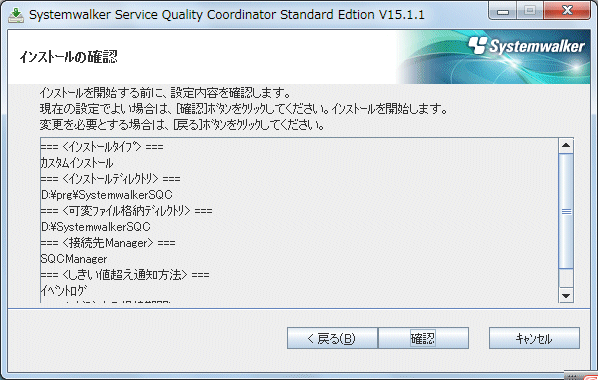
インストールの確認
設定内容を確認し、[確認]を選択します。
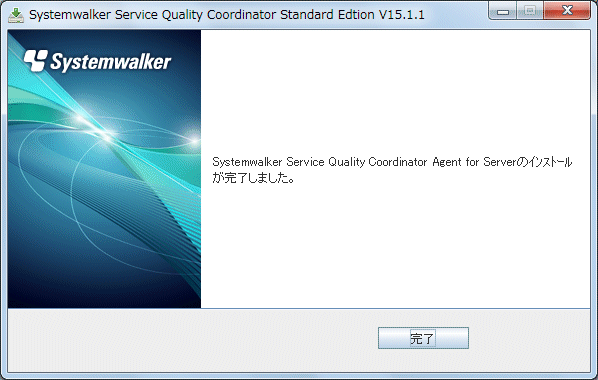
完了
インストールが完了すると以下の画面が表示されます。[完了]を選択し、インストールを終了します。
Linux/Solarisサーバに、Systemwalker Service Quality Coordinatorをインストールする手順について説明します。
■実行に必要な権限
システム管理者(スーパーユーザー)権限が必要です。
■インストーラの起動
UNIXマシンのDVD-ROM装置に本製品のDVD-ROMをセットします。
DVD-ROMをマウントします。
ポイント
ボリュームマネジメントデーモンにより自動的にマウントされる場合がありますので、DVD-ROMのマウント状態を確認します。マウントされていない場合は、以下の作業を行います。
【Solaris版】
# mkdir -p /cdrom/cdrom0 (*1) # /usr/sbin/mount -F hsfs -o ro /dev/dsk/cntndnsn /cdrom/cdrom0 (*2) # |
(*1) /cdrom/cdrom0がない場合のみ必要です。
(*2) nは各インストールマシンのDVD-ROMドライブに合わせてください。
【Linux版】
# mount -r -t iso9660 /dev/cdrom /mnt/cdrom(*) |
(*) DVD-ROM装置のマウントポイント/mnt/cdromについては、各システム環境に合わせてください
インストール用シェルスクリプトの起動
インストール用のシェルスクリプトを起動します。
実行例は、以下のとおりです。この例では、ドライブのマウントポイントを/mnt/cdromとしています。
/mnt/cdrom/swsetup |
注意
自動的にマウントされた場合に、実行許可がないために、以下のメッセージが出力される場合があります。
-bash: <マウントポイント>/swsetup: /bin/sh: bad interpreter: 許可がありません |
このような場合は、アンマウントしてから、2.の手順で再度マウントしてください。
起動画面
[Enter]を押します。
================================================================================
                Systemwalker Service Quality Coordinator Setup
                                     V15.1.1
 All Rights Reserved, Copyright(C) FUJITSU LIMITED && FUJITSU AUSTRALIA LIMITED
                                    2003-2014
================================================================================

Welcome to Systemwalker Setup!!
This program installs Systemwalker Service Quality Coordinator on your system.

Press Enter.
コンポーネントの選択
インストールするコンポーネントに対応する数字を入力し、[Enter]を押します。
================================================================================
                Systemwalker Service Quality Coordinator Setup
                                     V15.1.1
 All Rights Reserved, Copyright(C) FUJITSU LIMITED && FUJITSU AUSTRALIA LIMITED
                                    2003-2014
================================================================================

<< Select Installation type >>

 1.Enterprise Manager
 2.Manager
 3.Proxy Manager
 4.Agent for Server
 5.Agent for Business

--------------------------------------------------------------------------------
Please specify installation type. [?,q] ==> 4インストールタイプの選択
インストールタイプを選択します。
================================================================================
                Systemwalker Service Quality Coordinator Setup
                                     V15.1.1
 All Rights Reserved, Copyright(C) FUJITSU LIMITED && FUJITSU AUSTRALIA LIMITED
                                    2003-2014
================================================================================


Select installation type
	1.Standard installation
	2.Custom installation
Select installation type (default: 1)[1, 2, ?, q]
> 1
標準インストールの場合は[1]を、カスタムインストールの場合は[2]を選択します。
■標準インストールの場合
インストールディレクトリの確認
インストールディレクトリを確認します。
変更が必要な場合は[y]を、必要ない場合は[n]を入力し、[Enter]を押します。
**********************************************************************
Default installation information is following:
	Program install directory        : /opt
	Fixed configuration directory    : /etc/opt
	Variable configuration directory : /var/opt
Do you want to change the above information? (default: n)[y, n, ?, q]
> y
[y]を入力した場合、以下の画面が表示されます。インストールディレクトリを変更します。
Please specify program install directory. (default: /opt)[?, q]
> /opt2
Please specify fixed configuration directory. (default: /etc/opt)[?, q]
> /etc/opt2
Please specify variable configuration directory. (default: /var/opt)[?, q]
> /var/opt2
注意
以下のディレクトリは指定できません。
インストールディレクトリ
/opt/FJSVssqc
定義ファイル格納ディレクトリ
/etc/opt/FJSVssqc
可変ファイル格納ディレクトリ
/var/opt/FJSVssqc
接続先の入力
接続するManagerのホスト名またはIPアドレスを入力し、[Enter]を押します。
Please specify manager host name or IP address. [?, q]
> 192.0.2.10
インストールの確認
**********************************************************************
Current installation information is following:
	Program install directory         : /opt2
	Fixed configuration directory     : /etc/opt2
	Variable configuration directory  : /var/opt2
	Manager host name or IP address  : 192.0.2.10
	Alert action                      : syslog
	Troubleshoot Cycle                : 7
Do you want to continue with the installation of Systemwalker Service Quality Coordinator Agent for Server [y,n]
> y
[y]を入力し、[Enter]を押すと、インストールが開始されます。
完了
インストールが完了すると、以下のメッセージが表示されます。
The installation of Systemwalker Service Quality Coordinator Agent for Server is now complete.
■カスタムインストールの場合
インストールディレクトリの確認
インストールディレクトリを確認します。
変更が必要な場合は[y]を、必要ない場合は[n]を入力し、[Enter]を押します。
**********************************************************************
Default installation information is following:
	Program install directory        : /opt
	Fixed configuration directory    : /etc/opt
	Variable configuration directory : /var/opt
Do you want to change the above information? (default: n)[y, n, ?, q]
> y
[y]を入力した場合、以下の画面が表示されます。インストールディレクトリを変更します。
Please specify program install directory. (default: /opt)[?, q]
> /opt2
Please specify fixed configuration directory. (default: /etc/opt)[?, q]
> /etc/opt2/
Please specify variable configuration directory. (default: /var/opt)[?, q]
> /var/opt2
注意
以下のディレクトリは指定できません。
インストールディレクトリ
/opt/FJSVssqc
定義ファイル格納ディレクトリ
/etc/opt/FJSVssqc
可変ファイル格納ディレクトリ
/var/opt/FJSVssqc
接続先の入力
接続するManagerのホスト名またはIPアドレスを入力し、[Enter]を押します。
Please specify manager host name or IP address. [?, q]
> 192.0.2.10
しきい値超え通知方法の確認
しきい値超え通知方法を確認します。
変更が必要な場合は[y]を、必要ない場合は[n]を入力し、[Enter]を押します。
**********************************************************************
Default alert action is following:
        Alert action: syslog
Do you want to change the above environment? (default: n)[y, n, ?, q]
> y
[y]を入力した場合、以下の画面が表示されます。しきい値超え通知方法を変更します。
Please specify alert action.
  centric:Message link operation with Centric Manager (default: syslog)[syslog, centric, ?, q]
> centric
ログデータ(Troubleshoot)の保持期間の確認
ログデータ(Troubleshoot)の保持期間を確認します。
変更が必要な場合は[y]を、必要ない場合は[n]を入力し[Enter]を押します。
**********************************************************************
Default troubleshoot cycle is following:
	Troubleshoot Cycle: 7
Do you want to change the above environment? (default: n)[y, n, ?, q]
> y
[y]を入力した場合、以下の画面が表示されます。ログデータ(Troubleshoot)の保持期間を変更します。
Please specify Troubleshoot cycle.
 (default: 7)[1-30, ?, q]
> 10
インストールの確認
**********************************************************************
Current installation information is following:
	Program install directory         : /opt2
	Fixed configuration directory     : /etc/opt2
	Variable configuration directory  : /var/opt2
	Manager host name or IP address  : 192.0.2.10
	Alert action                      : centric
	Troubleshoot Cycle                : 10
Do you want to continue with the installation of Systemwalker Service Quality Coordinator Agent for Server [y,n]
> y
[y]を入力し、[Enter]を押すと、インストールが開始されます。
完了
インストールが完了すると、以下のメッセージが表示されます。
The installation of Systemwalker Service Quality Coordinator Agent for Server is now complete.