This section describes how to install Systemwalker Runbook Automation on the Windows Management Server.
There are two types of installation: Standard Installation and Custom Installation. To set up all parameters using the default values, perform a Standard Installation. To set up parameters using values other than the default values, perform a Custom Installation.
Note
To install Systemwalker Runbook Automation on a cluster environment, there are other points for which care is required.
Refer to "Installing Systemwalker Runbook Automation" in the Systemwalker Runbook Automation Cluster Setup Guide.
If the installation fails, restart the system and then log in again as the same user that performed the installation. Then, uninstall the product according to the uninstallation procedure.
After uninstalling the product, eliminate the cause of the failure by referring to the meaning and action method for the message that was output, and then install Systemwalker Runbook Automation again.
Refer to the Systemwalker Runbook Automation Message Guide for details on the message.
Refer to "Chapter 7 Uninstallation" for information on how to uninstall Systemwalker Runbook Automation.
If the problem cannot be addressed based on the message that was output, collect the following log file from the directory indicated by the %SystemDrive% environment variable, and then contact Fujitsu technical support:
swrba_inst.log
When installing on Windows Server 2012, the following error message may be displayed. There is no need to take any action, however, since the message does not mean that there is a problem.
Log Name: Application.
Source: Application Error
Event ID: 1000
Level: Error
Faulting application name: explorer.exe
This section explains the Standard Installation procedure.
To set all of the installation parameters to the default values, perform a Standard Installation.
The Standard Installation procedure is explained below.
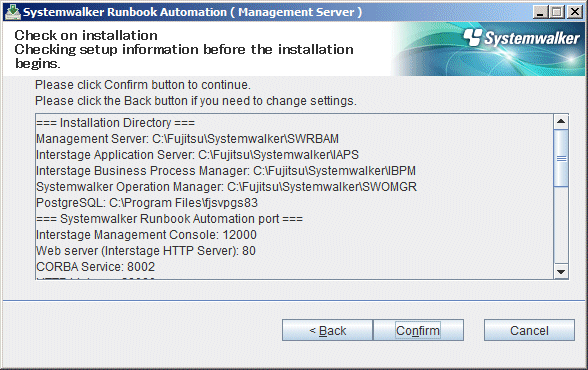
A Standard Installation installs Systemwalker Runbook Automation using the following default values:
Setting item | Meaning | Default value |
|---|---|---|
Installation folder | The installation folder for the Management Server | C:\Fujitsu\Systemwalker\SWRBAM |
CMDB Manager database directory | Database storage folder for the CMDB Manager | C:\Fujitsu\Systemwalker\SWRBAM\CMDB |
Interstage Management Console port | The port number for accessing the Interstage Management Console | 12000 |
Port number of Web server (Interstage HTTP Server) | The port number for accessing the Web console | 80 |
Port number of CORBA service | Port numbers used internally | 8002 |
Port number of HTTP Listener | Port numbers used internally | 28080 |
Port number of HTTP Listener for Operation Management | The port number for accessing the Interstage Java EE Management Console | 12001 |
Port number of IIOP | Port numbers used internally | 23600 |
Port number of IIOP_SSL | Port numbers used internally | 23601 |
Port number of IIOP_MUTUALAUTH | Port numbers used internally | 23602 |
Port number of JMX_ADMIN | Port numbers used internally | 8686 |
Subsystem Number | The subsystem number for Systemwalker Operation Manager that is used by Systemwalker Runbook Automation | 9 |
Job Scheduler Port number | Port numbers used internally | 9690 |
Job Execution Control Port number | Port numbers used internally | 9691 |
Note
Refer to "2.2.2.2 Custom Installation" for information on the settings and information used to check for port number duplication.
Log in using an account that belongs to the Administrators group.
Start the installer.
The installer will start automatically when the following DVD-ROM is inserted in the DVD-ROM drive. If the installer does not start automatically, start it manually by executing "swsetup.exe".
Systemwalker Runbook Automation Media Pack (V15.1.2) Disc No. 1/2
Note
If the operating system being used is Windows Server 2008 or later, execute the installer as an Administrator.
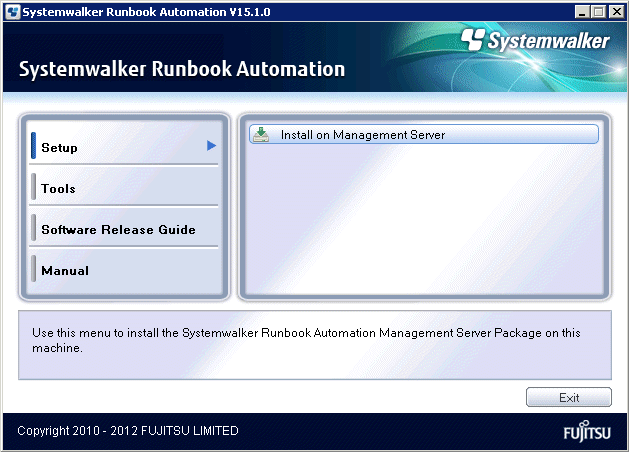
In the window that is displayed, select Install on Management Server.
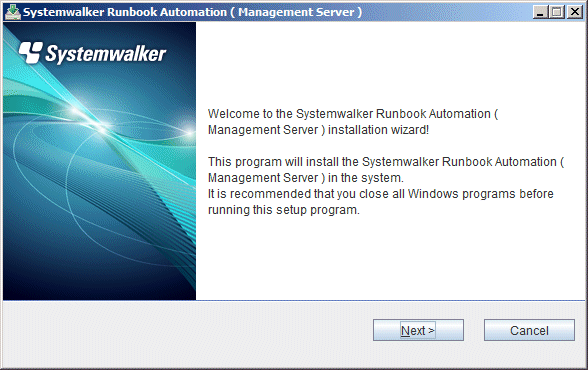
The welcome dialog box will be displayed.
Check the content of the dialog box and click the Next button.
The Select Installation Type dialog box will be displayed.
Select Standard Installation and click the Next button.

Check the installation settings.
In the Check on Installation window, check the content that has been entered, and then click the Confirm button if there are no mistakes. Installation will start.
To change the settings, click the Back button and then select Custom Installation in the Select Installation Type dialog box.
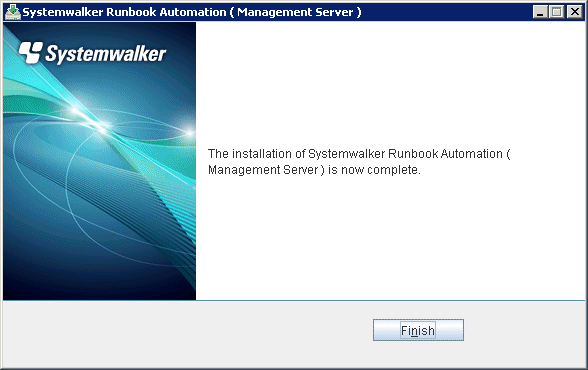
After the installation is completed, the window shown below will be displayed.
Click the Finish button.
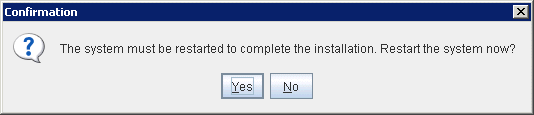
Restart the system.
Click the Yes button.
This section explains the Custom Installation procedure.
Log in using an account that belongs to the Administrators group.
Start the installer.
The installer will start automatically when the "Systemwalker Runbook Automation Media Pack (15.1.2) Disc No. 1/2" DVD-ROM is inserted in the drive.
If the installer does not start automatically, then start it manually by executing "swsetup.exe".
Note
If the operating system being used is Windows Server 2008 or later, execute the installer as an administrator.
In the window that is displayed, select Install on Management Server.
The welcome dialog box will be displayed.
Check the content of the dialog box and click the Next button.
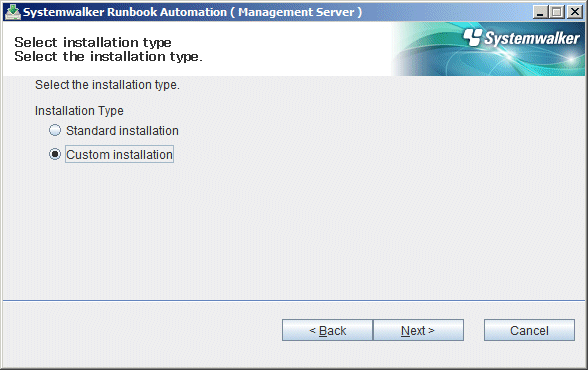
The Select Installation Type dialog box will be displayed.
Select Custom Installation and click the Next button.
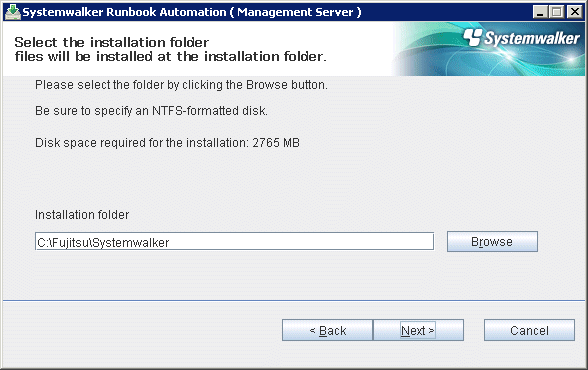
Select the installation directory for Systemwalker Runbook Automation.
Specify the directory, and then click the Next button.
Note
The installation directory can contain up to 45 characters.
Specify an NTFS format disk for the installation directory.
Do not specify path or relative path name beginning with "\\".
The directory name can contain only alphanumeric characters, hyphens (-), underscores (_), and spaces.
A standard directory under "C:\Program Files" or "C:\Program Files (x86)" can also be specified.
Do not include whitespace characters in the installation directory if using the library below to create an operation component, otherwise the operation results from using the library are not guaranteed.
File transfer
Configuration Management Database
Host name change
Network settings
Install software
The required products will be installed using the following directory configuration. Meanwhile if the directory which you specify already exists and the directory has any file or directory, it may have failed to install:
<Installation directory>/SWRBAM: Systemwalker Runbook Automation Management Server
<Installation directory>/IBPM: Interstage BPM
<Installation directory>/IAPS: Interstage Application Server
<Installation directory>/J2EE: J2EE common directory of Interstage Application Server
<Installation directory>/IJEE: IJEE common directory of Interstage Application Server
<Installation directory>/SWOMGR: Systemwalker Operation Manager
Do not change the following directory as static directory
Installation directory for PostgreSQL
%ProgramFiles%\ fjsvpgs83
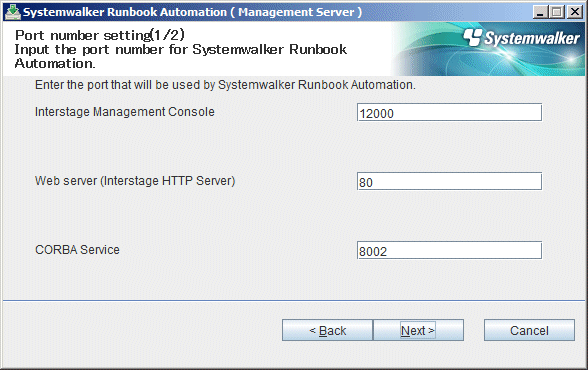
Specify the port numbers used by Systemwalker Runbook Automation.
In the Port Number Settings (1/2) window, specify the port number to be used by Systemwalker Runbook Automation, and then click the Next button.
In the Port Number Settings (2/2) window, specify the port number to be used by Systemwalker Runbook Automation, and then click the Next button.

Note
Do not specify port numbers currently used. To check which port numbers are currently used:
> netstat -a -n |
Even port numbers not displayed by the command above might be in use by another application. Refer to "9.1 Port Numbers" for information on how to check that the port number is not being used.
There is no confirmation for port number on the environment which installed Systemwalker Service Catalog Manager. Use same port number which you specified when you installed Systemwalker Service Catalog Manager
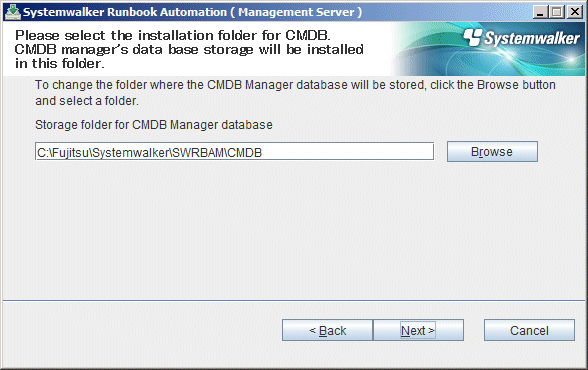
Specify the directory where the CMDB Manager database is stored.
Set Select the Database Storage Folder window, then click the Next button.
It is recommended to store the CMDB Manager database in a dedicated disk, because performance will drop if the database conflicts with other applications for disk I/O.
Note
The directory where the CMDB Manager database can contain up to 64 characters.
Specify an NTFS or ReFS format disk for the directory where the CMDB Manager database directory.
Specify new directory definitely.
Do not specify path or relative path name beginning with "\\".
The directory name can contain only alphanumeric characters, hyphens (-), underscores (_), and spaces.
A standard directory under "C:\Program Files" or "C:\Program Files (x86)" can also be specified.
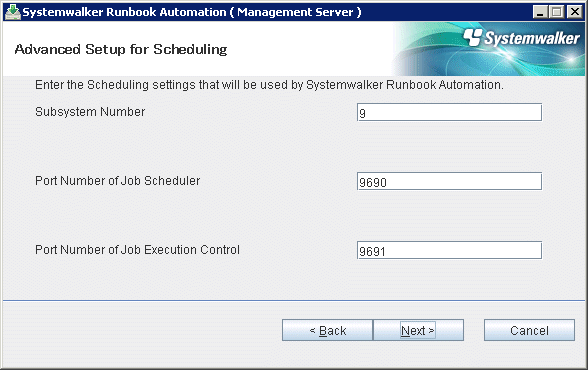
Specify the subsystem number and port number used by the schedule function.
If the default port number used by the schedule function is already used by another application, specify a different port number.
If you do not have Systemwalker Operation Manager coexist on the Management Server, or if the default port number is not used by another application, leave the default settings unchanged, and click the Next button.
Note
The port number that is currently being used can be checked using the following command. Do not specify the port number that is displayed by this command.
> netstat -a -n
Although the specified port number is not currently in use, it may already have been assigned to other software. Refer to "9.1 Port Numbers" to check that the port number has not already been used.
Check the installation settings.
Ensure that the settings are correct, and then click the Next button.
Installation will complete.
In the completion window, click the Finish button.
Restart Systemwalker Runbook Automation, then click the Yes button.