This section explains the procedure for installing and setting up Interstage Business Process Manager Analytics.
This section explains the procedure for installing Interstage Business Process Manager Analytics.
Information
Refer to the following manual for details:
"Setting Up the Analytics Server" in the Interstage Business Process Manager Analytics Installation Guide
Start the installer.
Insert the following DVD in the DVD drive of the computer.
Systemwalker Service Quality Coordinator Enterprise Edition V15.0.1
Point
Depending on the settings of the machine, the installer may not start automatically. If it does not start automatically, perform the following procedure to manually start the installer:
From the Start menu, select Run.
In the Run window, click Browse and select the file shown below, and then click OK.
DVD drive:\SwSetup.exe
When using DVD of the UNIX versions, perform the following procedure to manually start the installer:
From the Start menu, select Run.
In the Run window, click Browse and select the file shown below, and then click OK.
DVD drive:\client\SwSetup.exe
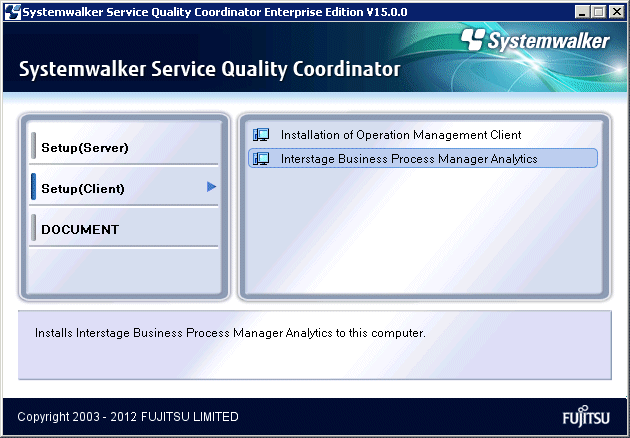
In the window that is displayed, select Setup(Client) >> Interstage Business Process Manager Analytics.
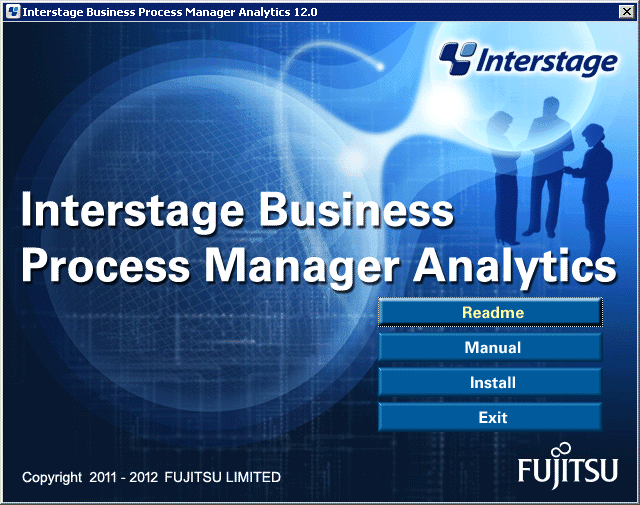
Click Install.
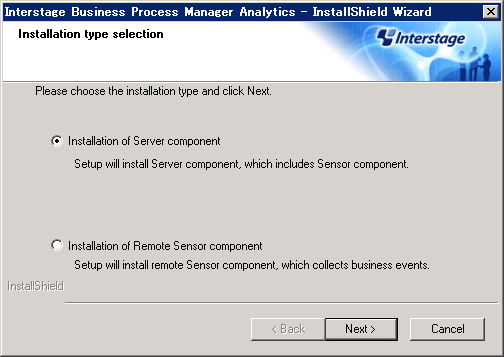
Make a selection for the installation.
Select Installation of Server component and then click Next.
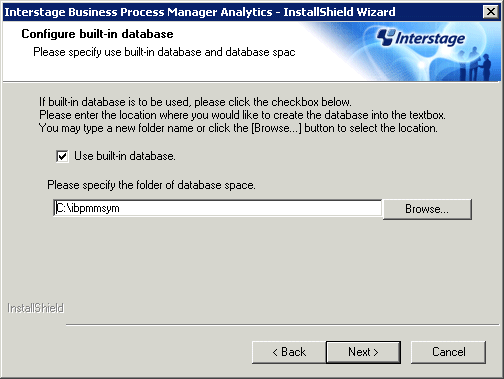
Specify the settings for the Built-in database.
Confirm that the Use Built-in database. checkbox is selected, and then, if there is no problem with the storage destination of the database space, click Next.
Note
For the storage destination of the database space of the Built-in database, specify a disk with at least 25 GB of free space.
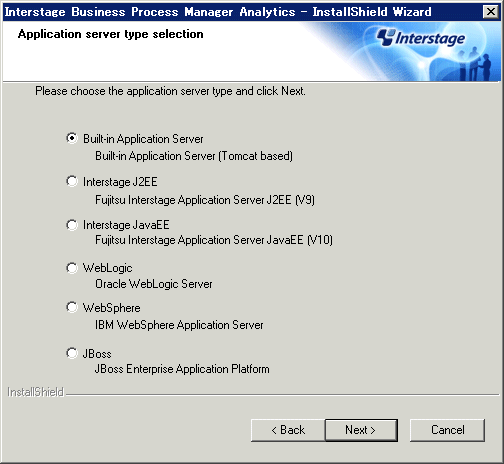
Select the Application Server type.
Confirm that Built-in Application Server has been selected, and the click Next.
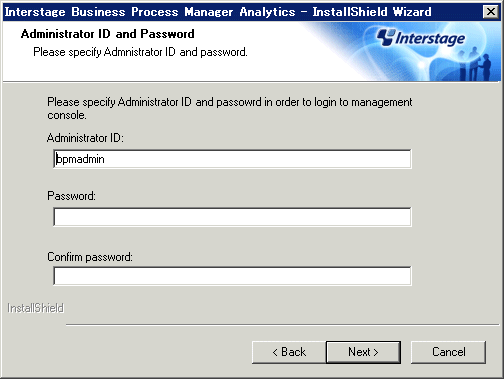
Set the administrator ID and password.
First specify the ID and password of the administrator who will login to the Analytics Management Console. After specifying them, click Next.
The characters that can be specified in the administrator ID and password are shown below:
Character length | Character type | |
|---|---|---|
Administrator ID | Up to 64 characters |
|
Password | Up to 64 characters |
|
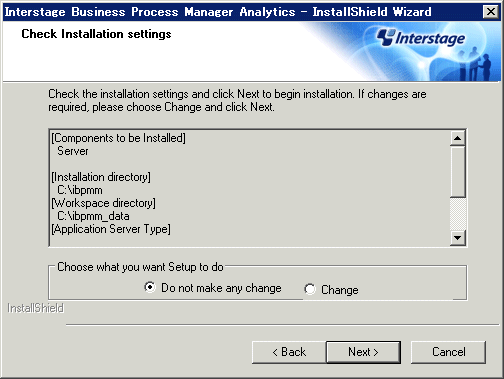
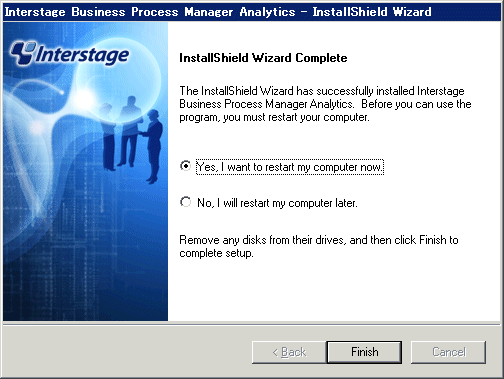
Confirm the installation.
To make changes to the installation (for example, to the installation directory), select Change and then click Next.
If there are no changes to make, select Do not make any change and then click Next. Installation will start
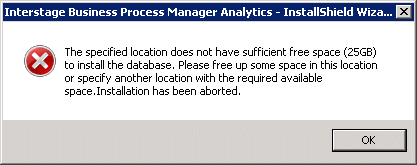
Note
At least 25 GB of free space is required for the storage destination of the database space of the Built-in database. If space is insufficient, the following error message will be output and installation will be interrupted:
Change the storage destination of the database space to a disk with at least 25 GB of free area.
Click Finish.
In Interstage Business Process Manager Analytics, register the PDB sensor definition files and integrated modules (jar files) that are required in order to construct the dashboard.
Note
Do this after installing Interstage Business Process Manager Analytics and after restarting the operating system.
Register definition files in Interstage Business Process Manager Analytics.
Deploy the template files for the PDB sensors of Interstage Business Process Manager Analytics.
Copy the PDB directories stored at the following location in the Systemwalker Service Quality Coordinator Operation Management Client to the Dashboard Server environment, by directory:
Storage location
<Install directory of the Operation Management Client>\dashboard\sensor\types\PDB |
The default <Installation directory of the Operation Management Client> is "C:\Program Files\SystemwalkerSQC-C".
Note that the following files are stored in the PDB directory.
agenttype.xml
template.xml
template_resource.properties
template_resource_ja.properties
Storage location
<Work area directory of the Interstage Business Process Manager Analytics>\tomcat6\webapps\ibpmm\conf\types |
The default <Work area directory of the Interstage Business Process Manager Analytics> is "C:\ibpmm_data".
Deploy the log definition files for the PDB sensors of Interstage Business Process Manager Analytics.
Copy "BPMAS_PDB_Log4jConfiguration.xml" to the Dashboard Server environment.
Storage location
<Install directory of the Operation Management Client>\dashboard\sensor\log\BPMAS_PDB_Log4jConfiguration.xml |
The default <Installation directory of the Operation Management Client> is "C:\Program Files\SystemwalkerSQC-C".
Storage location
<Work area directory of the Interstage Business Process Manager Analytics>\tomcat6\webapps\ibpmm\conf\log |
The default of the <Work area directory of the Interstage Business Process Manager Analytics> is "C:\ibpmm_data".
Register integrated modules (jar files) in Interstage Business Process Manager Analytics.
Information
Refer to the following manual for details.
"Integration Module Management" in the Interstage Business Process Manager Analytics Management Console Guide.
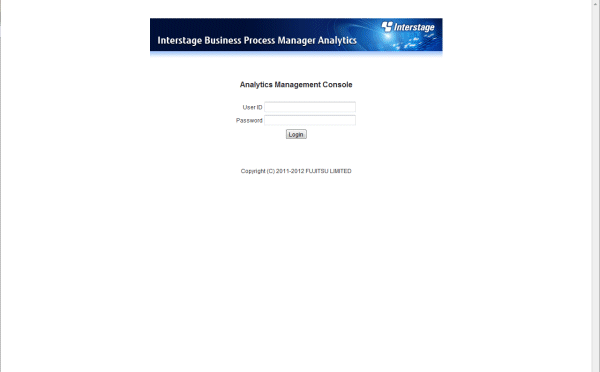
Using a Web browser, connect to the Interstage Business Process Manager Analytics Management Console.
From the Windows Start menu, click Interstage Business Process Manager Analytics >> Management Console, and then login using the administrator ID and password specified at installation.
Click Analytics System >> System Settings >>Integration Module Management.
Click the Browse button in Add JAR files(s)., and then specify the jar files stored below and click Add.
Storage location
<Install directory of the Operation Management Client>\dashboard\sensor\lib\pdb-sensor.jar |
Stop the Built-in Application Server. Refer to the "A.3.2 Stopping the Built-in Application Server" for information on the stopping procedure.
Once the Built-in Application Server is stopped, restart the Built-in Application Server. Refer to the "A.3.1 Starting the Built-in Application Server" for information on the starting procedure.
This section explains how to create a Built-in database and how to create users.
Note
Creating the Built-in database may take 60 minutes or more to complete.
Point
Database area of the Built-in database is 20GB for default. When changing the database area, edit the following file.
<Installation directory>\bpmm\dbscripts\symfoware\bpm-create-space-schema-symfo.sql
Edit part
CREATE DBSPACE EDBSPACE ALLOCATE FILE E:\ibpmmsym\space\EBPMSP01 ATTRIBUTE SPACE(20000M);
Edit "20000M" mentioned above edit part to the preferable size. Specify the value in MB unit.
Execute the following command to create Events DB and the database users:
<Installation directory>\bpmm\setup\builtinsetup.bat |
Note: The default installation directory is "C:\ibpmm".
Point
After the command is executed, a command prompt will be displayed as shown below. When creating the Built-in database is complete, the command prompt ends.
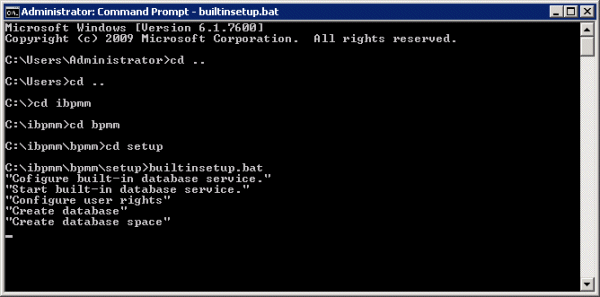
Completion confirmation of the automatic creation processing of the table for Dashboard template.
The Built-in Application Server restart automatically after completing the operation of the first step, and the automatic creation processing of the table for Dashboard template is done to the Built-in database. Execute following procedures, and confirm the automatic creation processing of the table for Dashboard template is completed.
Note
Automatic creation processing of the table for Dashboard template may take 60 minutes or more to complete.
From the Windows Start menu, click Interstage Business Process Manager Analytics >> Management Console, and then login using the administrator ID and password specified at installation.
Click Analytics System >> Sensor Management.
In the Sensor Status table, confirm the status of the Sensor Name <Host name> is "Running".
Point
When automatic creation processing of the table for Dashboard template has not been completed, following error message may display on the bottom right of the screen. In that case, wait about tens of minutes, and then confirm it again.
ERROR BADM2405: Failed to get the State of the Sensor. (Details: BSDK2803: The error occurred while executing the request. (detail : BSDK2101: The sensor has not been initialized.))
Create dashboard users.
Using a Web browser, connect to Analytics Management Console of the Interstage Business Process Manager Analytics.
From the Windows Start menu, click Interstage Business Process Manager Analytics >> Management Console, and then login using the administrator ID and password specified at installation.
Click Analytics System >> System Settings >> User Management, and then select the User >> Create User tab.
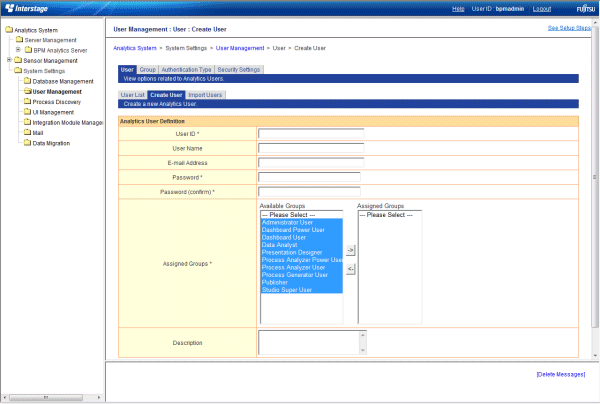
Create users with the following two types of privileges:
Users who can edit the dashboard using the Analytics Studio
Users who can only view the dashboard
Set the following items:
Parameter | Description |
User ID | Specify the ID of the user who will use the dashboard. The character length and character types that can be specified are as follows:
Point A user cannot be created with a user ID of "bpm", "sqc", or the administrator ID specified at installation. |
User name | Specify the user name of the user who will use the dashboard. |
E-mail address | Specify the email address of the user who will use the dashboard. Optional. |
Password | Specify the login password of the user who will use the dashboard. The character length and character types that can be specified are as follows:
|
Assigned Groups | Specify the group to which the user belongs and set the privileges of the user.
|
Description | Specify a description of the user. Optional. |
Parameter | Description |
User ID | sqcadmin |
User name | sqcadmin |
E-mail address | |
Password | <Any password> |
Assigned Groups | Select the following: Dashboard Power User Studio Super User |
Description |
Parameter | Description |
User ID | sqcuser |
User name | sqcuser |
E-mail address | |
Password | <Any password> |
Assigned Groups | Select the following: Dashboard User |
Description |
Click the Create button.
When the Dashboard Server and the Systemwalker Service Quality Coordinator Manager are constructed on different servers, setting of the IP address of the connection target Manager is required.
Point
Do not need to do this process if the Dashboard Server and the Systemwalker Service Quality Coordinator Manager are constructed on the same server.
Using a Web browser, connect to the Interstage Business Process Manager Analytics Management Console.
From the Windows Start menu, click Interstage Business Process Manager Analytics >> Management Console, and then login using the administrator ID and password specified at installation
Click Analytics System >> Sensor Management >> <Host Name>, and then select [01:Summary_ECO]
Note
When the status of the [01:Summary_ECO] is "Running", select the checkbox on the left side of the Connection Name ([01:Summary_ECO]) of the [Connection Status], click [Stop] button to stop.
Specify the host name of the Manager or the IP address to the textbox of the "PDB"Connection specific parameters >> PDBSensorConf >> SQCManagerHostName.
Click Modify button.
Select the checkbox on the left side of the Connection Name [01:Summary_ECO] of the Connection Status, and then click Start button.
Do the same steps 1 to 5 explained above for the Connection Name [06:VMwareESX/ESXi].
Refer to "A.1.1 Starting the Dashboard Server" for information on starting the Dashboard Server, and confirm that the BPM Analytics Server has started. If the dashboard is stopped, start the dashboard.
Work to open the view profile of the dashboard template to the users who was created at the "3.2.1.4 Creating Dashboard Users".
Refer to the "4.1.2.1 Releasing the Dashboard Templates Using the Analytic Studio" for the open procedure.
Point
View profiles which is applied as dashboard group at the "4.1.2.1 Releasing the Dashboard Templates Using the Analytic Studio" are as follows.
SQC Dashboard
Virtualized Dashboard