This section explains the procedure for performing a process simulation using historical values.
Prerequisite:
You have created a simulation scenario for which you want to use historical values.
To use values from history for simulating processes:
Open a simulation scenario in the Scenario editor.
In the Simulation Period And Arrival Setting area, click the Gather Default Values from History link.
The Gather Default Simulation Values from History dialog is displayed. Here you can specify the server from which you want to retrieve the simulation values.
Specify the source of the historical simulation values.
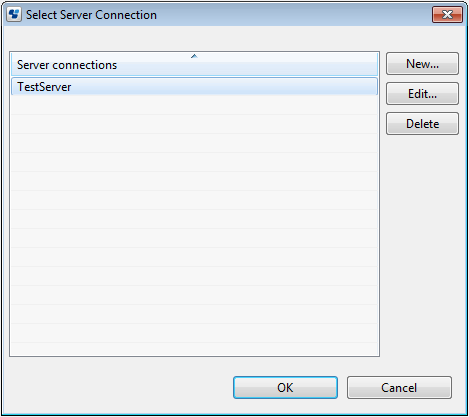
You can select an available server connection or browse for a new server connection:
Select a server connection: From the Server Connection drop-down list, select the remote server from which you want to fetch the historical simulation values.
Browse for a new server:
Click Browse Connection to add a new server connection. Select Server Connection dialog is displayed.
If you want to create a new server connection, click New on Select Server Connection dialog. 2.4.1 Server Connection Settings dialog is displayed.
Enter all the parameters in Server Connection Setting dialog to create a new server connection and click OK. The new server connection is displayed in Select Server Connection dialog. Refer Setting Your Preferences to know more about various parameters.
Click OK on Select Server Connection dialog.
Figure 12.3 Selecting a server connection
In the Gather Default Simulation Values from History dialog, click Get list.
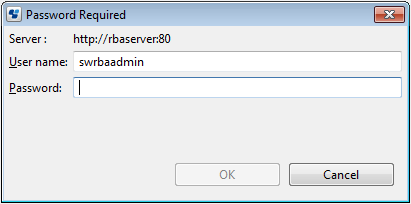
The Password Required dialog is displayed.
In the Password Required dialog box, type in your password to authenticate against the server.
The user name is automatically displayed. Click OK to confirm your user name and password.
Figure 12.4 Entering your password
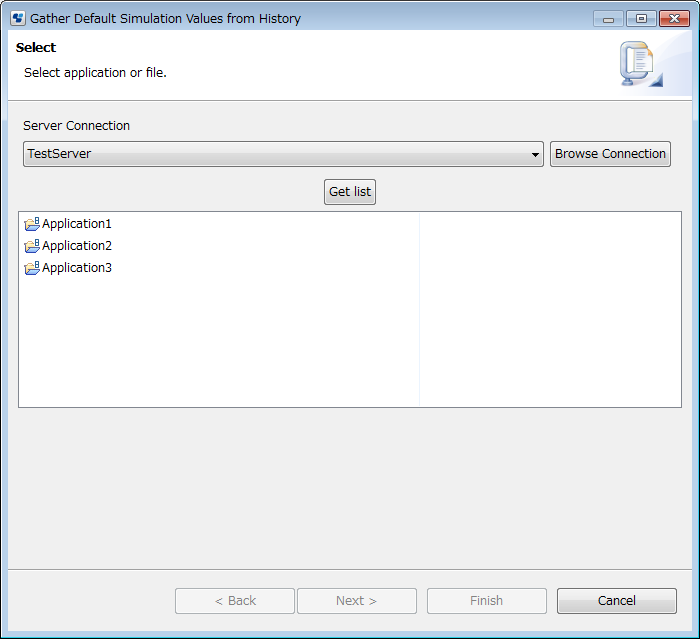
In the Select dialog that displays all applications stored on the selected server (remote_server, in the example), in the Application area select an application, and click Next.
Figure 12.5 Displaying applications on the selected server
The next dialog shows the history events pertaining to the selected application.
In the Process Definition area, select a process definition and click Next.
Figure 12.6 Displaying process definitions
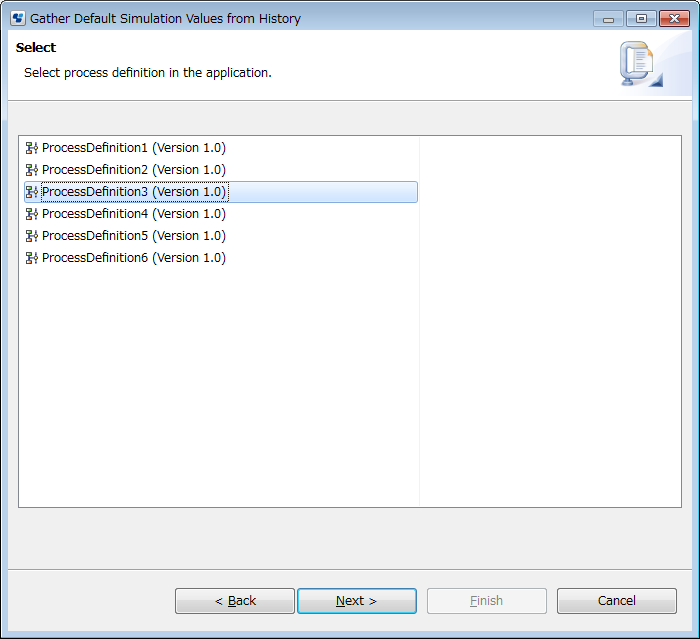
Note
This dialog appears only if your simulation scenario contains a single process definition. If your scenario contains more than one process definition, this dialog is skipped; all history events related to the selected application are retrieved.
Note
You can update the list of process definitions using the pop-up menu or pressing the F5 key on your keyboard.
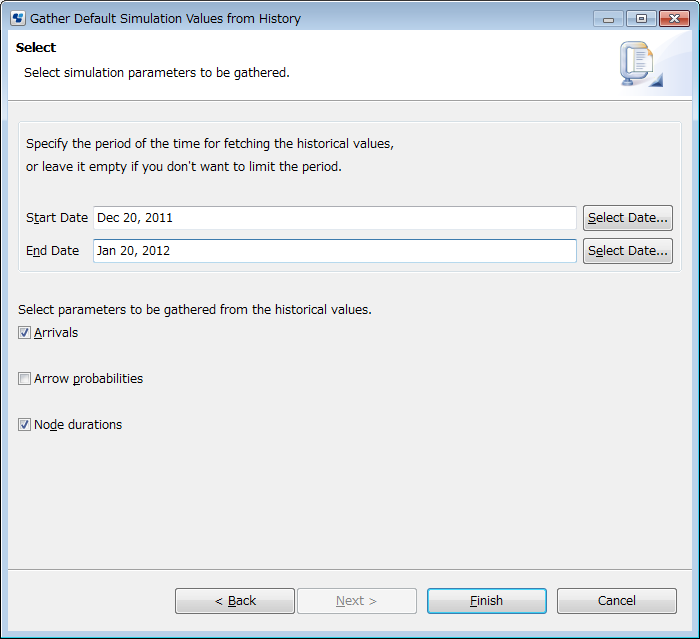
In the dialog that appears, specify when the simulation values are to be gathered.
You can specify the following parameters:
Start Date: Refers to the date when Systemwalker Runbook Automation Studio starts getting historical simulation values.
End Date: Refers to the date until which Systemwalker Runbook Automation Studio fetches historical simulation values.
Arrivals: Specifies that process instances will be triggered at the average interval you specified as arrival interval.
Arrow probabilities: Refers to the percentage of the time a particular arrow is taken.
Node durations: Refers to the calculation of average activity duration.
Figure 12.7 Specifying simulation dates
Note
If you have selected a process definition having Subprocess Nodes or Chained-Process Nodes for simulating its execution, the Arrivals checkbox will be disabled.
Note
If you do not select any dates, the time period for fetching historical values will be unlimited.
Specify simulation procedure.
You can specify the following parameter.
Start Date: The date when Systemwalker Runbook Automation Studio starts to get historical simulation value.
End Date: Systemwalker Runbook Automation Studio has got historical simulation value until this date.
Arrivals: To be triggered process instance by average interval as specified arrivals.
Transition of arrows: The probability(%) transited with specific arrows
Work time for node: calculated value for average activity period.