This section explains the procedure for creating a new scenario.
Prerequisite:
You have created process definitions for which you want to simulate the execution of processes.
To create a new scenario:
Right-click the empty Simulation folder in the Navigator view and select New > Scenario. The New Scenario dialog box is opened:
Figure 12.2 Creating a Scenario
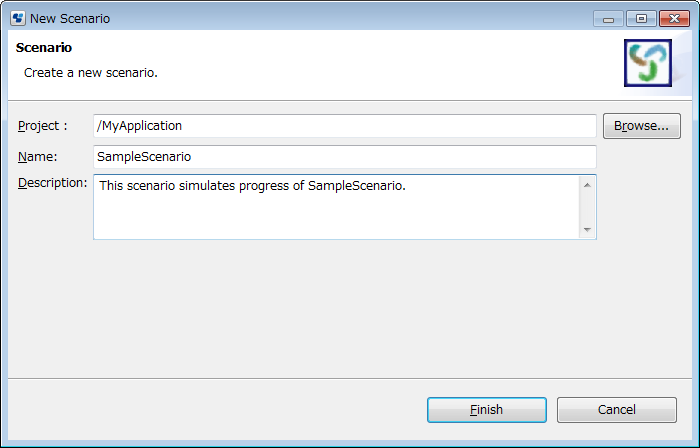
In the Project field, the current Workflow Application project or the Simulation Scenarios project is displayed. You can change to another project by clicking Browse and then selecting a different project. You can create a simulation scenario for a process definition of a Workflow Application project or a server project.
Type a name for your scenario in the Name field, and a brief description of the scenario in the Description field.
Click Finish.
The new scenario is automatically stored in the Simulation folder in the Navigator view. The Scenario editor is opened and the name and description you entered are automatically added.
Apart from creating a new simulation scenario, you can also open existing scenarios. To do so, open the Simulation folder where you have stored the new scenario, and double-click the scenario (.ssr) file.
Continue with defining the simulation scenario using the Scenario editor. Refer to section 12.2.3 Defining Simulation Properties for a Scenario for details.