

| PRIMECLUSTER Installation and Administration Guide 4.1 (for Solaris(TM) Operating System) |
|
Contents
Index
|
| Part 2 Installation | > Chapter 6 Building Cluster Applications | > 6.6 Setting Up Cluster Applications | > 6.6.1 Setting Up Resources | > 6.6.1.8 Creating Line Switching Unit Resources |
This section describes the procedure for setting up a line switching unit resource.
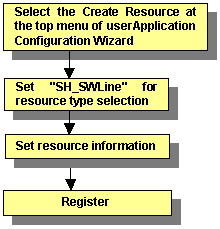
For information on the above operations up to "Selecting SH_SWLine for resource type selection," see "Creating Cmdline Resources." This section describes the operations from "Set resource information."

The displayed Help information when you click the Help button includes the information for CUI only.
 Setting resource information
Select SH_SWLine for the resource type selection. The following screen is displayed:
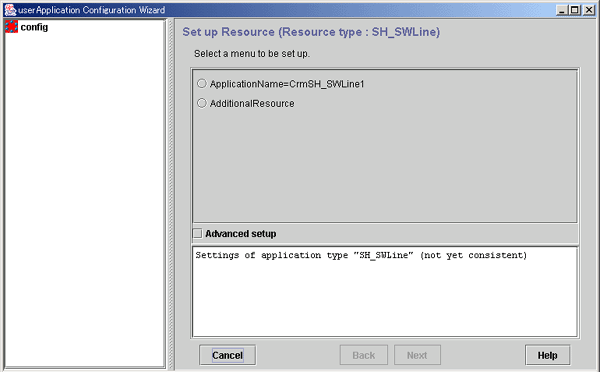
To terminate the selection process, click the Cancel button.
name in ApplicationName=name is the name of the line switching unit resource to be created.
The screen for changing the resource name is displayed.

An updated top screen containing the entered information is displayed. Go to step 2 to check the information.
A new menu will be added to the screen.
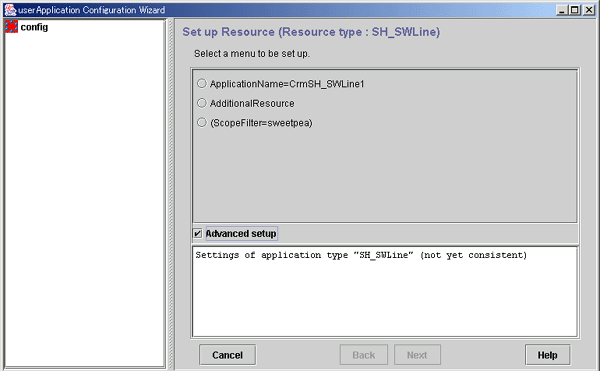
node-names in ScopeFilter=node-name shows the CF node names, which are separated with colons (":").

Of the switching line resources (SH_SWLine class) that are registered to the resource database, those resources that are common to these nodes can be added to the line switching unit resource according to the procedure described later.
The screen for entering the nodes to which the line switching unit is connected is displayed.
An updated top screen containing the entered information is displayed. Go to step 5 and check the information.
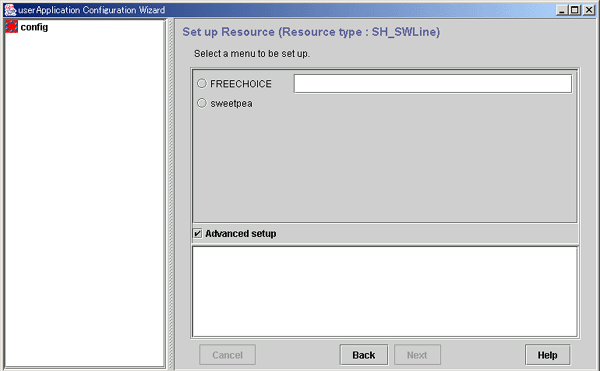
The screen for selecting switching line resources that are registered to the resource database is displayed.
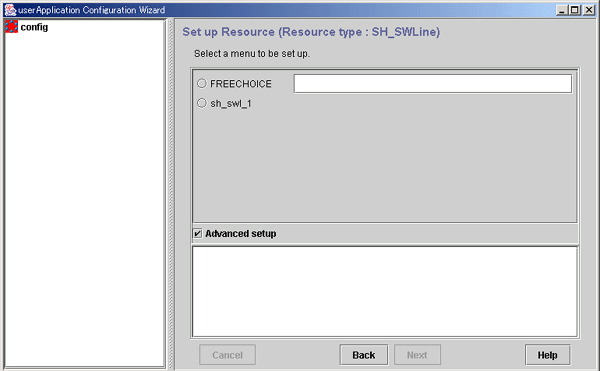
In the example shown in this screen, you can select the switching line resource called sh_swl_1. If no other data is displayed besides FREECHOICE, the following causes can be considered:
For the first case, return to step 5 and check the nodes. To return to step 5, click the Back button.
For the second case, see "Prerequisites" and register a switching line resource to the resource database. To do this, click the Back button, and then click the Cancel button in the displayed screen. This stops the setup process, and you can start again from the beginning.
The top menu to which the switching line resource was added is displayed.
The information is displayed as follows:
cluster_resource[number]=rsc-name
number A number corresponding to the sequence in which the resource was added is assigned.
rsc-name The resource name that was added is displayed.
The attribute must not be changed. If you add a switching line resource, the Attribute menu is added. If you use this menu to change any attribute of the switching line resource, RMS will not operate correctly.
Go to step 1 of "Registering the information."
Registering the information
If there is information that can be registered, the SAVE+EXIT menu will be added to the top screen.
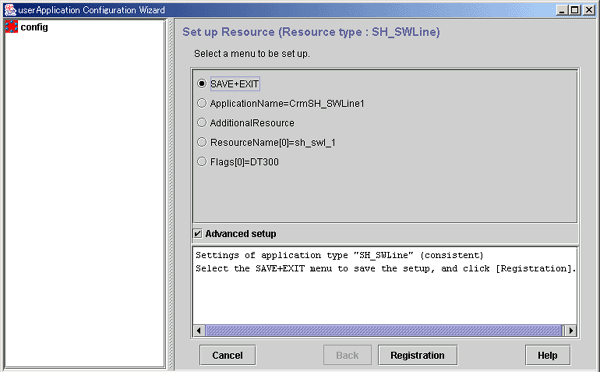
A line switching unit resource will be created according to the specified information, and the "userApplication Configuration Wizard Menu" screen will be displayed.
This ends the procedure.
|
Contents
Index
|