

| PRIMECLUSTER Installation and Administration Guide 4.1 (for Solaris(TM) Operating System) |
|
Contents
Index
|
| Part 2 Installation | > Chapter 6 Building Cluster Applications | > 6.6 Setting Up Cluster Applications | > 6.6.1 Setting Up Resources | > 6.6.1.6 Creating Procedure Resources |
Register the procedure resources that were registered to the cluster resource manager to RMS.
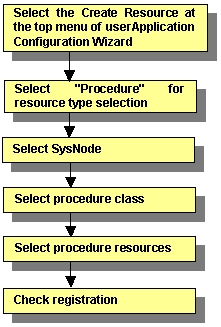
For information on the above operations up to "Select SysNode," see "Creating Cmdline Resources." This section describes the operations from Select procedure class.
 Selecting the procedure class
Select the procedure class to be created.

This class is used to make general applications to be cluster-aware.
It is a class used for DBMS.
It is used to make a part of OS functionality cluster-aware. This OS function should be started at "/etc/rc2.d" in a non-cluster single node. SystemState2 does not automatically start during OS startup. It is used to start a cluster application only on the OPERATING node.
It is used to make a part of OS functionality cluster-aware. This OS function should be started at "/etc/rc3.d" in a non-cluster single node. SystemState3 does not automatically start during OS startup. It is used to start a cluster application only on the OPERATING node.

To create an application resource that is set in one cluster application on each node, the application resource name should be the same as the application type on each node.
After completing the setup, click Next to go to the "Select procedure resource" screen.
Selecting the procedure resourceSelect the procedure resource to be created.
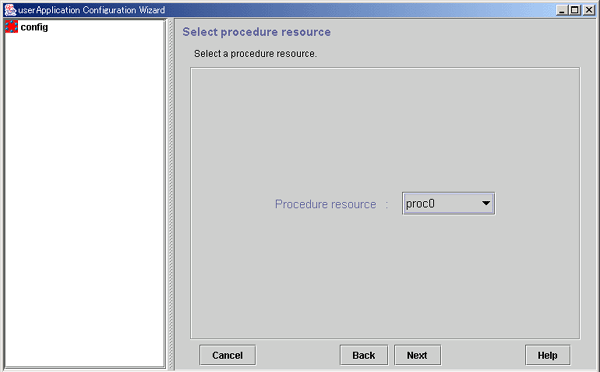
After completing the setup, click Next to go to the "Confirm registration" screen.
Checking the registration information for the procedure resourceCheck the registration information for the procedure resource. You can also set resource attributes by selecting the Attributes tab and switching the screen.
For information on the resource attributes, see "Attributes."
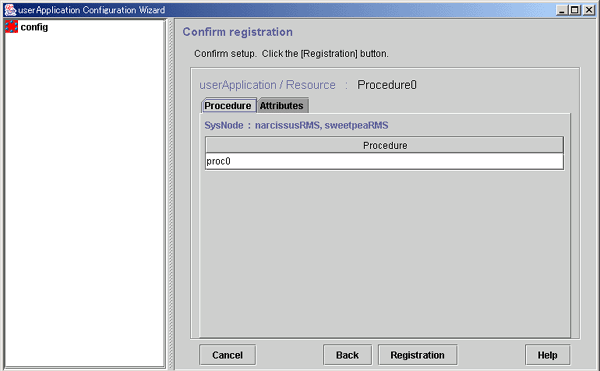
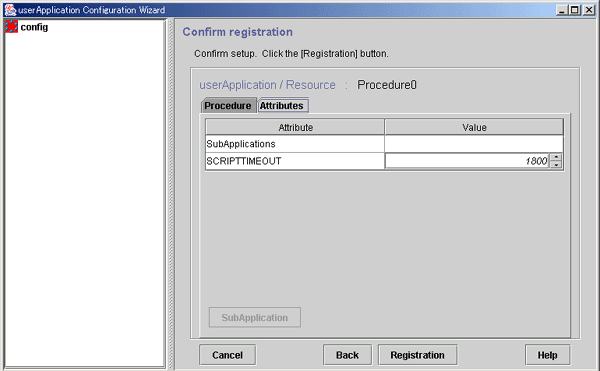
Check the registration information, and then click Registration.
Resource AssociationUse resource association to assign a startup order to resources of the same type.
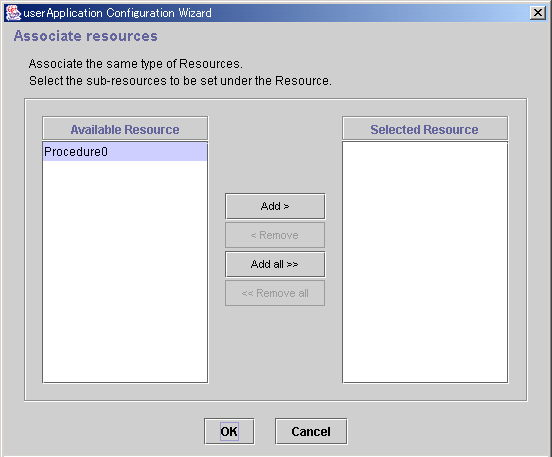
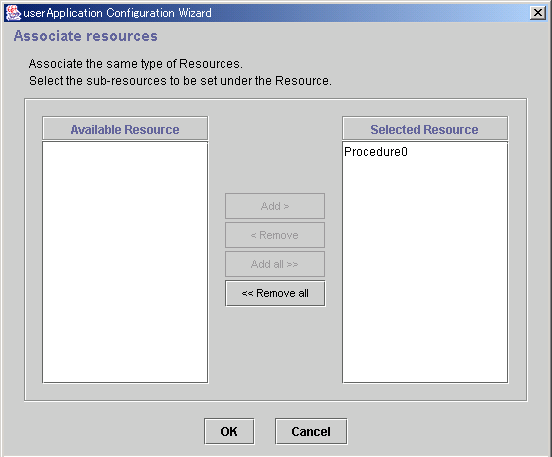
From Available Resource, select the resources to be configured under the current resource, and then click Add. To add all listed resources, click Add all. To remove a resource, select the resource to be removed from Selected Resource, and then click Remove. To delete all listed resources, click Remove all.
After completing the setup, select OK to return to the "Confirm registration" screen.
|
Contents
Index
|