When a disk unit abnormality occurs, contact field engineers to swap the disk units.
In GDS, regardless of hot swap or not, the following procedures are necessary before and after the disk swap.
Swap Physical Disk
Restore Physical Disk
After performing "Swap Physical Disk," swap the disk unit with the same procedure as the disk unit not registered to GDS. Then, perform "Restore Physical Disk."
For the procedure of how to swap disk units, see the manuals of the server, OS, and disk unit.
Note
Identifying a Failed Disk Unit
You should pinpoint a hardware error on a disk unit based on, for example, log messages for the disk driver output in the /var/adm/messages file. For details, see "F.1.12 Disk Unit Error."
Note
Swapping FC-AL Internal Disks
FC-AL internal disks cannot be swapped through these procedures. For details, see "A.2.17 Swapping Internal Disks (FC-AL)."
Note
Swapping SAS disks
The following disks cannot be swapped through these procedures:
The internal disk of SPARC M12/M10
The internal disk of SPARC T4-4/T4-2/T4-1/T3-4/T3-2/T3-1
The disk of Expansion File Unit connected to a 6Gbps SAS card
The disk connected to a 12Gbps SAS card
For details, see "A.2.18 Swapping Disks (SAS)."
Note
Swapping the system disk which is mirrored by ZFS mirroring
When swapping the system disk which is mirrored by ZFS mirroring, see "Swapping the system disk which is mirrored by ZFS mirroring" in "A.2.10 System Disk Mirroring in a ZFS Boot Environment."
Note
Notes on Physical Disk Swap
Swap Physical Disk
In order to swap the disk units, you must take the physical disk offline.
The procedures are explained below.
Displaying the status of physical disk
In the Main screen, display the physical disk to be swapped. Click the icon and select the physical disk.
Selecting [Swap Physical Disk]
In the Main screen [Operation] menu, select [Swap Physical Disk].
Figure 5.85 Swap Physical Disk
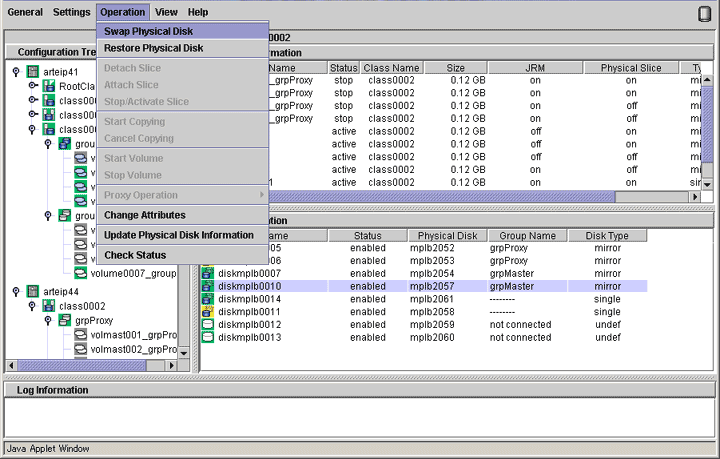
The confirmation screen shown below appears.
To continue the process, click <Yes>. Clicking <No> cancels the physical disk swapping process.
Figure 5.86 Confirming Swap Physical Disk
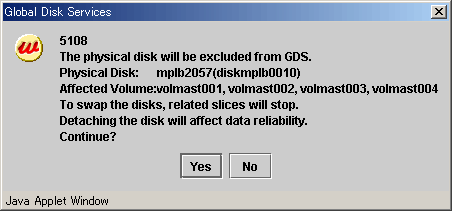
Requesting the swap of physical disk
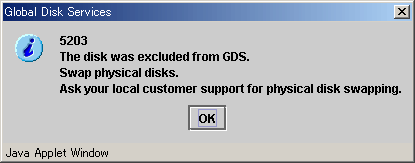
Click <Yes>, and a message notifying the offline status appears.
Click <OK>, and request field engineers to swap the disk unit.
Figure 5.87 Notifying Offline Completion
Note
Swapping disk unit
See the manuals of the server, OS, and disk unit to swap a disk unit with the same procedure as the disk unit not registered to GDS.
For hot swap, perform "Restore Physical Disk" after excluding a disk from OS, swapping a disk unit, and including the disk to OS.
For these procedures, see the manuals of the server, OS, and disk unit.
Note
To swap with a brand-new disk
If a label is not created for the swapped disk, it is necessary to create a label using the format(1M) command before performing "Restore Physical Disk." You can check whether the label exists by the verify menu of the format(1M) command.
The disk label type must be identical to that of a class where the disk was registered. The disk label type of the class can be viewed in the LABEL field displayed with the sdxinfo -C -e label command.
Restore Physical Disk
After swapping the disk units, you must put the swapped physical disk back online.
The procedures are explained below.
Selecting the physical disk to restore
Select the physical disk you want to restore.
Selecting [Restore Physical Disk] menu
In the Main screen [Operation] menu, select [Restore Physical Disk].
Figure 5.88 Restore Physical Disk
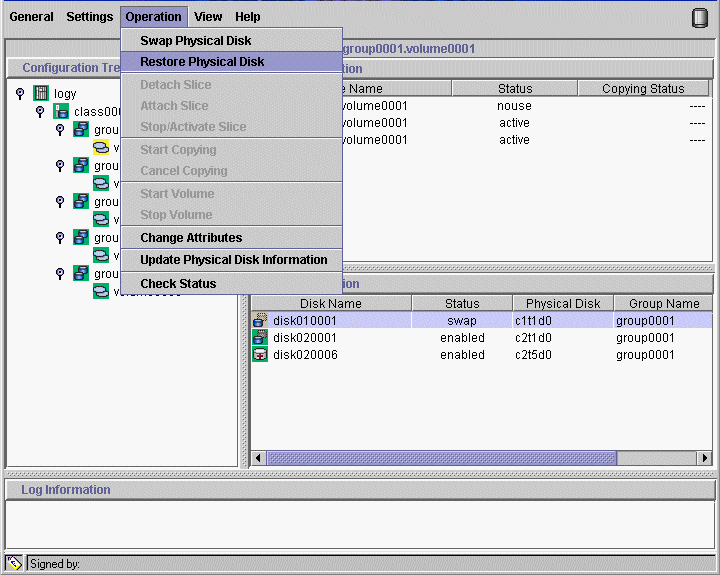
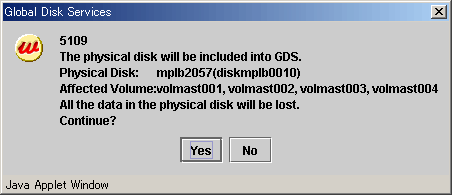
The confirmation screen shown below appears.
To continue the process, click <Yes>. Clicking <No> cancels the physical disk restore process.
Figure 5.89 Confirming Restore Physical Disk
Notifying online status
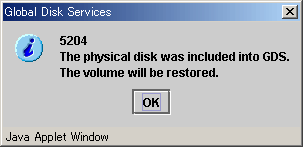
Click <OK>, and a message notifying the online status appears.
Figure 5.90 Notifying Online Completion
Note
In Cluster Systems
When physical disks for which disk resources are registered with the PRIMECLUSTER resource database are swapped, conduct automatic resource registration regardless of the class types after recovering the physical disks. It is required to change volume names set to the disk label of original disks to those of the replacing disks, which are registered with the PRIMECLUSTER resource database. If automatic resource registration is not performed, a message indicating a disk unit connection error may be output, or failover may occur when nodes are started. For details on automatic resource registration, see "PRIMECLUSTER Installation and Administration Guide."
Note
If the I/O Response Time Assurance Function is set
If there is not enough memory the physical disk restoration might become error.
In this case, the following messages are displayed:
5000
Command line output: ERROR: sfdsk driver returned an error, errno=12
Also, a warning message 22018 (WARNING: sfdsk: failed to open disk, no enough address space: ...) is output to the console.
In this situation, perform any of the following actions before starting the physical disk restoration.
(a) Start the system again.
(b) Wait until the memory is freed up.
(c) Increase the memory.
Refer to the installation guide for the necessary memory.
Plan the memory increase if selecting (a) or (b).