This subsection describes the procedures for restoring volumes through use of GDS Snapshot proxy volumes. This method requires the following "Proxy Operations."
Restore
See
To restore with proxy volumes, see "1.5.4 Instant Restore."
For the operation flow, see "5.1.5 Restore."
Note
System Volume Restoration
The system volumes currently running as file systems such as /, /usr, and /var cannot be stopped, and such volumes cannot be restored through this procedure. For the system volume restoration methods, see "6.3 Backing Up and Restoring a System Disk in a UFS Boot Environment" or "6.4 Backing Up and Restoring a System Disk through an Alternative Boot Environment."
Stop services using a volume to be restored (a master volume), stop the master volume, and then perform the following procedures.
Restore
Copy (overwrite) data from a proxy to a master.
Follow the procedures below.
Selecting a proxy as a restore copy source
Click an icon of a master volume to be restored on the GDS Configuration Tree in the Main screen.
To restore all the master volumes within a master group simultaneously, click the master group icon.
Select [View]:[Details]:[Proxy Object] to view all the proxy objects related to the master object selected on the GDS Configuration Tree, in the Object Information Field.
In this field, click an icon of a proxy volume (or a proxy group) as a restore copy source.
Point
Backup Generation
Proxy volume data is a replica of master volume data at the moment of snapshot creation. For snapshot creation time, check [Snapshot Created] time in the proxy volume information field.
Note
Proxy Volumes That Can Be Restore Copy Sources
Proxy volumes can be restore copy sources if they are parted and in "active" or "stop" status.
However, when selecting "Yes" to "Rejoin" for setting the restore environment in step 3., copy sources must be proxy volumes that are parted and are in "stop" status.
Selecting the [Restore] menu
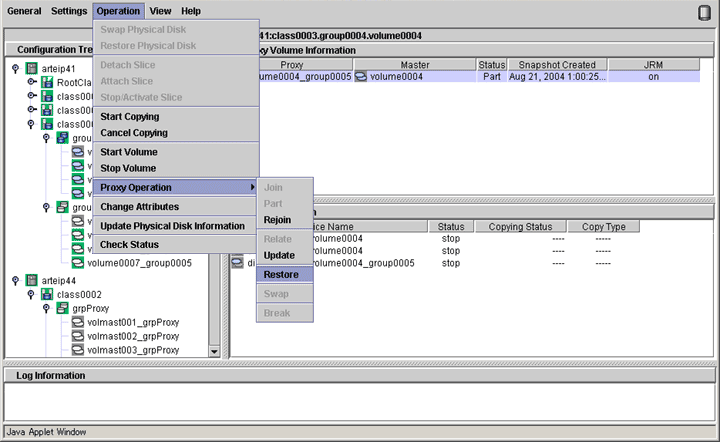
Select [Operation]:[Proxy Operation]:[Restore] in the Main screen.
Figure 5.79 Restore
Setting the environment for restoring the master
The Restore Master screen appears.
Figure 5.80 Setting the Restore Environment
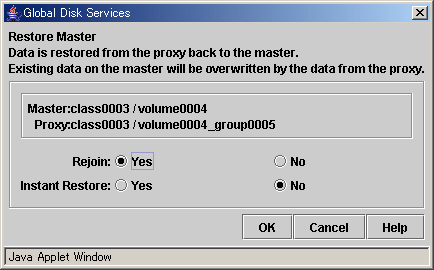
Set the environment for restoring the master.
Rejoin
Specify whether to rejoin the master and the proxy.
The default value is "Yes." The master and the proxy will be joined, and after copy is complete they will be synchronized. If the OPC function is unavailable, select "Yes."
To leave the master and the proxy parted and execute restore with the OPC function, set this option to "No."
When the master and proxy types are stripe or concatenation, "No" is selected and you cannot change the setting.
See
For the OPC function use conditions, see the following sections.
Note
Master Volumes with Mirroring Multiplicity of Two and Higher
Even if the device supports the OPC function, selecting "Yes" to [Rejoin] disables the OPC function. To use the OPC function for restoration, select "No" to [Rejoin]. However, slices other than the OPC copy destinations will be excluded from mirroring and the data statuses will be invalid. To restore the master volume mirroring status, select the master volume and execute [Operation]:[Start Copying] in the Main screen. If not executing [Start Copying], resynchronization copying automatically starts when the master volume starts.
Instant Restore
Specify whether to apply instant restore
The default value is "No." Wait until copying from the proxy volume to the master volume is complete and start the master volume.
To start the master volume immediately without waiting until copying from the proxy volume to the master volume is complete, set this option to "Yes."
Note
If "Yes" to [Rejoin] and "Yes" to [Instant Restore] Are Selected
Even if synchronization copying from the proxy to the master is in progress, the master volume can be started and accessed. Note, however, that the master and the proxy are joined and data written to the master is also written to the proxy. To prevent proxy data from being updated, wait until copying is complete and execute "Part" before starting the master volume.
After the settings are complete, click <OK>. Clicking <Cancel> cancels the restore process.
Information message of the completion
A message window appears informing you that the restore process is complete.
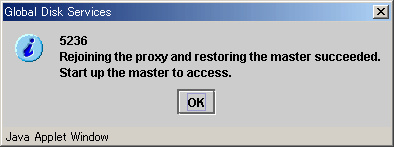
Figure 5.81 Information Message of "Restore" Completion (Yes to Rejoin/No to Instant Restore)

If "Yes" to [Rejoin] and "No" to [Instant Restore] were selected when setting the restore environment in step 3., the master and the proxy are joined. Wait until resynchronization copying from the proxy to the master is complete and start the master volume.
Figure 5.82 Information Message of "Restore" Completion (Yes to Rejoin/Yes to Instant Restore)
If "Yes" to [Rejoin] and "Yes" to [Instant Restore] were selected when setting the restore environment in step 3., the master and the proxy are joined. You may start the master volume immediately without waiting until resynchronization copying from the proxy to the master is complete.
Figure 5.83 Information Message of "Restore" Completion (No to Rejoin/No to Instant Restore)
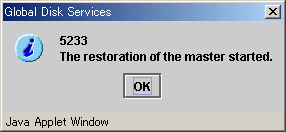
If "No" to [Rejoin] and "No" to [Instant Restore] were selected when setting the restore environment in step 3., the master and the proxy are left parted. Wait until OPC copying from the proxy to the master is complete and start the master volume. If the OPC function is unavailable, the restore process fails.
Figure 5.84 Information Message of "Restore" Completion (No to Rejoin/Yes to Instant Restore)
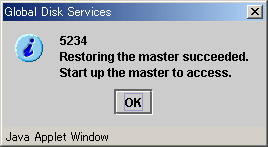
If "No" to [Rejoin] and "Yes" to [Instant Restore] were selected when setting the restore environment in step 3., the master and the proxy are left parted. You may start the master volume immediately without waiting until OPC copying from the proxy to the master is complete.
If the OPC function is unavailable, the restore process fails.
Break
If no more backup is necessary after the restore, break the relationship between the master and the proxy.
For "Break Proxy" procedures see "5.5.5 Breaking a Proxy."