It describes how to create policy group.
Add a policy group.
The procedure is as follows.
Login to the main menu and click Environment Setup.
The Environment Setup window is displayed.
Click Policy Groups.
The following window is displayed.
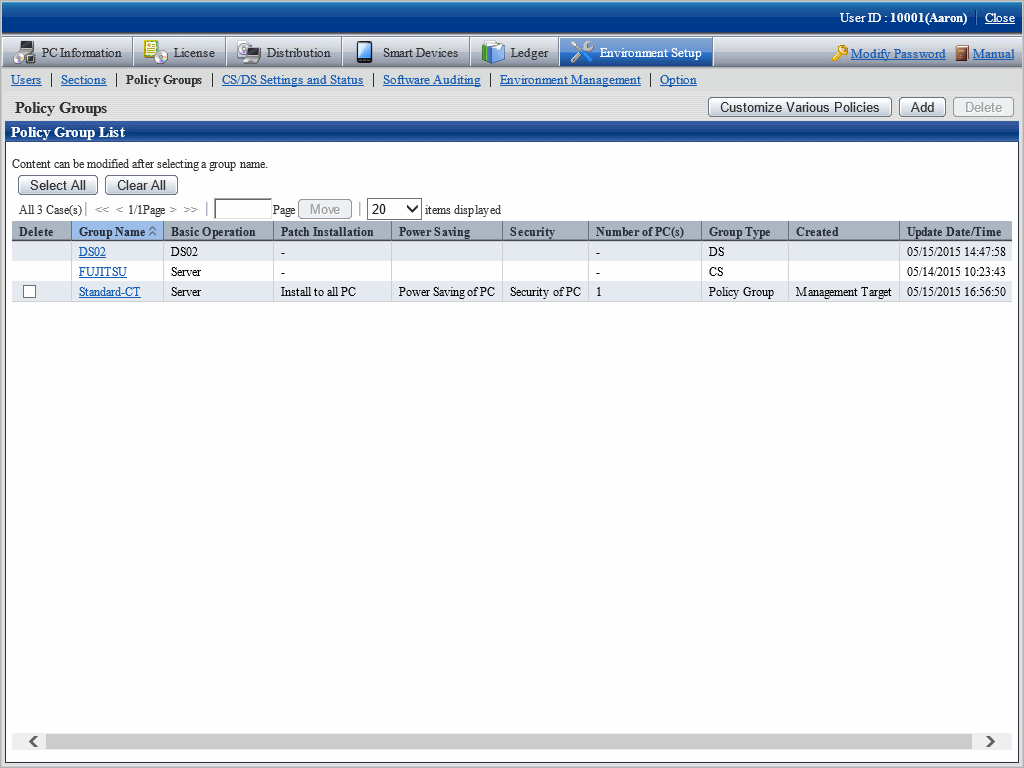
Click the Add button.
The following window is displayed.
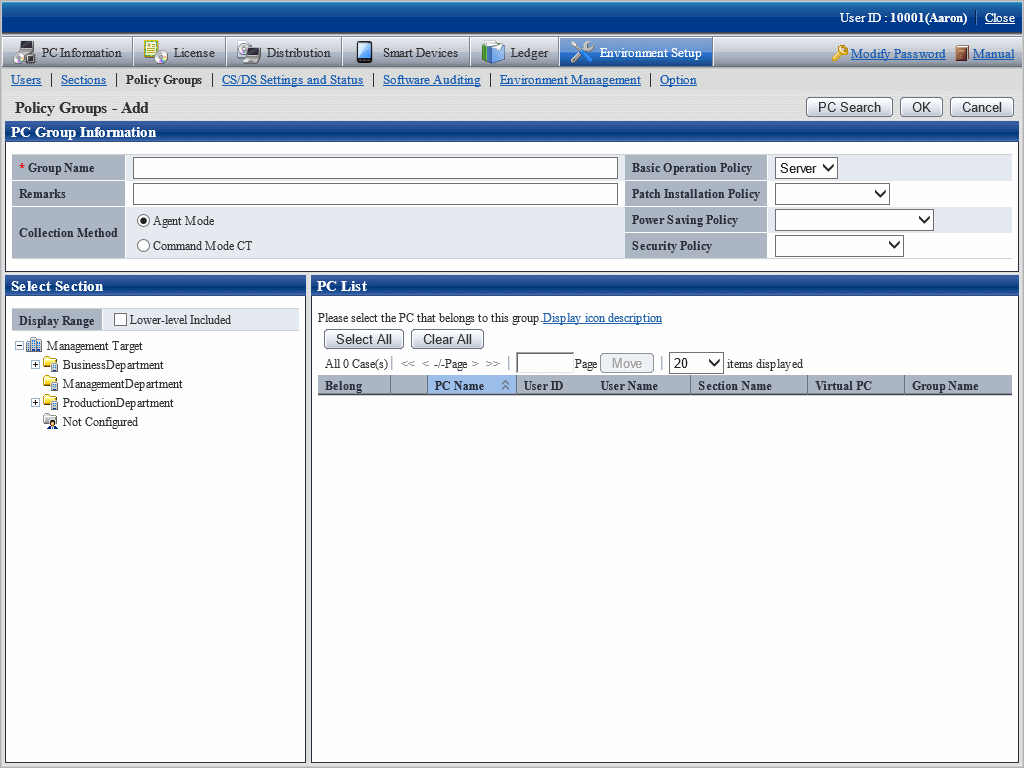
Enter the following items.
Item | Description |
|---|---|
Group Name | Enter the name of policy group. Up to 60 characters can be entered. Characters can be specified include alphanumeric characters and the following single-byte symbols. ("-""@"".""("")""[""]""{""}""<"">"":"";") |
Remarks | Enter the remarks. Up to 256 characters can be entered. |
Basic Operation Policy | Select the basic operation setting used in this group from the pull-down menu. |
Patch Installation Policy | Select the excluded patch setting used in this group from the pull-down menu. Select the blank field when the operation of excluded patch is not performed. Exclusion patches cannot be set for groups with group type of "CS" or "DS". |
Power Saving Policy | Select the power saving setting used in this group from the pull-down menu. Select the blank field when the operation of power saving setting is not performed. |
Security Policy | Select the security setting used in this group from the pull-down menu. Select the blank field when the operation of security setting is not performed. |
Collection Method | Select the collection method of this group.
|
Register PC to policy group.
Select the PC to be registered through one of the following method.
Select a section from the section tree in the field on the left.
The PC under the selected section will be displayed in the field on the right.
If the words such as PC name are displayed in gray, it indicates that the PC is not running according to policy group. There are following major types.
In case of command mode CT
In case of PC of the version prior to V13.0.0
The PC of versions prior to V13.0.0 can be classified to the policy group. In this case, when the PC is updated to V13.0.0 or later, it will run according to the policy group.
The PC registered using the dtppcmst.exe (PC registration) command is displayed using the following dot line icon.
|
Click the PC Search button.
The window for entering search condition is displayed.
Enter the search condition and click the Search button.
The PC that matches with the search condition is displayed.
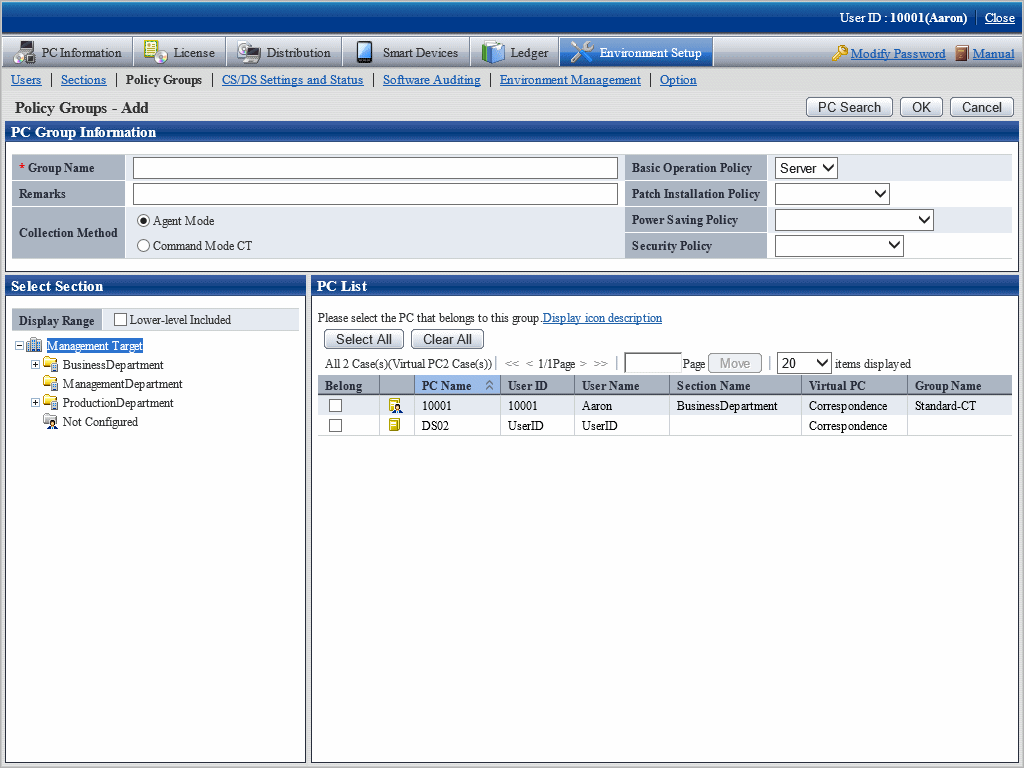
Select the PC name to be belonging to the policy group and click the OK button.
The PC to be belonging to the policy group is selected.
Click the OK button.
The policy group to which the PC belongs is added.
To confirm the PC that belongs to the policy group, repeat the operation of step "5.", and click the PC List tab to confirm.
The belonging PC list is displayed.
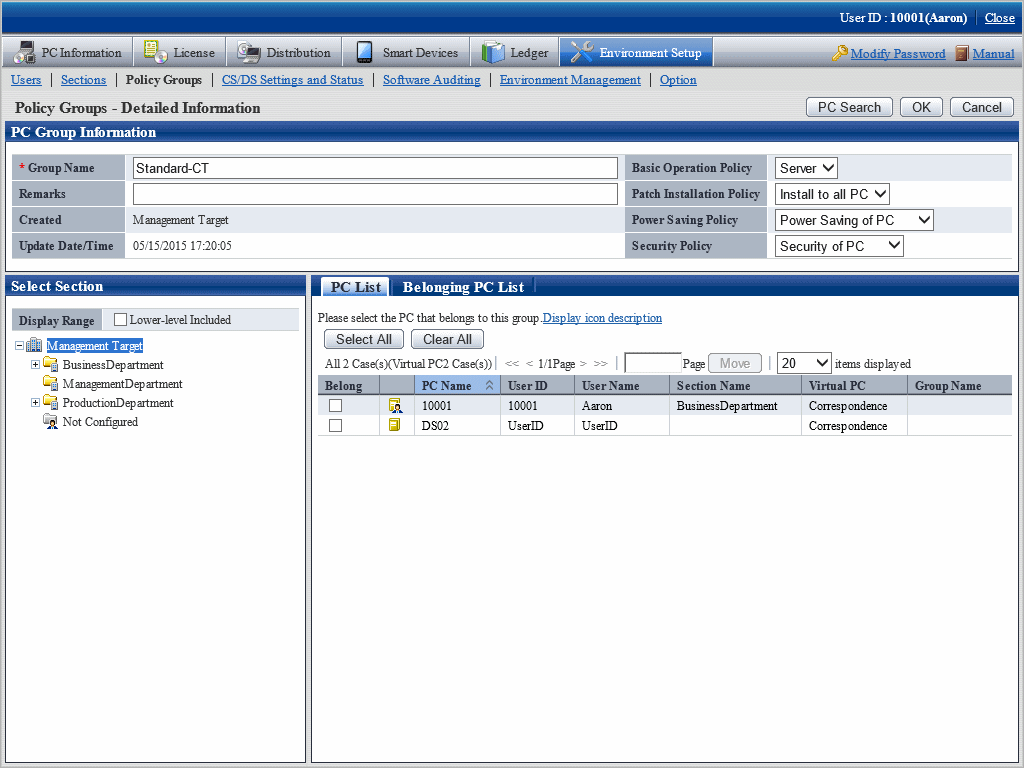
Add the group used for command mode CT.
The procedure is as follows.
Login to the main menu and click Environment Setup.
The Environment Setup window is displayed.
Click Policy Groups.
The following window is displayed.

Click the Add button.
The following window is displayed.
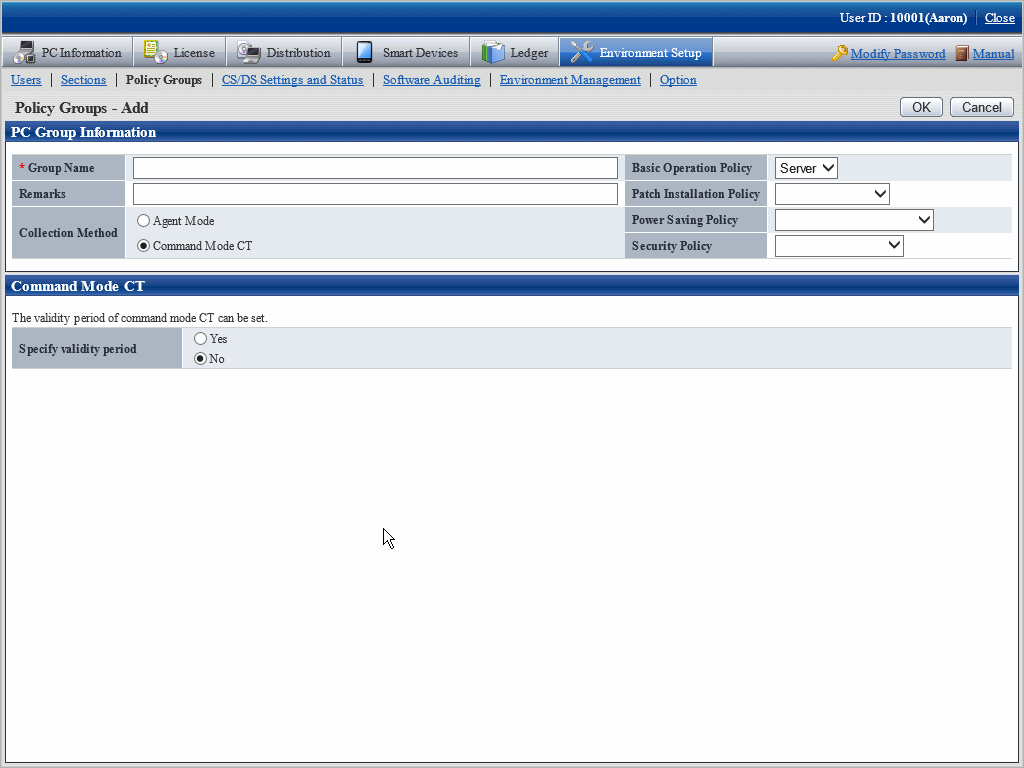
Enter the following items.
Item | Description |
|---|---|
Group Name | Enter the name of policy group. Up to 60 characters can be entered. Characters can be specified include alphanumeric characters and the following single-byte symbols. ("-""@"".""("")""[""]""{""}""<"">"":"";") |
Remarks | Enter the remarks. Up to 128 multi-byte characters and 256 single-byte characters can be entered. |
Basic Operation Policy | Select the basic operation setting used in this group from the pull-down menu. |
Patch Installation Policy | Select the excluded patch setting used in this group from the pull-down menu. Select "- "when the operation of excluded patch is not performed. |
Power Saving Policy | Select the power saving setting used in this group from the pull-down menu. Select "- "when the operation of power saving setting is not performed. |
Security Policy | Select the security setting used in this group from the pull-down menu. Select "-" when the operation of security setting is not performed. |
Collection Method | Select the collection method of this group.
|
Set the effective period of command mode CT.
Item | Description |
|---|---|
Specify validity period | Select Yes to set the effective period of command mode CT. Select the number of days from 1 to 60 since creation from the list. |
Click the OK button.
The group is added.
Modify the information of registered policy group.
The procedure is as follows.
Login to the main menu and click Environment Setup.
The Environment Setup window is displayed.
Click Policy Groups.
The following window is displayed.

Click the link of Group Name to modify settings.
The following window is displayed.

Modify the content of each item.
In addition, when CS or DS is selected in the type, the group name, Patch Installation Policy and belonging PC cannot be modified.
Click the OK button.
The group information is modified.
Delete a policy group.
The procedure is as follows.
Login to the main menu and click Environment Setup.
The Environment Setup window is displayed.
Click Policy Groups.
The following window is displayed.

Select the policy group to be deleted, and click the Delete button.
The group is deleted.
After the policy group has been deleted, the PC that belongs to the group will have no affiliation. At this time, the PC will run according to the policy set in CS/DS.