Sample 21 demonstrates how COBOL can support multithreading programming.
In sample 21, a resource (file data) is shared between threads, and the synchronous control between threads is shown by using the multi-thread programming functions of NetCOBOL.
Please refer to Chapter 22, "Multithread Programs” of the “NetCOBOL User's Guide” for details of the multi-thread programming functions of NetCOBOL.
Sample 21 is a Web application. Web applications typically can benefit from multithreading applications.
Please refer to the "NetCOBOL Web Guide" and the "NetCOBOL ISAPI Subroutines User's Guide" for details of the functions available for programming the Web.
To execute this sample, the following products are needed on the client side and the server side.
Client side
World Wide Web browser
Microsoft(R) Internet Explorer 4.0 or more
Netscape Navigator(TM) 4.0 or more
Server side
One of the following products:
Microsoft® Windows® 2000 Server operating system
Microsoft® Windows® 2000 Advanced Server operating system
Microsoft® Windows Server® 2003 Standard Edition
Microsoft® Windows Server® 2003 Enterprise Edition
Microsoft® Windows Server® 2008 Standard Edition
Microsoft® Windows Server® 2008 Enterprise Edition
Microsoft® Internet Information Server 5.0 or later
Overview
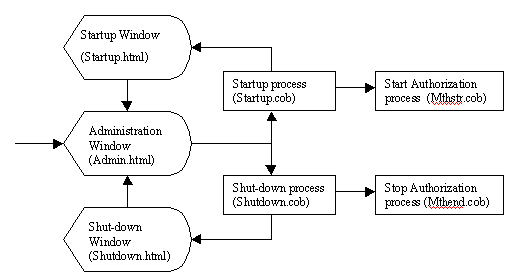
The sample program consists of the following three parts.
Initialization processing
The resource (file data) between threads is acquired, and is initialized.
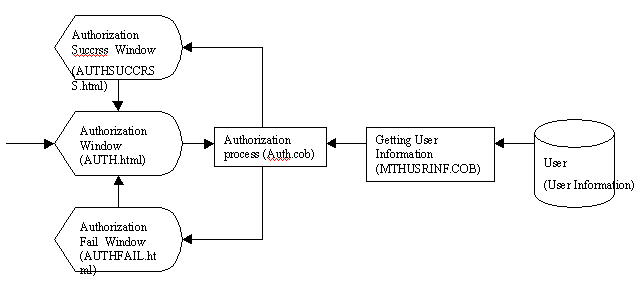
Authorization processing
The authorization process is achieved by accessing the resource (file data) between threads.
Termination processing
The resource (file data) between threads is closed.
This sample demonstrates how to share resource data with Web functions, and how to synchronize the threads.
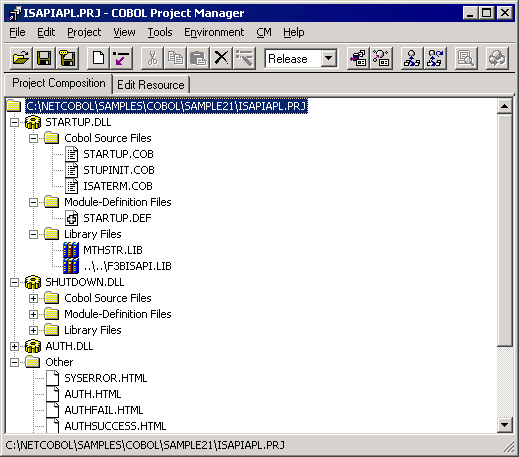
Available Programs
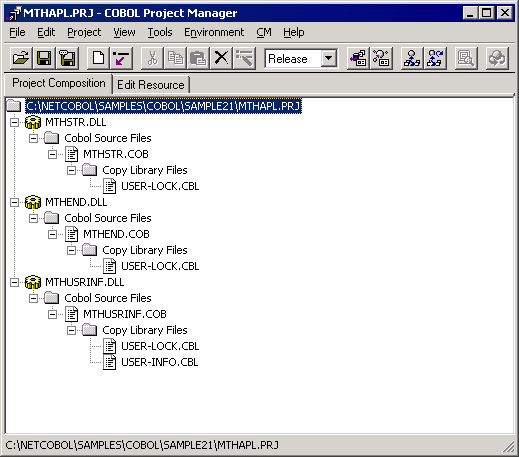
Project files
ISAPIAPL.PRJ
MTHAPL.CBI
Option files
ISAPIAPL.CBI
MTHAPL.CBI
COBOL source files
AUTH.COB
ISAINIT.COB
ISATERM.COB
MTHEND.COB
MTHSTR.COB
MTHUSRINF.COB
SHUTDOWN.COB
STARTUP.COB
STUPINIT.COB
Library text
User-Info.CBL
User-Lock.CBL
Module definition files
AUTH.DEF
SHUTDOWN.DEF
STARTUP.DEF
Data files
USERINFO
Run-time Initialization file
COBOL85.CBR
HTML files
ADMIN.HTML
AUTH.HTML
AUTHFAIL.HTML
AUTHSUCESS.HTML
NOTOPENED.HTML
OPENED.HTML
SHUTDOWN.HTML
STARTUP.HTML
SYSERROR.HTML
SYSTEMERROR.HTML
Process Flow
Business start and end
Authorization service
Applicable COBOL Functions
Index file (reference)
External data
External file
Data lock subroutine
COBOL ISAPI subroutine
Applicable COBOL Statements
The CALL, CLOSE, EXIT, GO TO, IF, MOVE, OPEN, PERFORM, READ, and SET statements are used.
Building the Program
Project manager's Build function is used to create the executable program.
In the following screen snapshots, the sample program was installed to C:\NetCOBOL. Your installation folder may be different.
The project manager is started.
The project file "MTHAPL.PRJ" is opened.
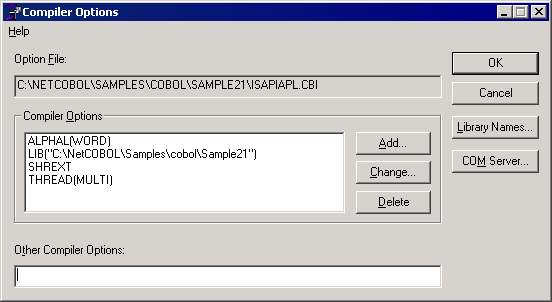
The project file is selected, and "Compiler options" is selected from "Project"-"Options" menu.
The "Compiler options" dialog is displayed.
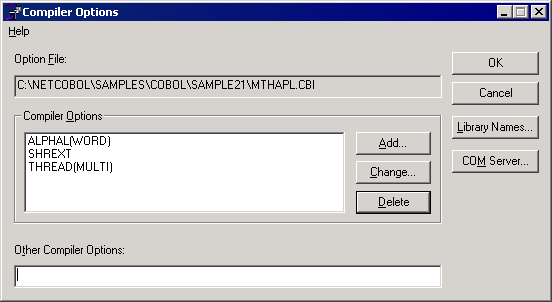
Compiler option THREAD(MULTI), SHREXT and ALPHAL(WORD) are specified.
After confirming the information, click the OK button.
You are now returned to the Project Manager window.
"Build" is selected from Project Manager's "Project" menu.
(Prior to executing the application, please confirm that all the DLL’s in the application have been built correctly.)
The project file "ISAPIAPL.PRJ" is opened
The compiler option dialog is displayed as in step 3 above, showing that the compiler options THREAD(MULTI), SHREXT, and ALPHAL(WORD) are specified.
Modify the folder name of the library file specified in the compiler option LIB.
Click the OK button.
You are now returned to the Project Manager window.
"Build" is selected from Project Manager's "Project" menu.
Executing the Program
It is assumed that the domain-name and virtual directory name are registered in IIS (Internet Information Services) as "user" and "sample21" respectively.
This example presumes that Microsoft Internet Explorer is being used.
The authentication service begins.
The following information is set in URL.
Address │ http://user/sample21/admin.html
The administrator menu screen is displayed. Click on the “Set Starting Business” hyperlink.
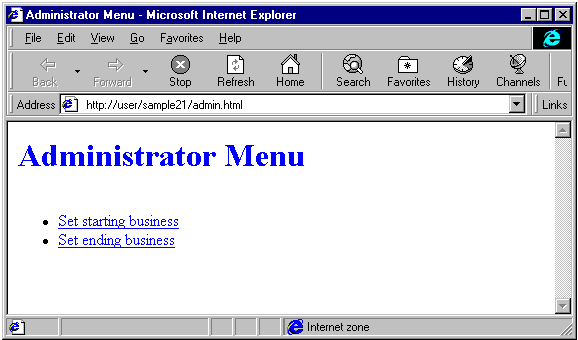
When clicked, the authentication service begins. Please do so before starting the authentication service.
The authentication service is started.
The following information is set in the URL and the "Execute" key is pushed.
Address │ http://user/sample21/Auth.html
The authentication service screen is displayed. After the screen is displayed, input a User ID and password, then click the "OK" button.
Valid User ID’s are USER0001 to USER0030. The password is the same as the User ID.
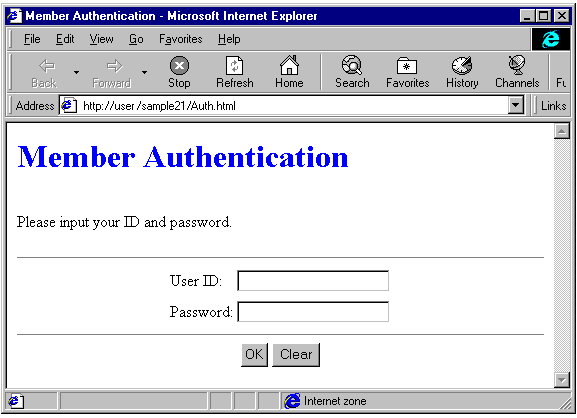
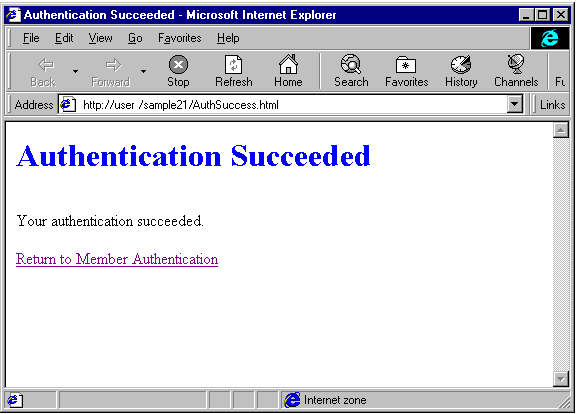
When the OK button is clicked, the authentication success screen is displayed.
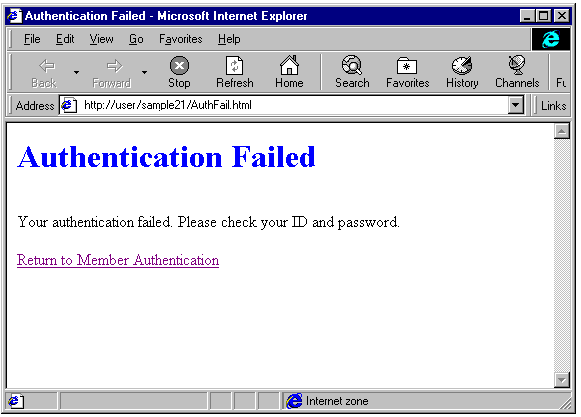
If the User ID and/or password are invalid, an authentication failure screen is displayed.
The authentication service is ended.
Input following information in the URL and press the "Execute" key.
Address │ http://user/sample21/admin.html
Because the administrator menu screen is displayed, "Set ending business" is clicked.
