In sample 22, the program in sample 21 is enhanced to demonstrate an online store.
The sample uses multi-thread programming functions as well as functions for programming the Web.
Please refer to "NetCOBOL Web Guide" and "NetCOBOL ISAPI Subroutines User's Guide" for details of the Web functions.
Please refer to Chapter 22 "Multithread Programs" of the "NetCOBOL User's Guide" for details of the multithreading programming functions.
This example also outputs an event log using the function “COB_REPORT_EVENT”.
This function is described in Appendix H of the “NetCOBOL User's Guide”.
To use this sample, the following products are needed on the client side and the server side.
Client side
Microsoft® Internet Explorer 4.0 or more
Netscape NavigatorTM 4.0 or more
Server side
One of the following products:
Microsoft® Windows® 2000 Server operating system
Microsoft® Windows® 2000 Advanced Server operating system
Microsoft® Windows Server® 2003 Standard Edition
Microsoft® Windows Server® 2003 Enterprise Edition
Microsoft® Windows Server® 2008 Standard Edition
Microsoft® Windows Server® 2008 Enterprise Edition
Microsoft® Internet Information Server 5.0 or later
Overview
The sample program consists of the following five parts.
Begin processing
The resource (file data) between threads is acquired and initialized.
Authorization processing
The authorization processing is achieved by referring to the resource (file data) between threads.
Order confirmation processing
The order confirmation processing is performed by referring to the resource (file data) between threads.
Order issue processing
The order issue processing is performed by referring to the resource (file data) between threads. Shared file update processing is done.
Termination
The resource (file data) between threads is closed.
Available Programs
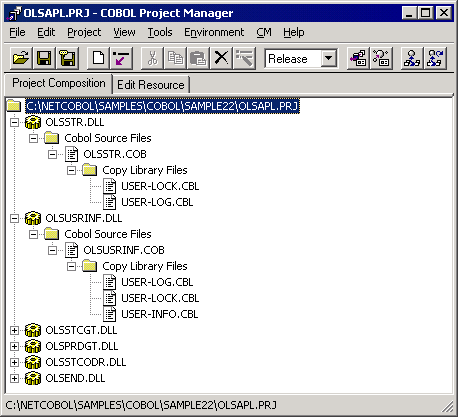
Project files
ISAPIAPL.PRJ
OLSAPL.PRJ
Option files
ISAPIAPL.CBI
OLSAPL.CBI
COBOL source files
AUTH.COB
CONFIRM.COB
ENTRY.COB
ISAINIT.COB
ISATERM.COB
OLSEND.COB
OLSPRDGT.COB
OLSSTCGT.COB
OLSSTCODR.COB
OLSSTR.COB
OLSUSRINF.COB
SHUTDOWN.COB
STARTUP.COB
STUPINIT.COB
Library text
Order-Info.CBL
Product-Info.CBL
Stock-Info.CBL
User-Info.CBL
User-Lock.CBL
User-Log.CBL
Module definition files
AUTH.DEF
CONFIRM.DEF
ENTRY.DEF
SHUTDOWN.DEF
STARTUP.DEF
Data files
PRODUCTINFO
STOCKINFO
USERINFO
Run-time Initialization file
COBOL85.CBR
HTML files
ADMIN.HTML
AUTH.HTML
AUTHFAIL.HTML
CATALOG.HTML
CONFIRMDETAILPARTS.HTML
CONFIRMHEAD.HTML
CONFIRMTAIL.HTML
ILLIGALACCESS.HTML
ILLIGALSYSTEM.HTML
NOTOPENED.HTML
OPENED.HTML
ORDERDETAILPARTS.HTML
ORDERRESULTHEAD.HTML
ORDERRESULTTAIL.HTML
SHOPPINGMENU.HTML
SHORTAGESTOCK.HTML
SHUTDOWN.HTML
STARTUP.HTML
STARTMENU.HTML
SYSERROR.HTML
SYSTEMERROR.HTML
UNDERCONSTRUCTION.HTML
GIF files
CATALOGTITLE.GIF
FJLOGO.GIF
TITLE.GIF
LifeBookE.GIF
JPEG files
LifeBookB.JPG
LifeBookC.JPG
LifeBookL.JPG
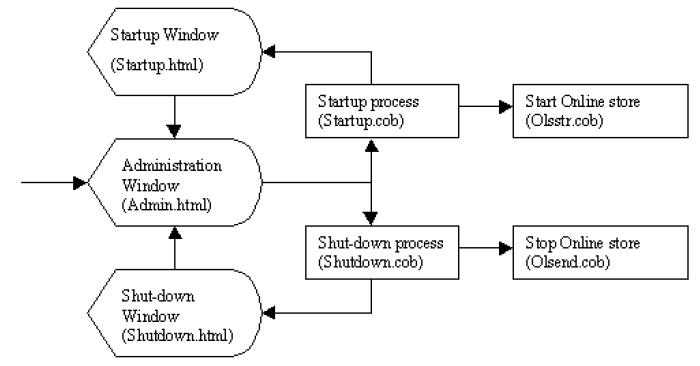
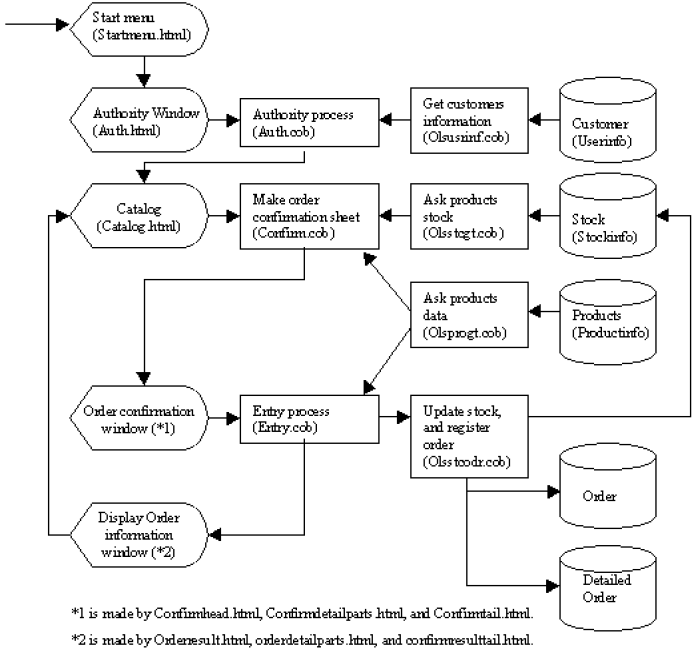
Process Flow
Business start and end
Online store
Applicable COBOL Functions
Index file (creation, reference, update, and rewrite)
External data
External file
Data lock subroutine
External file event log (output of user definition information)
COBOL ISAPI subroutine
Applicable COBOL Statements
The CALL, CLOSE, EXIT, GO TO, IF, MOVE, OPEN, PERFORM, READ REWRITE, SET, START, and WRITE statements are used.
Building the Program
The Project Manager's Build function is used to create the executable program.
In the following screens, the user has installed the COBOL system in C:\NetCOBOL.
Your install location may be different.
The Project Manager is started.
The project file "OLSAPL.PRJ" is opened.
The project file is selected, and "Compiler options" is selected from the "Project"-"Options" menu.
The "Compiler options" dialog is displayed.
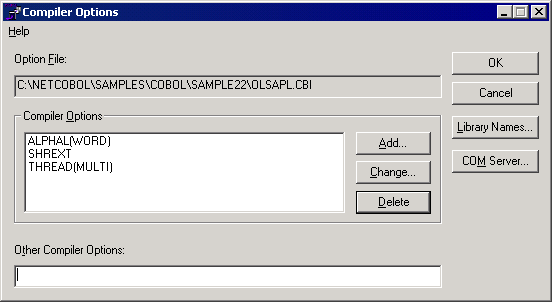
Compiler option THREAD(MULTI), SHREXT and ALPHAL(WORD) are specified.
Click the OK button.
"Build" is selected from Project Manager's "Project" menu.
Please confirm each DLL (dynamic link library) registered in the project is created.
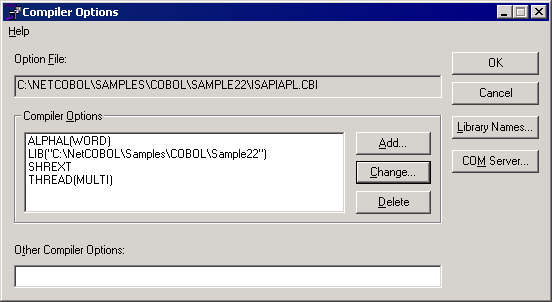
Next, The project file "ISAPIAPL.PRJ" is opened
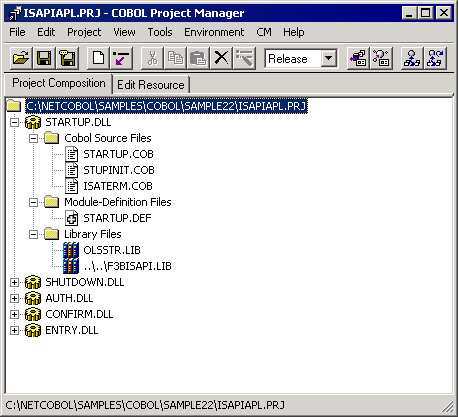
The compiler option dialog is displayed as in step 3 above. The compiler option THREAD(MULTI), SHREXT, and ALPHAL(WORD) are specified. Modify the folder name of the library file specified with the compiler option LIB. After confirmation, the OK button is clicked.
"Build" is selected from Project Manager's "Project" menu.
Please confirm each DLL (dynamic link library) registered in the project is built.
Executing the Program
It is assumed that the domain-name and virtual directory name are registered in IIS (Internet Information Server) as "user" and "sample22" respectively.
In this example uses Microsoft® Internet Explorer as the WWW browser.
Online store is started.
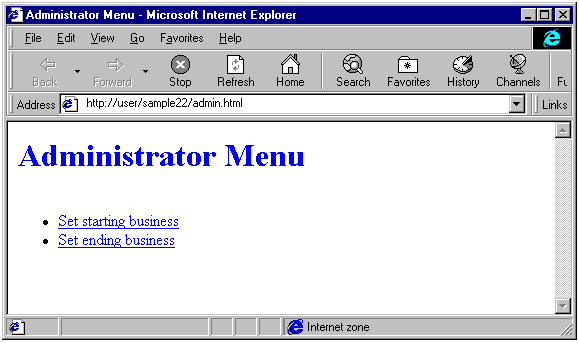
The following information is set in theURL.
http://user/sample22/admin.html
Then click "Set starting business".

When clicked, the online store is started. Please do the "Set starting business" before starting online shopping.
Online store is started.
The following information is set in URL and the "Execute" key is pushed.
http://user/sample22/startmenu.html
Because the screen of an online store is displayed, the catalog shopping is clicked.
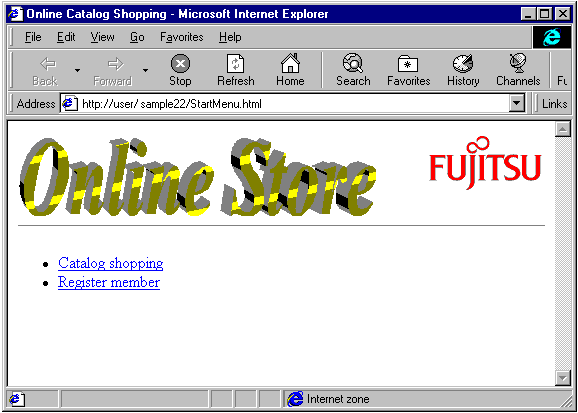
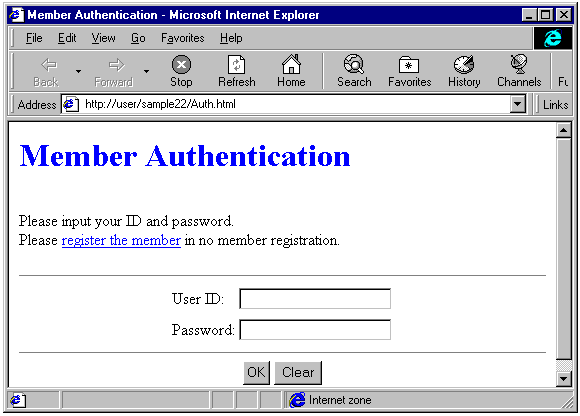
When Catalog Shopping is clicked, the member authentication screen is displayed.
After the screen is displayed, the User ID and password are input. Click the "OK" button.
Valid User ID’s are USER0001 to USER0030. The password is the same as the user ID.
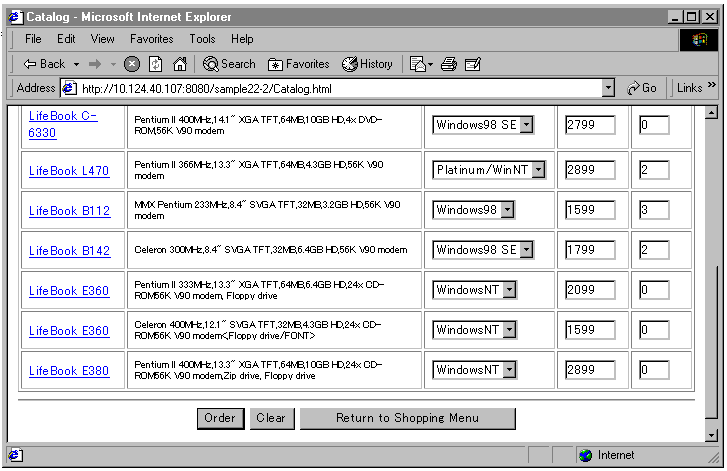
When the "OK" button is clicked, the catalog screen is displayed. The catalog screen shows you the various PC’s and their quantities available for ordering. To place an order, select one or more products and enter an order quantity, then press the “Order” button.
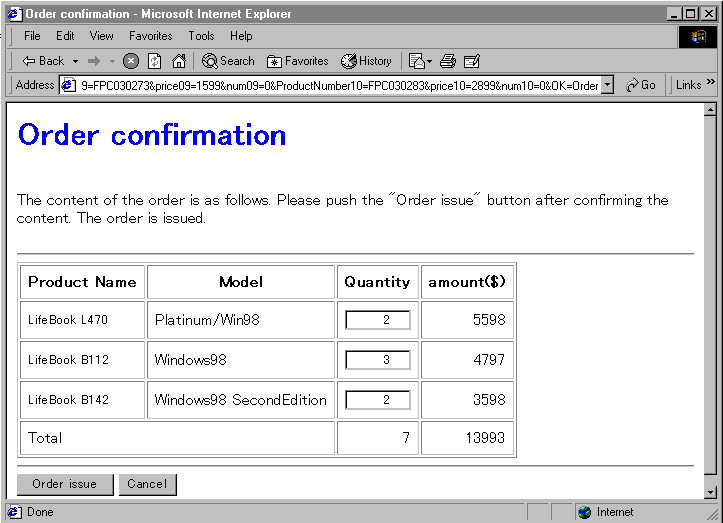
When the "Order" button is clicked, the order confirmation screen is displayed. The content of the order is confirmed and the "Order issue" button is clicked.
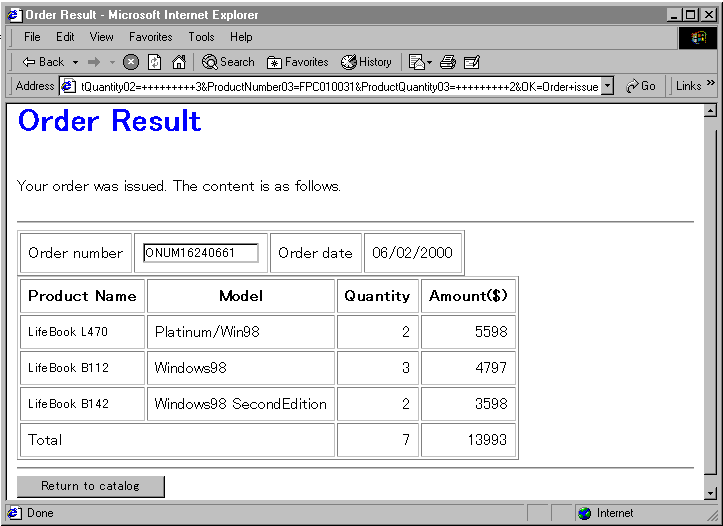
When the "Order issue" button is clicked, the order result screen is displayed.
Online shopping is terminated.
The following information is set in URL and the "Execute" key is pressed.
http://user/sample22/admin.html
Because the administrator menu screen is displayed, the "Set ending business" is clicked.
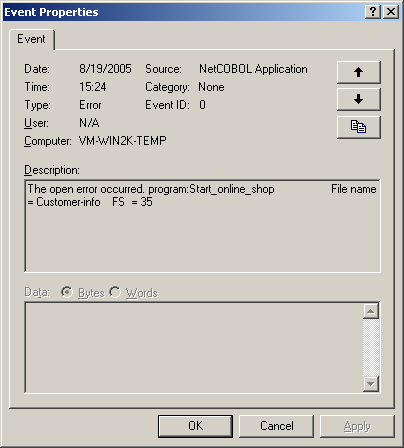
Creating an Event Log
In this exercise, detailed information of errors detected by the program is output to an event log by using the event log output subroutine. Note that the Event Viewer discussed below is only available on Windows Vista, Windows 2000, Windows Server 2003, Windows Server 2008 and Windows XP.
The log of the application is selected by starting the Event Viewer from the Administrative Tools.

Detailed information is displayed when the source selects the log of "NetCOBOL Application", and double-clicks it.