Sample 20 demonstrates a method of making a permanent object and is based on the program created in "Sample 18 Object-Persistence". In sample 18, all objects were created in memory. Therefore, the objects disappear at program termination. However, some data has to remain in the system after the program ends. An object that retains data after the program ends is called a "Permanent Object".
In the previous program, such data was stored in a file or a database. To create a permanent object one must associate the permanent object with data in file or a database. In this example, the permanent object has been achieved by associating each object with a line in a data base table.
Refer to the "NetCOBOL User's Guide" for details on Object Persistence.
The database exists on the server, and is accessed from the client side.
The database is accessed via the ODBC driver. For information on setting up and using ODBC databases, please refer to the Chapter 19, "Database (SQL)" of the "NetCOBOL User's Guide".
The following products are necessary to execute this program.
Client
ODBC driver manager
ODBC driver
Products needed for the ODBC driver
On the server
Database
Products needed for accessing the database via ODBC
Overview
The management of employee information (addition, deletion, and modification), the salary calculations, and address are printed as was done in sample 18.
In addition to the functions above, in this example the employee object and the address object stored in the database, and a permanent object function is added.
These functions have been created in the employee and the address objects by adding the following methods.
Store-Method (object method)
: The object is stored in a database.
RetAt-Method (object method)
: The object is read from the database using the employee number as the key.
RemoveAt-Method (object method)
: The object is removed from the database using the employee number as the key.
Update-Method (object method)
: The object stored in the database is updated.
Available Programs
MAIN.COB (COBOL source program)
ALLMEM.COB (COBOL source program)
MEMBER.COB (COBOL source program)
MANAGER.COB (COBOL source program)
ADDRESS.COB (COBOL source program)
SET.COB (COBOL source program)
ALLMEM_M.COB (COBOL source program)
BONU_MAN.COB (COBOL source program)
BONU_MEM.COB (COBOL source program)
MEM_SET.COB (COBOL source program)
MEM_STOR.COB (COBOL source program)
MAN_SET.COB (COBOL source program)
MAN_STOR.COB (COBOL source program)
ADDR_M.COB (COBOL source program)
SALA_MAN.COB (COBOL source program)
SALA_MEM.COB (COBOL source program)
SAMPLE20.PRJ (project file)
SAMPLE20.CBI (compilation option file)
SAMPLE20.MDB (Microsoft Access Database file)
COBOL85.CBR (initialization file for execution)
SAMPLE20.KBD (key definition file)
SAMPLE20.INF (ODBC information file)
Applicable COBOL Functions
Object oriented programming function
Remote database access (ODBC) function
Project manager function
Available Object-oriented Statements/Paragraphs/Definitions
INVOKE and SET statements
Object property
In-line invocation of a method
Repository paragraph
Class definition, object definition, factory definition, and method definition
Prerequisite to Executing the Program
ODBC is a defined interface that attempts to provide a highly generic API into any database system that provides compliant drivers. Just about every database system available today provides ODBC drivers for a variety of platforms.
In order to proceed with this exercise, you must have already installed 32-bit ODBC support on your Windows 2000, XP, Windows Server 2003, or Windows Server 2008 system, along with the Microsoft Access Driver.
Verifying Whether ODBC is Installed
Please refer to "Sample11".
Defining an ODBC Source for Your Application
The first development task that needs to be accomplished is to define an ODBC Source for the application.
An ODBC Source can be thought of as simply specifying to the ODBC manager a symbolic name that you wish to use in your application to describe an ODBC connection to a specific ODBC database driver and database.
The following figures may or may not match what you see on your particular operating system, but you should be able to perform the following tasks by using the instructions provided.
Bring up the Administrative Tools and double click on the Data Sources (ODBC) icon.
The main ODBC Data Source Administrator window is displayed.
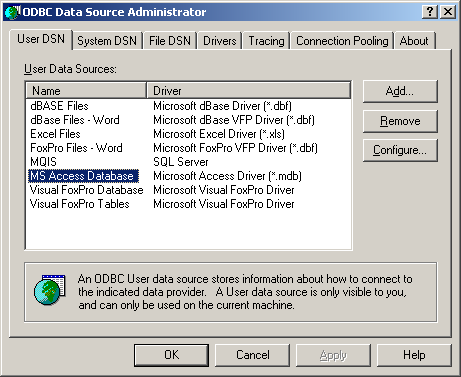
You will add a new User DSN. Select the User DSN tab, and click on the Add button.
ODBC Data Source Administrator displays the “Create New Data Source” dialog box.
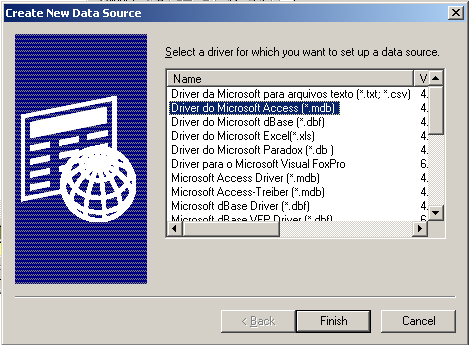
Select the Microsoft Access Driver (*.mdb) and click on the Finish button.
The ODBC Microsoft Access Setup dialog box is displayed.
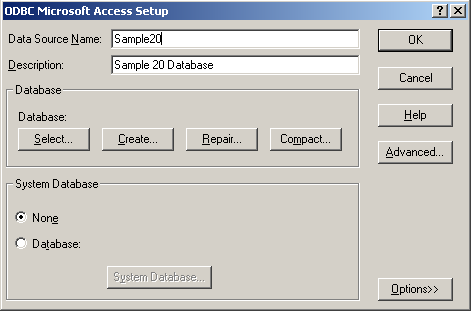
Enter Sample20 in the Data Source Name field and Sample20 Database in the Description field as shown above.
You also need to select a file (database) to bind this driver to. Click on the Select button in the ODBC Microsoft Access Setup dialog box. The Select Database dialog box is displayed. Navigate through the directories and find the "Sample20.mdb" database file:
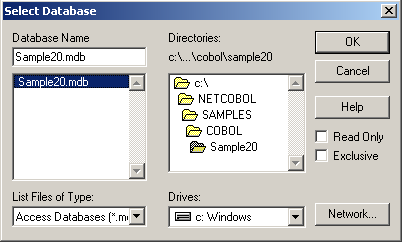
Click on the OK button. This will take you back to the ODBC Microsoft Access Setup dialog box.
Click on the OK button. This will take you back to the main ODBC Source Administrator window.
Note that "Sample20" has been added to the list in User DSN. Although you should not set any additional options for this exercise, you may wish to highlight “Sample20” and click on the Configure button.
This will give you an idea of some of the additional options that are available when developing these types of applications. Once you are back to the main ODBC Source Administrator window, click on the OK button. This will exit the ODBC configuration facility. You have now defined the new ODBC Source (Sample20) you are going to use with COBOL.
Building/Rebuilding the Program
Project manager's build function is used to create the executable program.
The project manager is started.
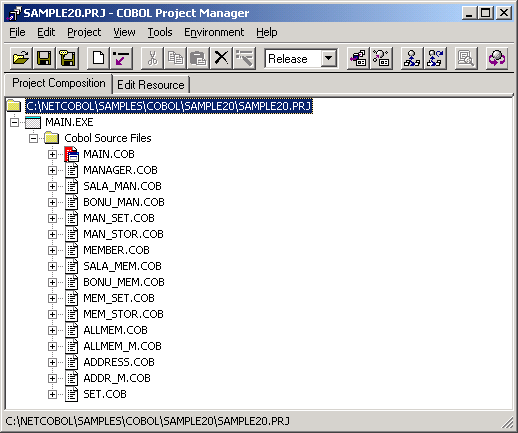
Project file "SAMPLE20.PRJ" is opened.
"Build" is selected from the "Project" menu.
Setup the Execution Environment Information
The initialization file for execution is updated with the Run-time Environment Setup Tool. The content is shown below.
The Run-time Environment Setup Tool is started.
The initialization file for execution is opened. (COBOL85.CBR)
A common tab is selected.
The ODBC information file name is specified for @ODBC_Inf. (SAMPLE20.INF)
The key definition file name is specified for @CBR_SCR_KEYDEFFILE. (SAMPLE20.KBD)
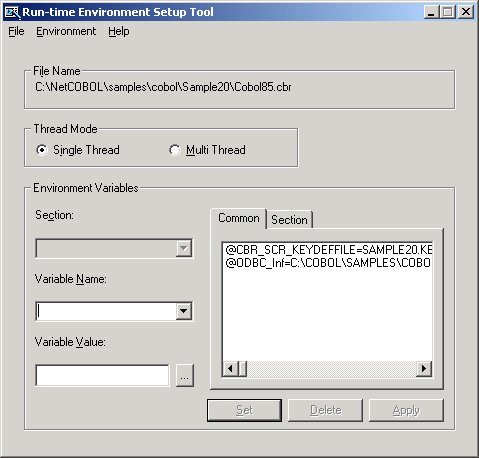
Click "Apply" button, and the content is saved in the execution initialization file.
Click "Exit" button in file menu, and the Run-time Environment Setup Tool ends.
Executing the Program
To execute the program, "Execute" is selected from the project menu.
Execution Procedure
Please refer to "Sample 18 Object Persistence" for execution procedures.
However, please note the following points.
When the name and the address are input, National characters cannot be used.
Please use upper and lower case letters or numeric characters.
An error report is generated when an error occurs when accessing the database (such as connecting or getting a record).