To install Live Help Client software using the product CD-ROM, follow the steps below:
Note
You need an administrator's permission to install Live Help software. Therefore, you must logon to the Windows(R) system as an administrator (a user who belongs to the Administrator group) to install the Live Help products.
During installation of Live Help, the screen may blackout a few seconds. This is a proper behavior that occurs when Live Help installer registers drivers for controlling screen information.
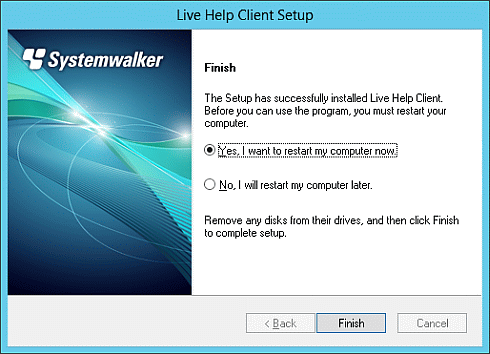
After installing Live Help Client, you must restart the computer to run it.
For the following operating systems, enable Secure Attention Sequence for the software.
Windows Vista or later
Windows Server 2008 or later
Settings
From the Start menu or Apps screen, select Run, then execute "gpedit.msc".
In the Local Group Policy Editor window, select Computer Configuration >> Administrative Templates >> Windows Components >> Windows Logon Options. Then, on the right hand side of the window, double-click
Disable or enable software Secure Attention Sequence.
In the Disable or enable software Secure Attention Sequence window, select Enabled, then select Services or Services and Ease of Access applications from the drop-down menu in the bottom left hand side of the window,
and then click OK.
In the Local Group Policy Editor window, select File >> Exit.
Insert the CD containing the Live Help Client software in the CD drive.
The Systemwalker Live Help installation program should automatically start showing the dialog box below. If not, run SWSETUP.EXE stored in the root of the CD.
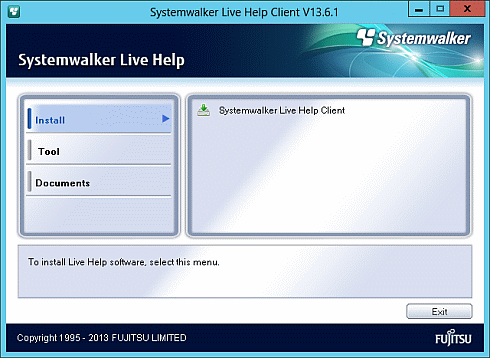
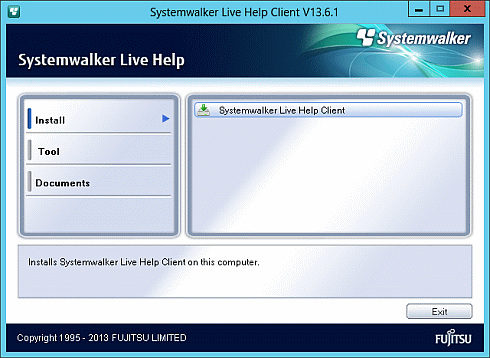
Click [Systemwalker Live Help Client] in the [Install] menu.
If a "User Account Control" (UAC) message appears, click Continue and move on to the next step.
Click Next when Welcome screen appears.
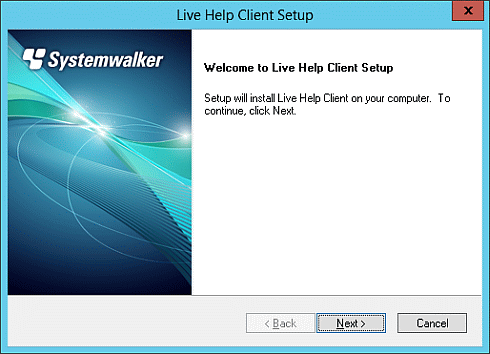
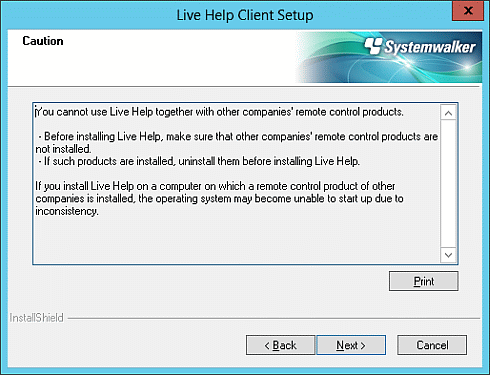
Caution screen will be displayed.
Read the contents carefully and click Next if your system has no problem.
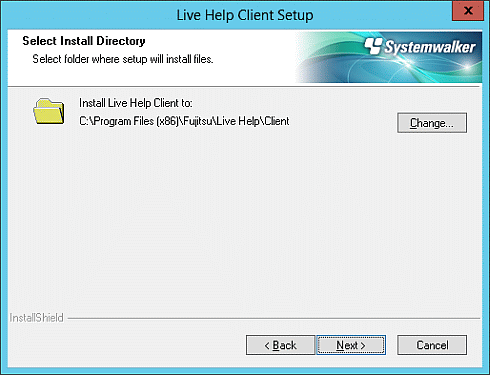
Specify a directory where the software will be stored.
The default install directory is as follows. Change if necessary.
On 32bit OS:
%ProgramFiles%\Fujitsu\Live Help\Client
On 64bit OS:
%ProgramFiles(x86)%\Fujitsu\Live Help\Client
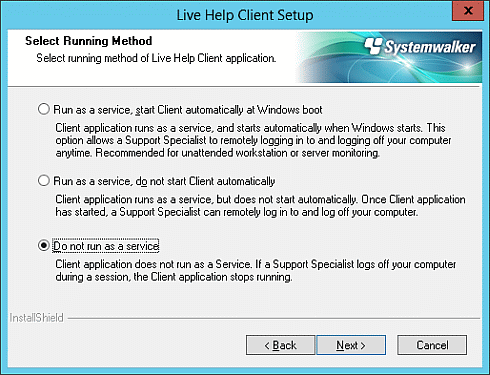
Specify the running method of Live Help Client program.
Refer to the section "Running Client as a Windows Service" in "Changing your Configuration" for details on each option in the dialog.
Information
You can also change this option after the installation is completed, by using the Client Setup program.
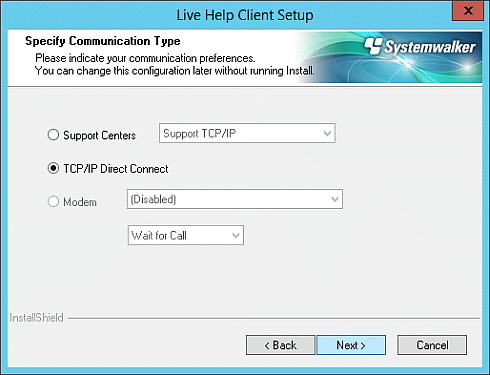
Select your preferences of communications.
When selecting a modem, choose the name of the modem and its connection method ("Wait for Call," or "Dial calling") from the pull-down box.
Refer to the section "Communications Options" in "Changing your Configuration" for details on each option in the dialog.
Note
You cannot use a Modem for communication when you run the Live Help Client program as a service.
Information
You can also change this option after the installation is completed, by using the Client Setup program.
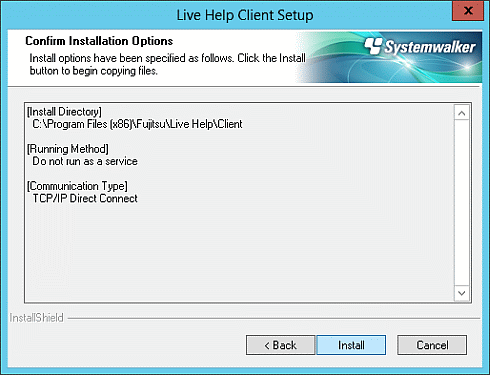
Confirm installation options.
If you are satisfied with the settings, click Install to begin copying files.
At the end of the installation process, the system files (the Windows(R) registry) will be modified and shortcuts for Live Help Client and Client Setup will be added to the Live Help folder in the Start menu.
Select a preferred option and click Finish to exit the Setup program when [Finish] screen appears.