It is possible to monitor job nets on multiple servers using the Job Nets Management window.
The following describes the Job Nets Management window.
The Job Nets Management window
It is possible to specify filtering conditions for job nets on multiple servers and monitor related job nets in a batch.
This window also lets you operate job nets on multiple servers in a batch. For details on batch operation, see "7.3 Batch Process of Job Nets Management on Multiple Servers".
Procedure
Displaying the Filtering Conditions for Job Nets Management window
In the Multi-server Monitoring window of the multi-server monitoring client, select the Job Nets Management from the Tools menu. Specify the conditions to filter job nets to be displayed in the Job Nets Management window.
Figure 6.17 Filtering Conditions for Job Nets Management window
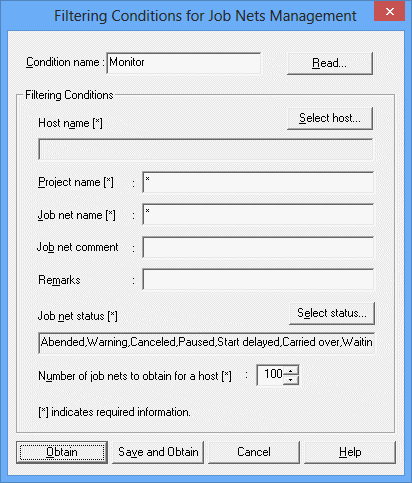
Specify the title of a character string which is used to save the filtering conditions. Specify with a string of 64 bytes or less.
Displays the Filtering Conditions window.
Displays the Select Host window.
Displays the condition specified in the Select Host window.
Specifies a project name for filtering condition.
Specifies a job net name for filtering condition.
Specifies a job net comment for filtering condition.
Specifies a memo for filtering condition.
Displays the Select Status window.
Displays the filtering conditions specified in the Select Status window.
Specifies the number of job nets obtained per host.
Obtains the list of job nets with the specified conditions.
Obtains the list of job nets after saving the specified conditions.
Reading the filtering conditions
To specify an already-saved filtering condition, click the Read button. When the Filtering Conditions window appears, specify the desired filtering condition and click OK.
Figure 6.18 Filtering Conditions window
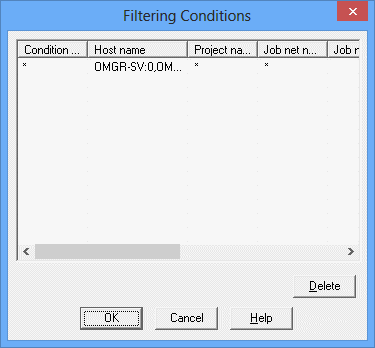
Displays the list of filtering conditions that have been saved.
Displays the titles of filtering conditions that have been saved.
The host name to be filtered.
The project name to be filtered.
The job net name to be filtered.
The job net comment to be filtered.
The memo to be filtered.
The job net status to be filtered.
The number of job nets to be obtained per host.
Setting the server to be monitored
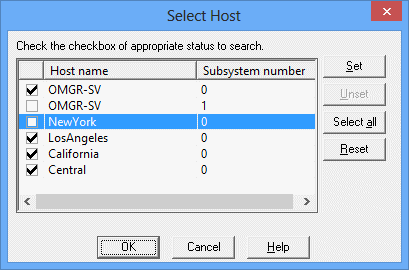
When you click the Select Host button, the Select Host window appears. Specify the server to be monitored in the Select Host window.
Figure 6.19 Select Host window
Filtering the job net status
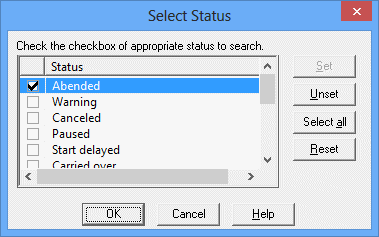
Clicking the Select Status button displays the Select Status window. Then specify the filtering conditions to filter the job nets to be displayed in the Job Nets Management window.
Figure 6.20 Select Status window
Displaying the Job Nets Management window
Clicking OK in the Filtering Conditions for Job Nets Management window displays the job nets filtered with the specified conditions in the Job Nets Management window.
Figure 6.21 Job Nets Management window
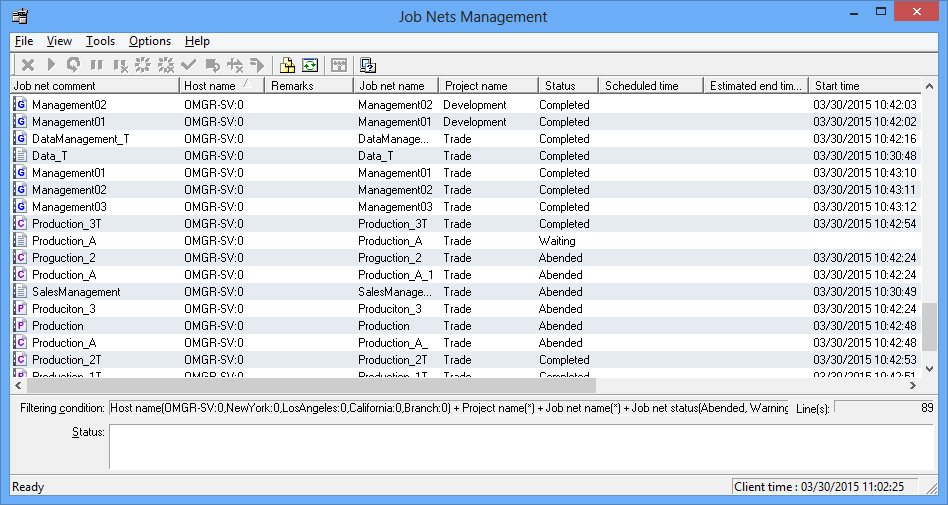
Lists the information related to the job net. Note that job net information relating to projects that the user is not permitted to access will not be retrieved or displayed.
The Job net comment.
The name of the server to be monitored.
The job net memo.
The Job net name.
The name of the project where the job net is registered.
The current job net status.
The next scheduled startup date and time.
The estimated schedule end date and time. If the execution attribute is "Interstage," it is indicated as the estimated stop time.
The date and time on which the previous execution has been started.
The date and time on which the previous execution has been completed.
The execution condition of the job net.
Whether to wait for a message event occurrence as the execution condition.
The group comment where the job net is registered. For child job nets or linked job nets, the parent job net comment will be displayed.
Displays the filtering conditions specified in the Filtering Conditions for Job Nets Management window.
Displays status messages in such cases as an error while obtaining information, or the obtainable number exceeded.
Displays the number of lines existing in the list.
Note
The number of job nets that can be obtained for each server to be monitored in the Job Nets Management window is the number specified as Number of job nets to obtain for a host in the Filtering Conditions for Job Nets Management window. The job net information exceeding it will not be displayed.
If the job net information cannot be obtained in the Job Nets Management window even after three minutes from the start of communication with the server, a time out will occur.
A general user with registration and reference rights cannot manipulate job nets from the Job Nets Management window.