Startup days for all registered job nets can be confirmed in a list for each Project. The Startup days can also be customized so the system is not overloaded on any specific day.
This section describes how to customize the registered Startup days.
Procedure
Displaying the Application Plan window:
Select the desired Project from the Job Selection window of the Systemwalker Operation Manager window. Then, select Application Plan from the Tools menu. The Application Plan window will appear.
The Application Plan window shows information about job net startup days for three years (this current year, the next year, and the year following).
Changing the startup days
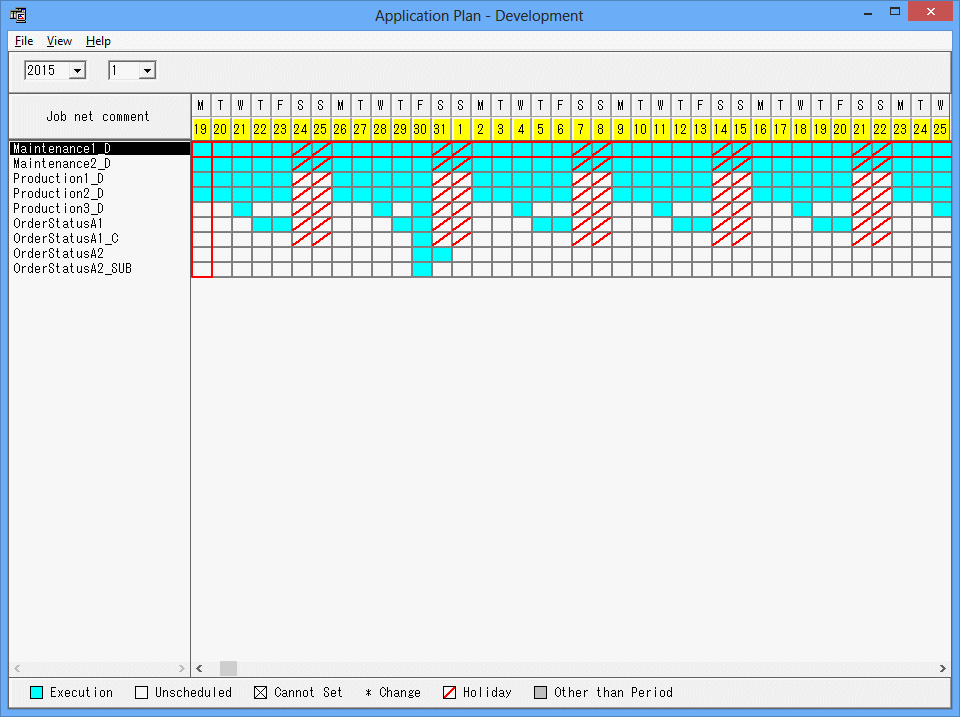
Startup days (shown in blue) and no startup days (shown in white) are set by clicking the date of desired job net in the Application Plan window. Clicking a startup days changes it to a non startup days, and clicking a non startup days changes it to a startup days.
Figure 4.27 Application Plan window

Specifies the year and month for which the operation schedule is to be displayed.
Click a day in the desired job net to set it as the job net startup days.
Blue:
Indicates the startup days. The job net Startup days.
White:
Indicates the no startup days. This is not the job net startup days.
[X]:
Indicates that setup is not allowed. This is the date you cannot set as it is in the past.
[*]:
Indicates a changed date. This is the date you have changed to either a startup or no startup days.
Red:
Indicates a holiday. These are holidays that have been set for each job net.
Gray:
Indicates an unavailable period. These are days outside the operation period.
The colors of days are the same as those used in the power control pattern of SYSTEM_CALENDAR.
Note
The display of linked job nets and master linked job nets
Master linked job nets are displayed, but linked job nets are not displayed in this window. To change the startup days for a linked job net, change the startup days for the master linked job net that it refers to.