The installation must be performed by a user with administrator privileges (a user ID that belongs to the Administrators group).
The installation procedure is described below.
1. Stop applications and the client program
If the installation method is one of the following, the applications and the program must be stopped:
Reinstallation
Upgrade installation
Before starting the installation, stop the following:
Applications that use the product
pgAdmin
Instance
In the [Monitor] menu window, click [stop].
Execute the net command or sc command of the operating system.
> net stop windowsServiceName> sc stop windowsServiceNameWeb server feature of WebAdmin
If you are using WebAdmin, stop WebAdmin.
Refer to "E.1.3 Stopping the Web Server Feature of WebAdmin" for details.
Mirroring Controller
Execute the mc_ctl command with the stop mode option specified and stop the Mirroring Controller.
> mc_ctl stop -M D\mcdir\inst1
2. Inserting the DVD
Insert the Symfoware Server DVD into the drive.
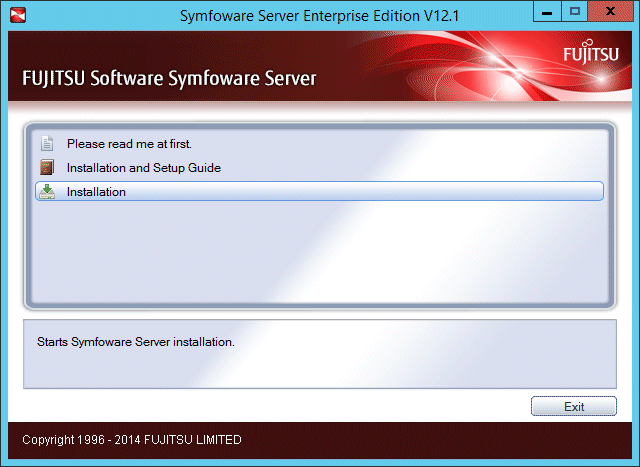
3. Run the installation
The installation menu will be displayed. Click [Install].
Note
If the Autorun feature of Windows is disabled, or if the operating system is a remote desktop service (terminal service), the installation program is not automatically started. Execute the following file using [Run] or Windows Explorer.
Z:\autorun.exe
For Z, specify the drive name of the drive where the DVD has been inserted.
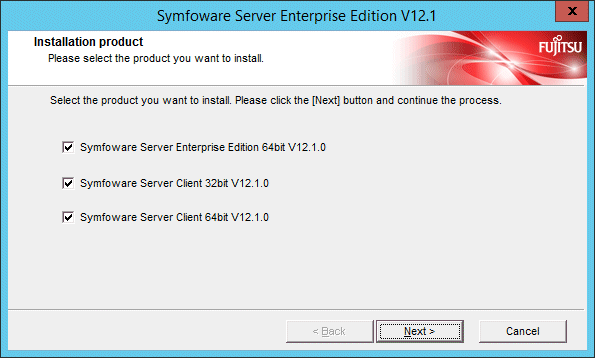
4. Select the product to install
The [Installation Product] window will be displayed.
Select the product to install, and then click [Next].
If the selected product can only be reinstalled, refer to "9. Check the settings".
5. Checking the installation content
The [Confirm Setup Information] window will be displayed.
If there are no issues with the settings content, click [Next].
The installation process will then start. Proceed to "10. Completing installation".
To modify the settings content, select [Modify], and then click [Next].
Note
If using WebAdmin for operation, make a note of the port number of the Web server displayed in the settings, for use in the Windows firewall settings.
6. Enter the installation destination
If the installation method is one of the following, the [Select Destination Path] window is displayed for each product:
New installation
Multi-version installation
Enter the installation destination, and then click [Next].
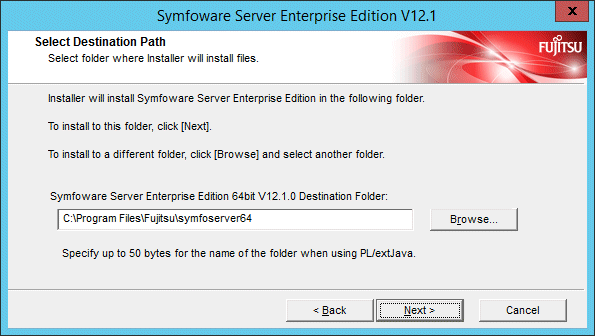
Note
It is necessary to specify a local disk as the installation destination of Symfoware Server.
If using PL/extJava, specify the directory defined in [Symfoware Server Destination Folder] using up to 50 bytes.
7. Select the optional product to be installed
If an optional product can be installed, the [Select Components to Install] window is displayed.
Select the optional product to be installed, and then click [Next].
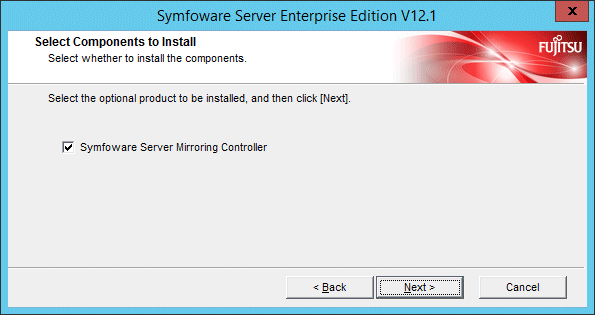
Note
A licensed product must be purchased if installing an optional product.
8. Setting up WebAdmin
The [The Setup of WebAdmin] window is displayed. To perform setup, confirm that the port numbers are unused port numbers in the following ranges, and then click [Next]:
Windows Server(R) 2003 or Windows Server(R) 2003 R2: 5001 to 49151
Windows Server(R) 2008, Windows Server(R) 2008 R2, Windows Server(R) 2012 or Windows Server(R) 2012 R2: 1024 to 49151
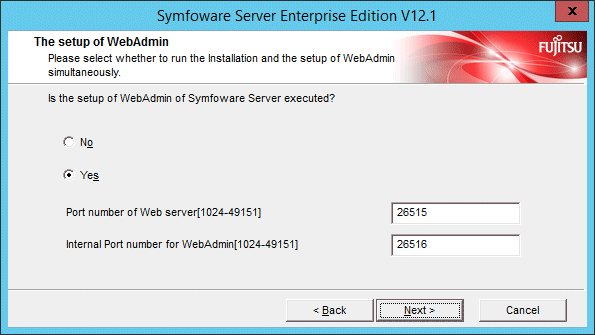
Note
Make a note of the Web server port number for use in the Windows firewall settings.
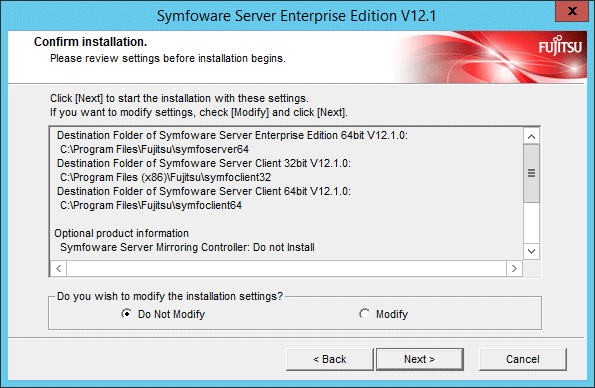
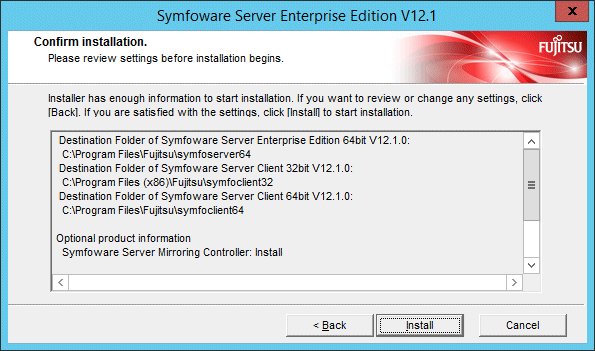
9. Check the settings
The [Confirm installation] window will be displayed.
If there are no issues with the settings content, click [Install].
To modify the settings content again, click [Back].
10. Completing installation
The completion window is displayed. Click [Finish].
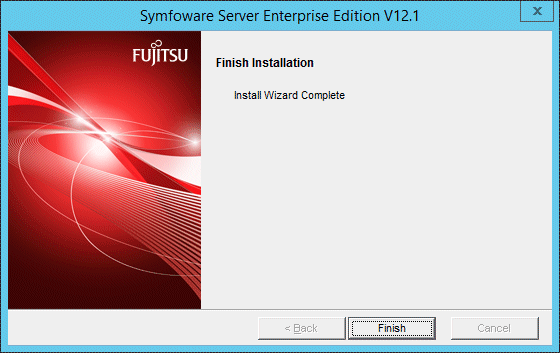
Installation is successful if the following has been added to [All Programs] or [All apps] in Windows when you finish the installation:
Symfoware Server Enterprise Edition (Open Interface) (64-bit) V12.1.0