This section explains the procedure for customizing email send settings. It is necessary to customize email send settings. Customize threshold values and monitored pools as required.
Information
Immediately after dashboard installation, the settings specify that email is not sent. Customize email send settings to send notifications via email. Email send settings must be set in order to send alert information via email. Refer to "18.1.7 Settings for Email Sent from the Dashboard" for information on email setting for mail server.
Open "Alerts and Action" in the "Definition" view definition tree in the dashboard development environment.
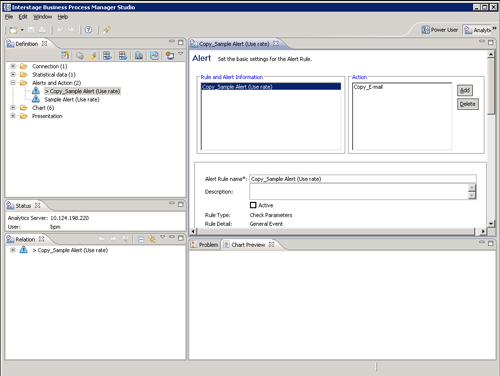
From the displayed list of alert definitions, right-click "Sample Alert (Use rate)", and then select "Copy".
Double-click the copied "Copy_Sample Alert (Use rate)" to open the definition.
Change the alert rule name from "Copy_Sample Alert (Use rate)" to a suitable name.
Set the "Active" checkbox below the alert rule name to ON.
Customize threshold values as required. Refer to "E.2.2 Customizing Threshold Values" for information on changing threshold values.
Customize monitored Pools as required. Refer to "E.2.3 Customizing Monitored Pools" for information on changing monitored Pools.
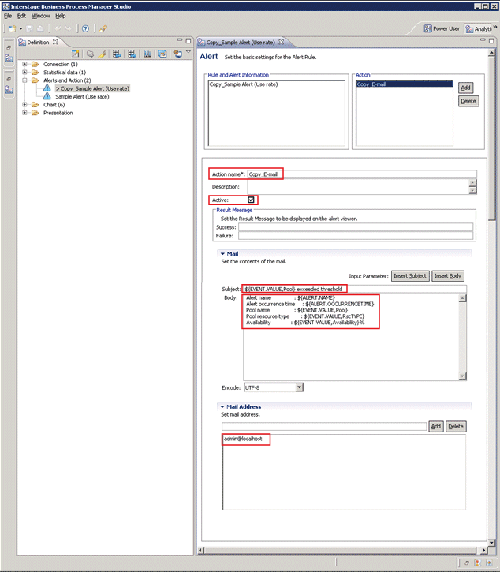
Select "Copy Email" in Action at the upper-right of the editor view.
At Email address, specify the email address of the alert email send destination. Delete the email address "admin@localhost" specified as the default.
An alert email is sent as Bcc (Blind Carbon Copy), so the addresses of other addressees will not be seen by the recipient. Depending on the settings of the mail server, the "to address" (the recipient) may also be shown as "undisclosed-recipients:;".
Modify the following items, as required:
Action: Change from "Copy_Email" to a suitable name.
Subject: "${EVENT.VALUE,Pool} exceeded threshold" as default.
example: /VMHostPool exceeded threshold
Body: the following items can be as default:
Alert name: ${ALERT.NAME}
Alert occurrence time: ${ALERT.OCCURRENCETIME}
Pool name: ${EVENT.VALUE,Pool}
Pool resource type: ${EVENT.VALUE,RscTYPE}
Availability: ${EVENT.VALUE,Availability}%
The alert parameter to be used in Subject and Body is as follows:
Variable | Description | Example |
|---|---|---|
${ALERT.NAME} | Alert Rule name | Alert (Use rate) CPU |
${ALERT.OCCURRENCETIME} | time when alerts occurred | October 14, 2011 13:05:45 |
${EVENT.VALUE,Pool} | global pool name | /VMHostPool |
${EVENT.VALUE,RscTYPE} | resource type | CPU |
${EVENT.VALUE,Availability} | global pool use rate | 35.5% |
Click the Save icon.
Click the Upload to Server icon from the tool bar on the Definition view.
Do not select the After uploading the Analytics Definition, replicate result in the system checkbox but click the OK button.
Click OK.
Restart the Analytics server. Refer to "E.6.4 Restarting the Analytics Serverr" for details.
The initial password must be changed. Use the operation management console of Interstage Business Process Manager Analytics to change the initial password. Refer to "E.6.2 Changing the Password of the Administrator" for details.
Do not perform any operations from the operation management console other than setting passwords and the procedure described above for restarting the Interstage Business Process Manager Analytics server.