Add/cancel the registered License name or software of defined License.
The procedure is as follows.
Log in to the Main Menu, click “License Management”
→ ”License Management” window will be displayed.
Click “License Definition”.
→ The following window will be displayed.
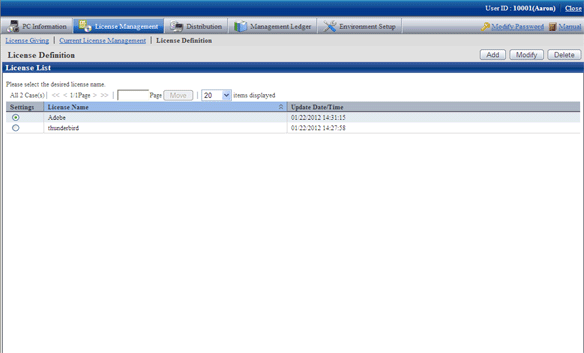
Select the License name to be changed from the “License List”, click the “Modify” button.
→ The following window will be displayed.
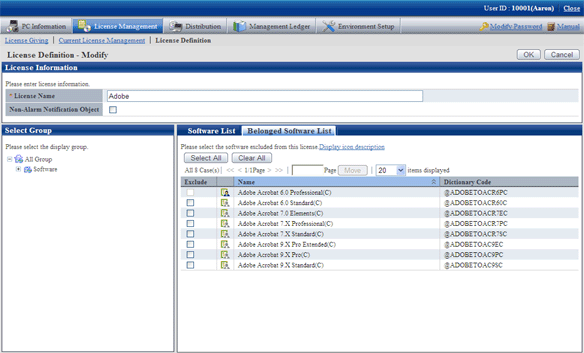
Enter the License information to be modified.
Item to be changed | Input character |
|---|---|
License Name (required) | Enter the grouped License name. Enter characters within 30 multi-byte and 60 single-byte. Specified characters can be alphanumeric characters and the following single-byte characters. (”-””@””.””(“”)””[””]””{“”}””<“”>“”:””;”) |
”Non-Alarm Notification Object” | When grouped software is not to be used as Non-Alarm notification target of License violation, select “Non-Alarm Notification Target”. |
Remarks. Alarm notification of License violation is the function of notifying when software not allocated with License is in use or number of License is exceeded. For details, please refer to “Alarm Notification” in the “Systemwalker Desktop Patrol Installation Guide”.
Perform the following operations to delete software from License.
Click the “Belonged Software List” tab, select the software to be deleted from License.
But software allocated with License cannot be deleted. Please delete after removing the allocation of License. Please refer to “5.3.2 License Giving ” for removal of License Giving.
Perform the following operations to add software to License.
Click the “Software List” tab, select software supplier from the tree in the field on the left.
→ Software provided by the selected supplier appears in the field on the right.
Select the software to be added to License.
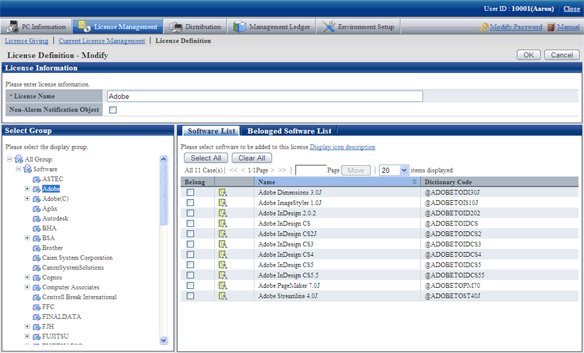
Click “Ok” button.
→ The defined License will be modified.
Repeat the steps starting from “3.” after confirmation of software with changed License, click the “Belonged Software List” tab for confirmation.