To manage and operate License, It is necessary to allocate License registered in “5.3.1.1 Register Current License Information”.
This chapter describes how to allocate License and cancel the unwanted License.
The procedure is as follows.
Log in to the Main Menu, click “License Management”.
→The “License management” window will be displayed.
Click the “License Giving” button.
→The following window will be displayed.

Click the “Settings” button.
→The following window will be displayed.
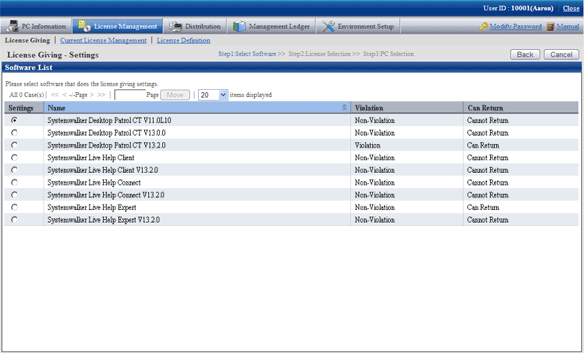
Select the radio button of software name to be allocated from the software list, and click the “Next” button.
→ The License List will be displayed.

The upstream purchasing section to which the user belongs to will be displayed when logging in with the section management account.
Select the radio button of License name to be allocated, click “Next” button.
→The following window will be displayed.
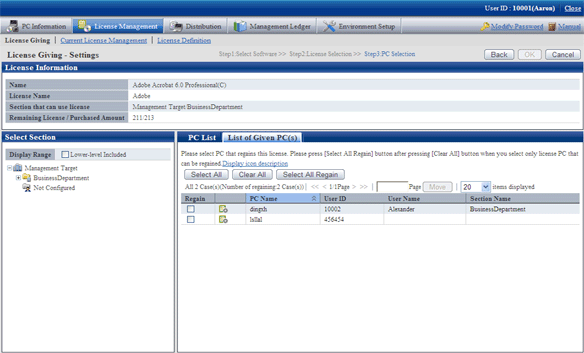
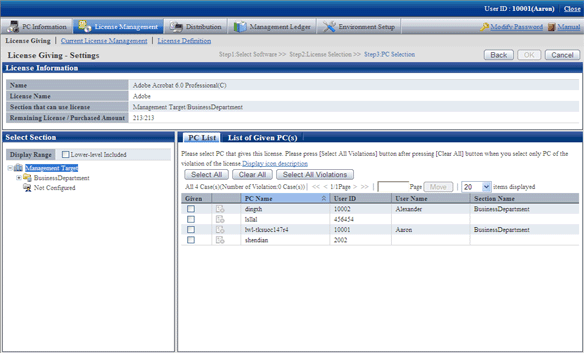
Select the section as object for allocation from the section tree in the field on the left.
→ PCs under the selected section will be displayed in the field on the right.
PCs displayed in the section tree are all the ones belonging to the purchasing section specified in step “5.”.
Only all the PCs of the section to which the login user belongs will be displayed even it is the upstream purchasing section specified in step “5.” when logging in with the section management account.
Select the check box of PC to be allocated with License from the PC list, click the “OK’ button.
When the License violation PC is to be selected, click the “Select All Violation” button. All the check boxes of License violation PC will be selected.
To return License, click the “List of Given PC” tab, and click the “Select All to Return” button. The check box of all PCs with License given but not imported will be selected.