Install the HBA address rename setup service using the following procedure:
The installation time for this software is around one minute.
Before installing Resource Coordinator VE, check that the preparations given in "2.3.1 Preparations" have been performed.
Log on to Windows as the administrator.
Log on to the system on which the HBA address rename setup service is to be installed. Log on as a user belonging to the local Administrators group.
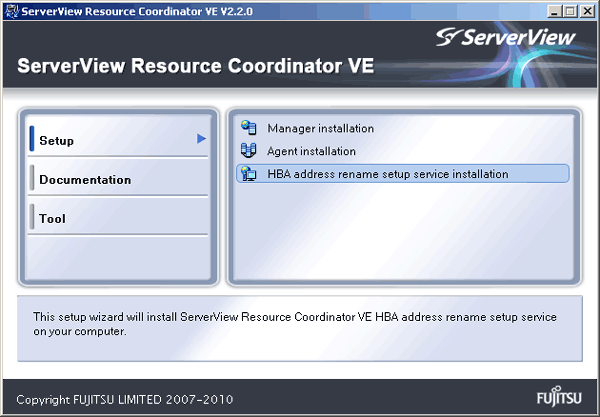
Boot the installer from the following window displayed when the Resource Coordinator VE CD-ROM is set.
Click "HBA address rename setup service installation" on the window.
Figure 2.3 Selection Window

Information
If the above window does not open, execute "RcSetup.exe" from the CD-ROM drive.
The Resource Coordinator VE setup window will be displayed.
Check the contents of the license agreement window, etc. and then click <Yes>.
The [Select Installation Folder] window will be displayed.
Click <Next>> to use the default Installation Folder and Image Folder. To change folders, click <Browse>, change folders, and click <Next>>.
Note
When changing the folders, be careful about the following points.
Do not specify the installation folder of the system (such as C:\).
Enter the location using 100 characters or less. Do not use double-byte characters or the following symbols in the folder name.
""", "|", ":", "*", "?", "/", ".", "<", ">", ",", "%", "&", "^", "=", "!", ";", "#", "'", "+", "[", "]", "{", "}"
When installing Resource Coordinator VE to Windows 2003 x64 Edition or Windows 2008 x64 Edition, the "%SystemRoot%\System32\" folder and the "Program Files" folder cannot be specified.
The [Start Copying Files] window will be displayed.
Check that there are no mistakes in the contents displayed on the window, and then click <Install>>.
Copying of files will start.
To change the contents, click <<Back>.
The Resource Coordinator VE setup completion window will be displayed.
When using the HBA address rename setup service immediately after configuration, check the "Yes, launch it now." checkbox.
Click <Finish> and close the window. If the checkbox was checked, the HBA address rename setup service will be started after the window is closed.
If the checkbox was not checked, start the HBA address rename setup service referring to the procedure in "6.2.2.1 Settings for the HBA address rename setup service" of the "ServerView Resource Coordinator VE Setup Guide".
Note
Corrective Action for Installation Failure
When installation is stopped due to errors (system errors, processing errors such as system failure, or errors due to execution conditions) or cancellation by users, remove the causes of any problems, and then take corrective action as follows.
Open "Add or Remove Programs" from the Windows Control Panel, and if "ServerView Resource Coordinator VE HBA address rename setup service" is displayed, uninstall it and then install the service again.
For uninstallation, refer to "3.3 HBA address rename setup service Uninstallation".
Information
For Windows Server 2008 or Windows Vista, select "Programs and Features" from the Windows Control Panel.
If "ServerView Resource Coordinator VE HBA address rename setup service" is not displayed, install it again.