The Clone type Advanced Copy includes the following three types.
Clone(One Time)[OPC]
Execute OPC (One Point Copy) of the ETERNUS Disk storage system.
All the volume contents at the point of time that Advanced Copy was executed are copied onto its copy destination volume.
When the OPC command is invoked, ETERNUS creates a point in time snapshot of the source volume and then immediately returns a notification to the operator that the backup is complete, before any physical copying has even occurred. This allows for access to be returned to the transaction or source volume with little or no interruption while the copy is performed as a background process at the hardware level in the ETERNUS.
Clone(One Time)[OPC] is highly effective for the following applications:
Generation backups where near continuous uptime is critical such as internet business applications
Clone(One Time)[OPC] is the primary method for restoration from a backup volume irrespective of the backup copy method thus minimizing resultant downtime
Where minimizing server I/O load is critical to overall business application performance.
The following diagram represents the process used in a Clone(One Time)[OPC].
Figure 6.4 Clone(One Time)[OPC]
.gif)
Clone(Recurring)[Quick OPC]
Execute QuickOPC of the ETERNUS Disk storage system.
When the QuickOPC command is invoked, it will determine if an initial copy exists, then will copy only updated blocks of data that have been tracked since the initial copy was created to the backup volume for that specific QuickOPC session.
If QuickOPC detects that an initial copy does not exist, it will create the initial copy using OPC. The differential copy method used in QuickOPC significantly reduces the time required for physical data copying in order to create a Point in Time snapshot whilst minimizing the I/O load on the storage system host server.
Clone(Recurring)[Quick OPC] is highly effective where:
Backup to disk where uptime is critical
Creation of frequent restore points or generation backups
The following diagram represents the differential copy process used in a Clone(Recurring)[QuickOPC] Copy after an initial copy has been created.
Figure 6.5 Clone(Recurring)[Quick OPC]
.gif)
Clone(Split mirror)[EC]
Execute EC (Equivalent Copy) of the ETERNUS Disk storage system.
The Equivalent Copy feature invokes a process of synchronization between source and destination volumes to create a synchronized copy of the source volume. The purpose of the synchronization is to reach and maintain a state of equivalence with the source volume in order to create a temporary copy or archival backup.
The source volume remains available and accessible as there is no need to stop or suspend access to the source volume while the copy is built using the synchronization process.
When a state of equivalence with the source volume has been attained, the destination volume continues to be maintained as an image of the source volume.
At any subsequent point while the source volume and the destination copy are in this state of equivalence, the destination copy can be split from the source, thus creating a backup with history or a replica copy as at that point in time.
Clone(Split mirror)[EC] is highly effective for:
Making backups much more quickly than with conventional backup processes, because backup data can be collected in parallel with ordinary transactions.
Reducing processing time and costs by means of distributed processing using copy data.
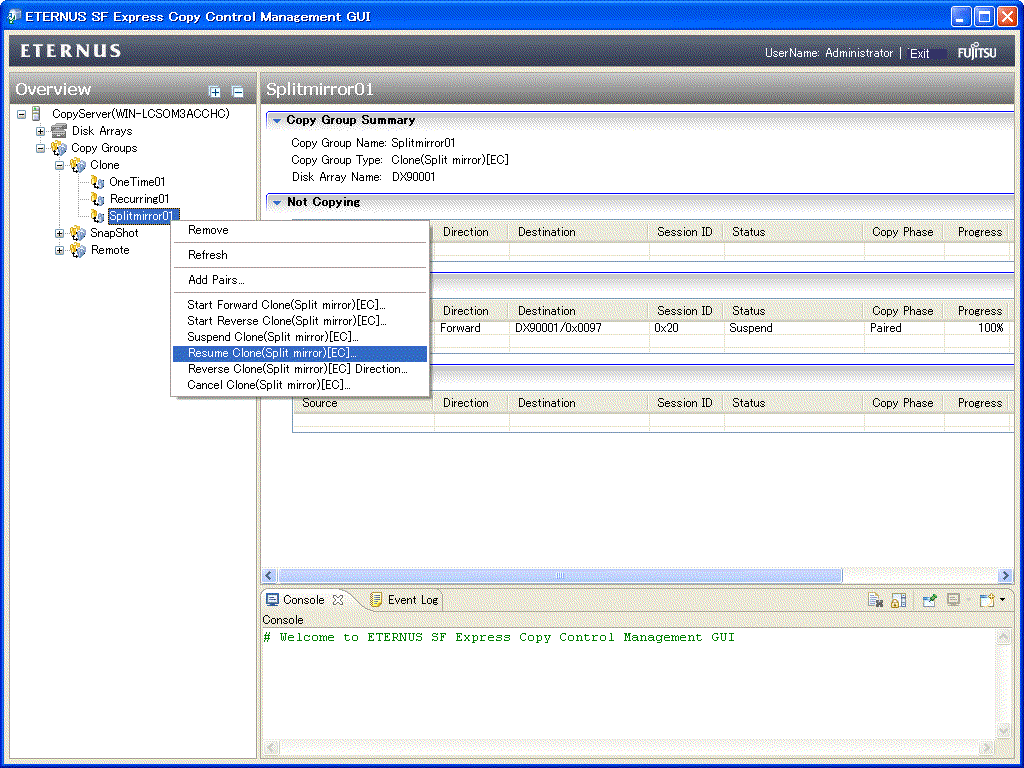
Figure 6.6 Clone(Split mirror)[EC]
.gif)
Take the following procedure to execute Clone type Advanced Copy.
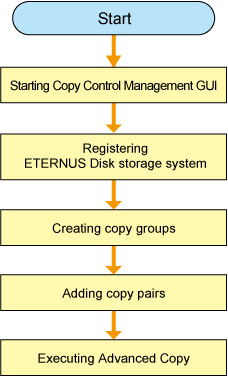
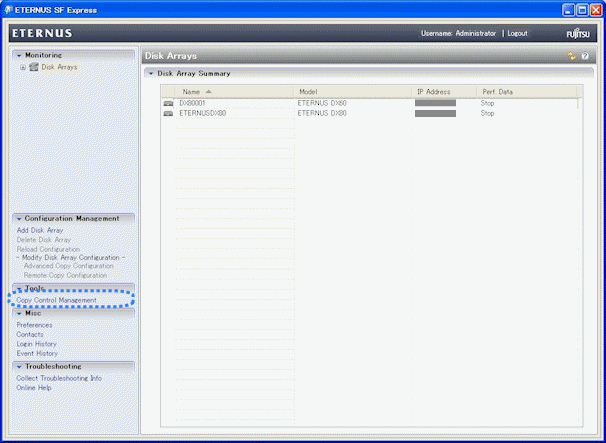
Start the Copy Control Management GUI from Express Clinet.
Click [Copy Control Management] in [Tools] to launch Copy Control Management GUI.
Register an ETERNUS Disk storage system with Express Manager as the devices to be used for copies.
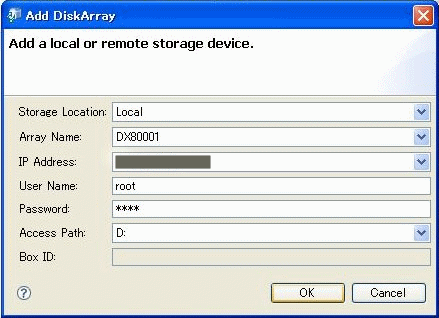
Click [Add disk Array] in [Disk Arrays] to register an ETERNUS Disk storage system.
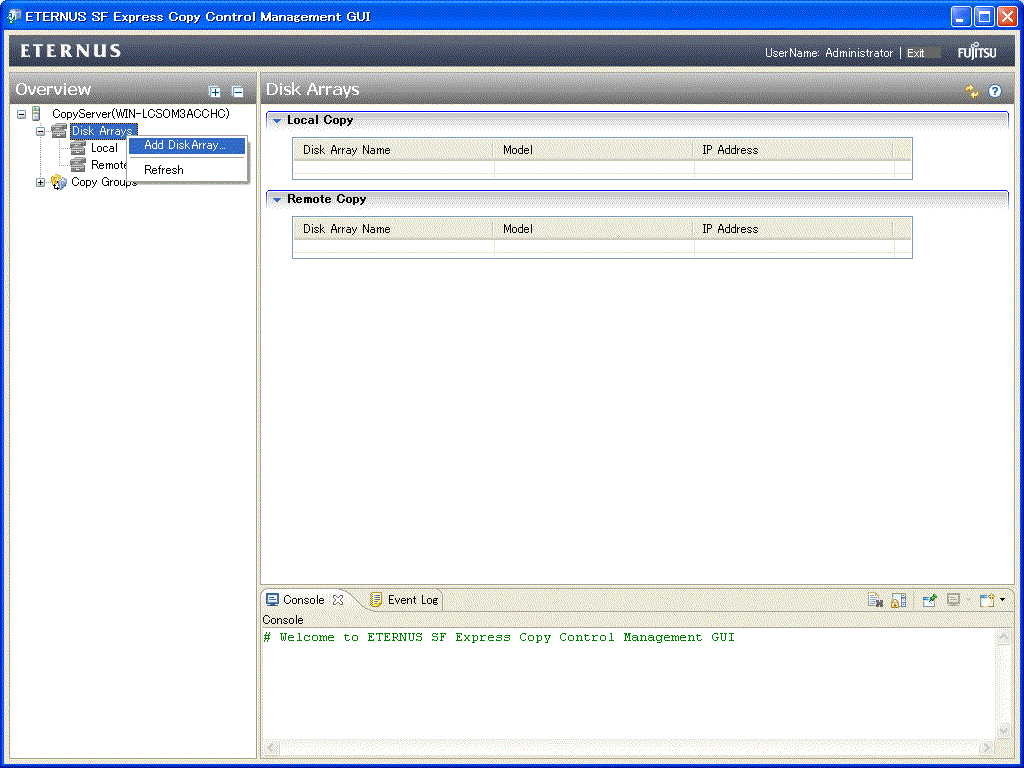
The [Add Disk Array] menu is shown.
Specify the following information.
Storage Location
Array Name
IP Address
User Name
Password
Access Path
A copy group is a group of copy pairs, consisting of a copy source logical volume and a copy destination logical volume.
When creating copy groups, specify which type of Advanced Copy and which ETERNUS Disk storage system to use.
Click [Create] in [Copy Groups] to create a copy group.
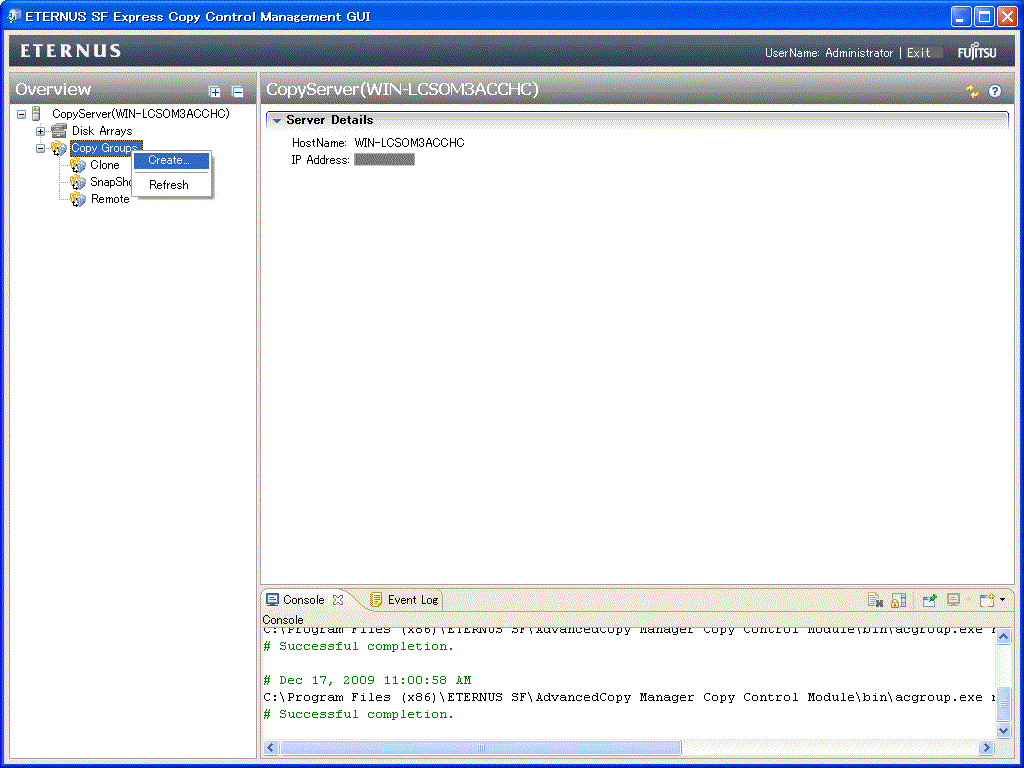
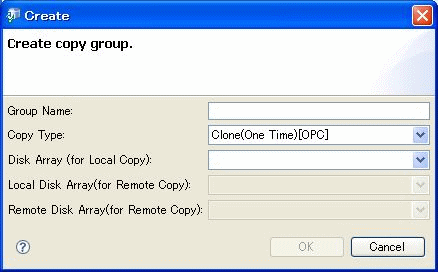
The [Create] menu is shown.
Specify the following information.
Group Name
Copy Type
Disk Array (for Local copy)
Point
Group Name must be up to 64 alphanumeric characters, hyphens (-), underscores (_), hashes (#) or periods (.). The first character must be an alphanumeric character.
Add copy pairs to the copy group that have been created.
Copy pairs are strings that define copy source and destination logical volumes.
Click [Add pairs] in the Copy Group to add copy pairs.

The [Add Copy Pair] menu is shown.
Select the following information.
Copy Source Volume
Copy Destination Volume

Execute Clone(One Time)[OPC] type Advanced Copy.
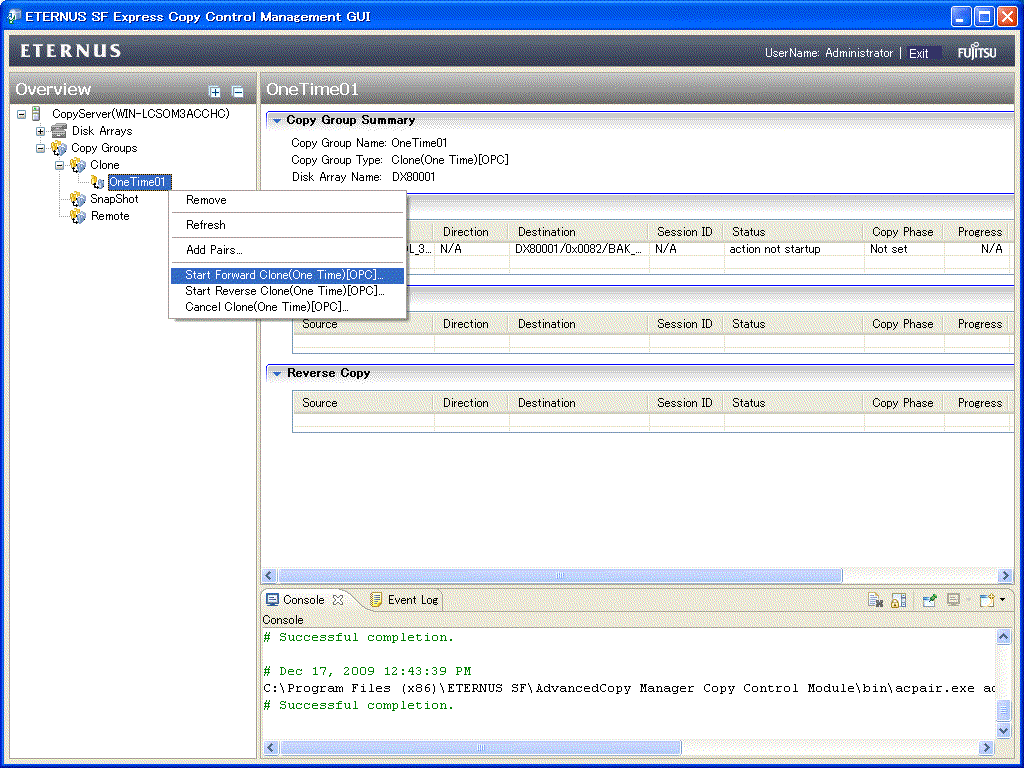
Click [Start Forward Clone(One Time)[OPC]] in the Copy Group to start Clone (One Time) [OPC]. However, if you want to reverse the copied data, click [Start Reverse Clone(One Time)[OPC]].
Execute Clone(Recurring)[QuickOPC] type Advanced Copy.
The Clone(Recurring)[QuickOPC] type operating procedure is as follows.
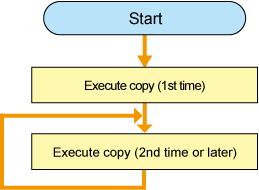
Execute copy (1st time).
Click [Start Forward Clone(Recurring)[QuickOPC]] in the Copy Group to start Clone (Recurring) [QuickOPC]. However, if you want to reverse the copied data, click [Start Reverse Clone(Recurring)[QuickOPC]].
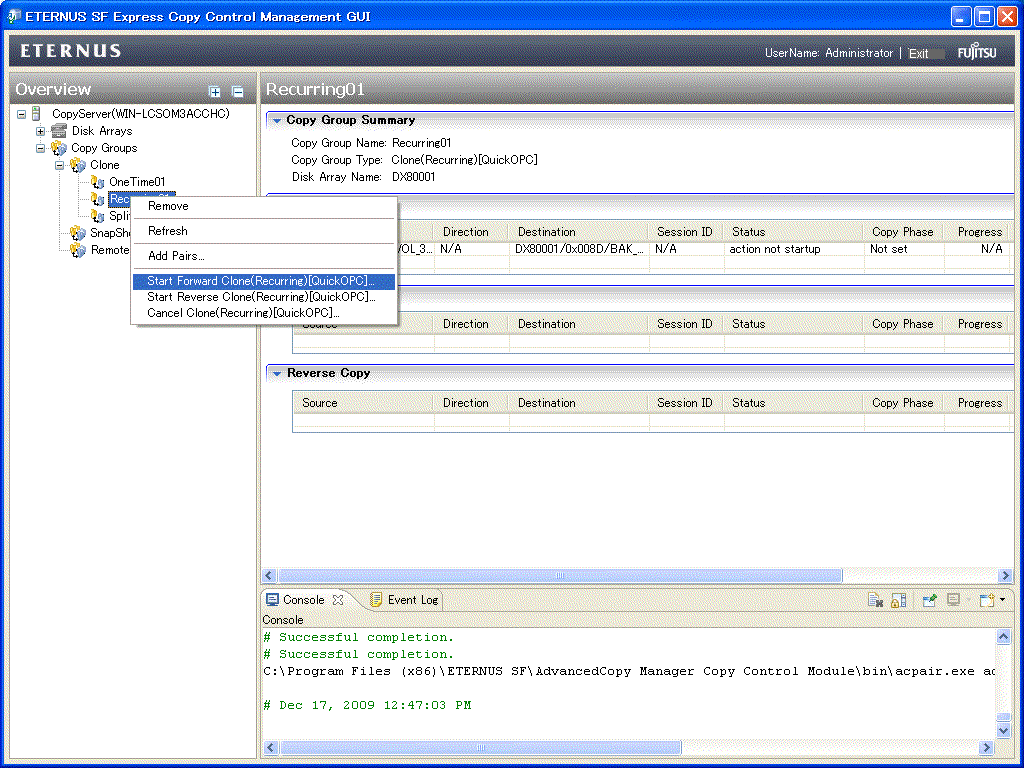
The [Start Forward Clone(Recurring)[QuickOPC]] menu is shown.
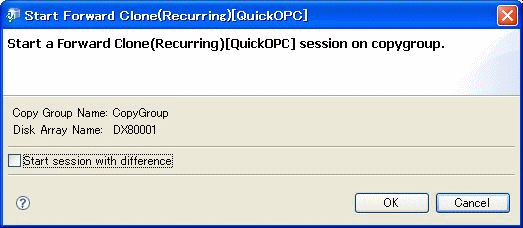
Point
This time does not check the [Start session with difference].
Execute copy (2nd time or later).
Click [Start Forward Clone(Recurring)[QuickOPC]] in the Copy Group to start Clone(Recurring) [QuickOPC].

The [Start Forward Clone(Recurring)[QuickOPC]] menu is shown.
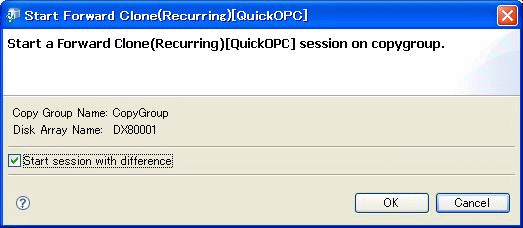
Point
A system administrator should check the [Start session with difference].
Execute Clone (Split mirror) [EC] type Advanced Copy.
The Clone (Split mirror) [EC] type operating procedure is as follows.
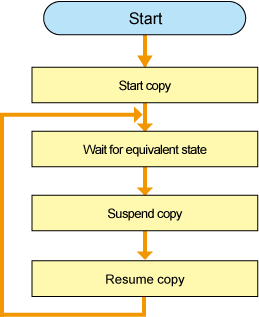
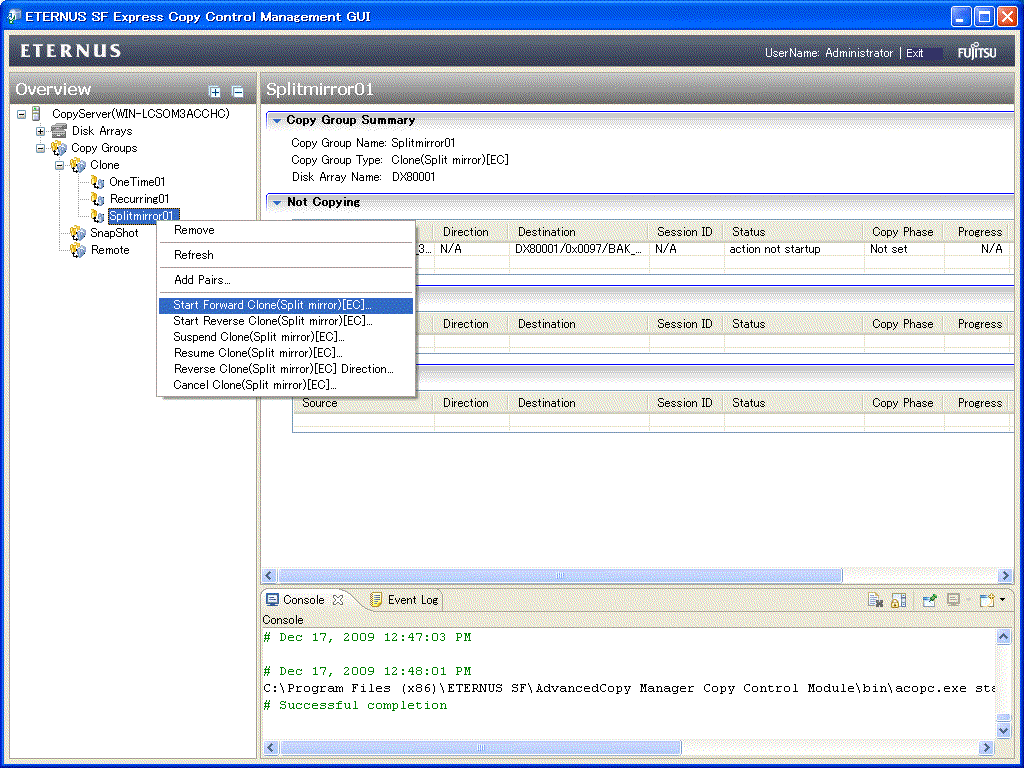
Start copy
Click [Start Forward Clone(Split mirror) [EC]] in the Copy Group to start Clone (Split mirror) [EC]. However, if you want to reverse the copied data, click [Start Reverse Clone(Split mirror)[EC]].
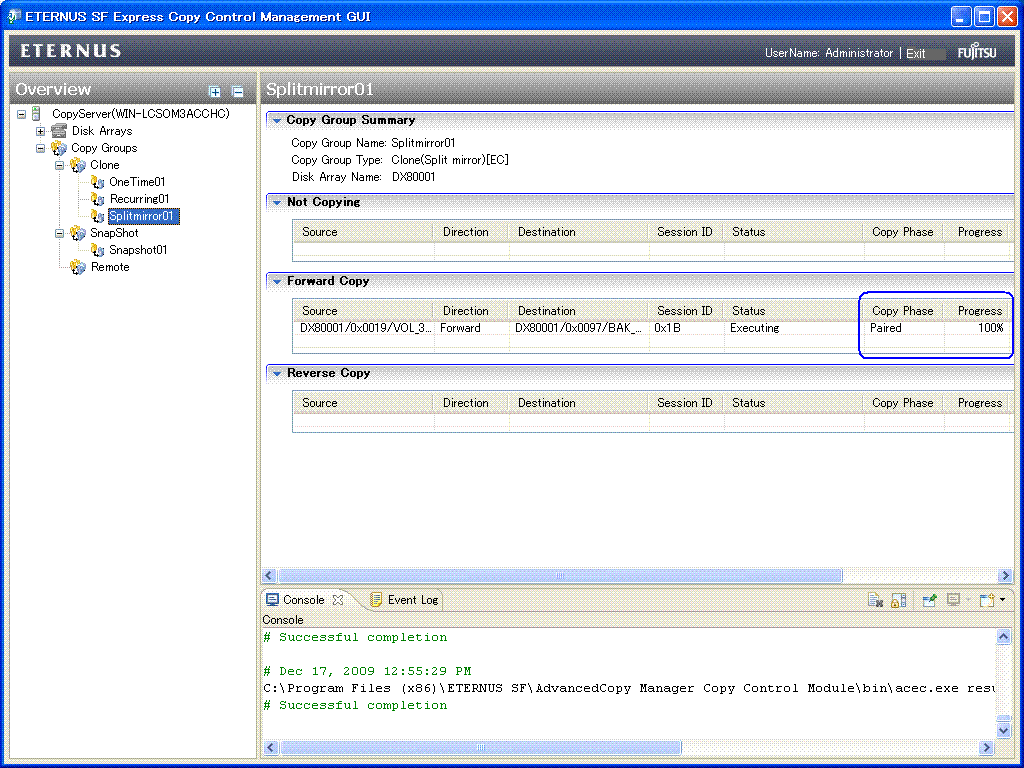
Wait for equivalent state
Wait until [Copy Phase] is changed to "Paired" from "Copying".
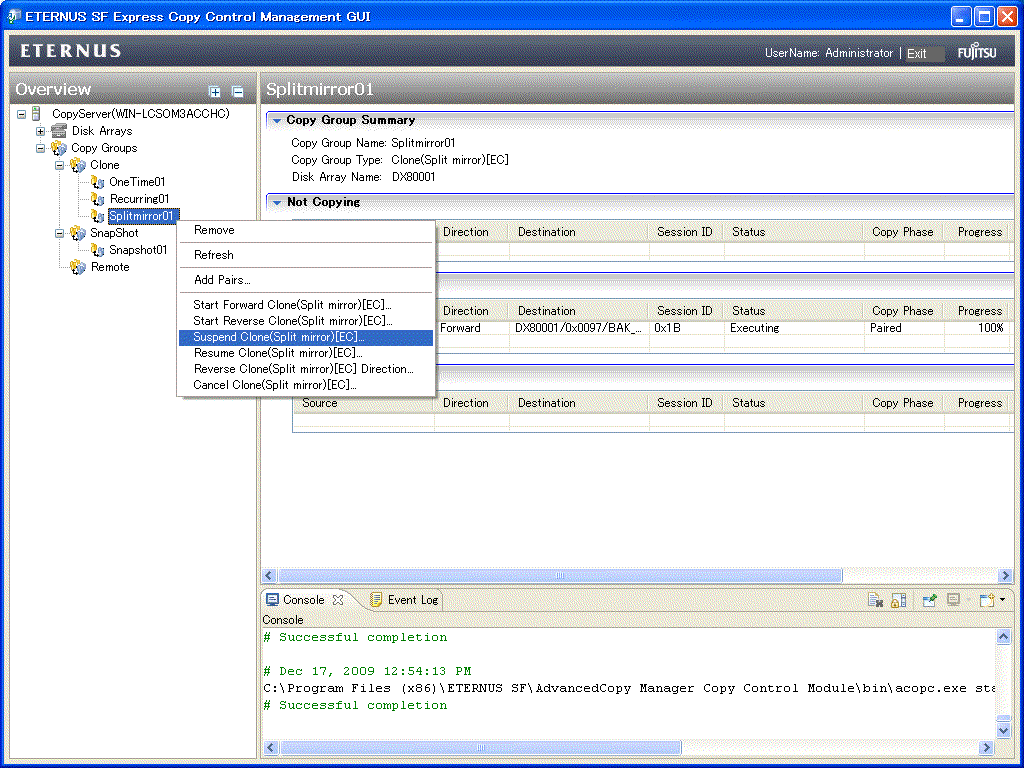
Suspend copy
Click [Suspend Clone(Split mirror)[EC]] in the Copy Group to suspend the clone copy.
Resume copy
Click [Resume Clone(Split mirror)[EC]] in the Copy Group to resume the clone copy.
Then repeat the procedures 2 to 4.
