
| ETERNUS SF Disk Space Monitor User's Guide - Microsoft(R) Windows Server(TM) 2003/Solaris(TM) Operating System/Linux - 13.0 |
Contents
Index
 
|
| Part 3 User's Guide | > Chapter 8 Report View |
This section explains how to use the On-Demand Report View.
The On-Demand Report View is started by selecting On-Demand Report from the toolbar in the Console window.


Do not perform operations in the On-Demand Report View using the pop-up context menu that appears when the right mouse button is clicked.
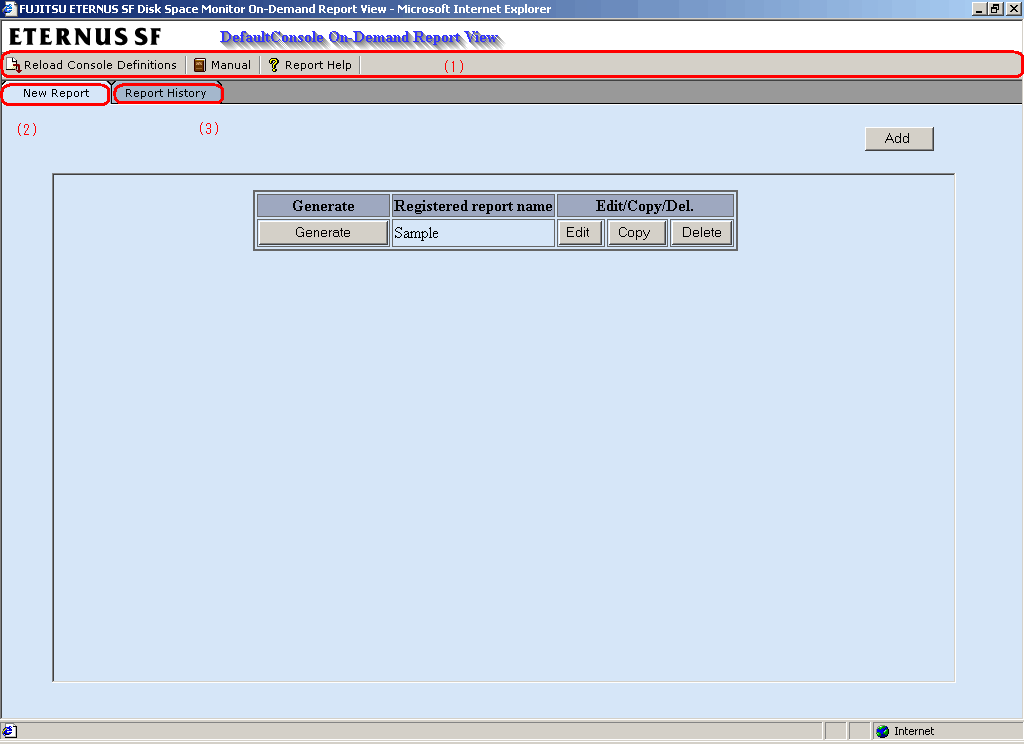
The On-Demand Report View will appear as below.

The On-Demand Report View is organized as shown in the following table.
|
Item No. |
Component |
Description |
|---|---|---|
|
(1) |
Toolbar |
The toolbar provides the following menus:
|
|
(2) |
New Report tab |
Can be used to create, edit, copy and delete an on-demand report. It can also be used to register reports that are used frequently. |
|
(3) |
Report History tab |
Can be used to display the history of previously created reports. |
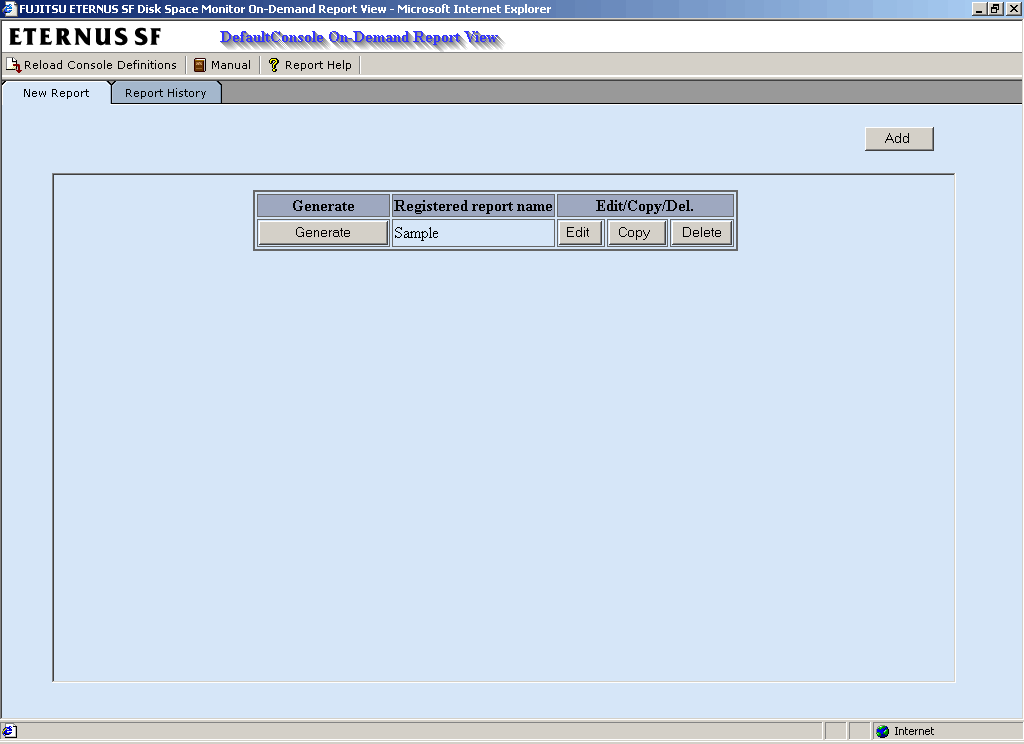
The windows associated with each tab are explained below.
The New Report tab can be used to perform the following operations.

The New Report tab provides the following buttons that correspond to the operations described above.
|
Button |
Operation |
|---|---|
|
Generate |
Opens the window for creating a new report immediately. This window can be used to create reports based on specified conditions. |
|
Add |
Opens the report registration window in its default state to register an on-demand report created according to the desired conditions. The report registration window allows the user to specify the desired report conditions and register the report using a name. It can also be used to run a test display to check that the specified report conditions are correct. |
|
Edit |
Displays a report registration window with existing report conditions specified to enable the registered on-demand report conditions to be edited. The report registration window allows report conditions to be edited, overwritten and then registered. It is also possible to run a test display to check that the specified report conditions are correct. |
|
Copy |
Copies registered on-demand reports. When the Copy button is clicked, the Copy of registered report dialog box will be displayed. Enter the report name to be assigned to the copy, and then click the OK button. |
|
Delete |
Deletes a registered on-demand report. |
Refer to Section 8.5, "Using the Report Creation and Registration Windows" for details on how to use the report creation window.
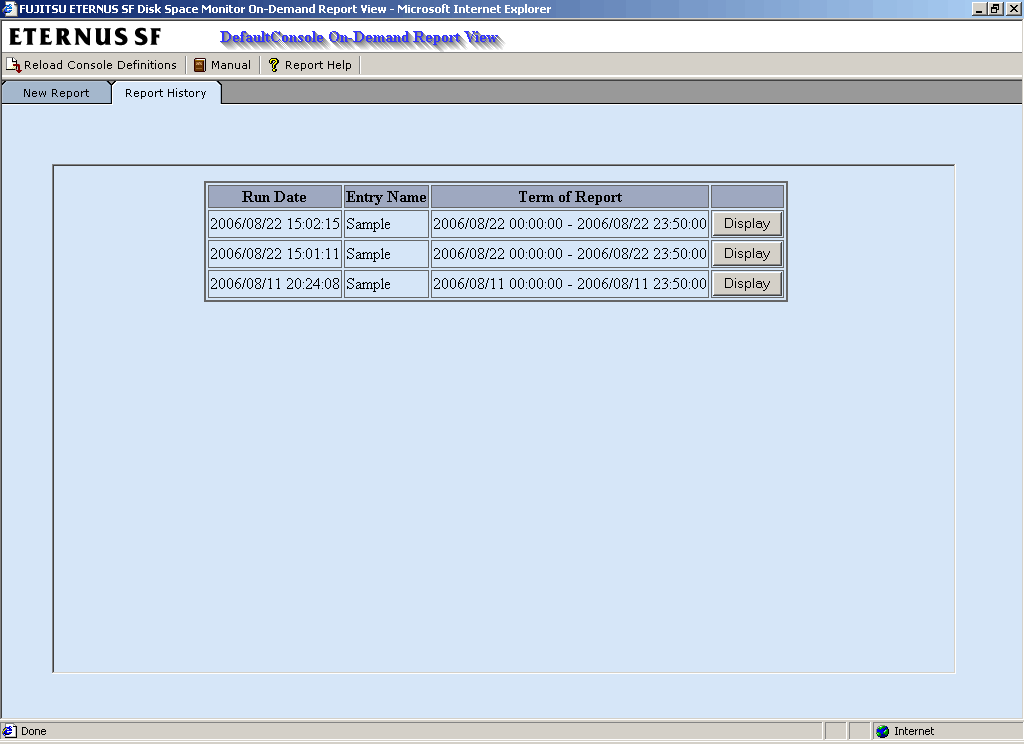
The Report History tab can be used to perform the following operations.

The Report History tab provides the following button that corresponds to the operation described above.
|
Button |
Operation |
|---|---|
|
Display |
Displays the corresponding on-demand report that was created previously. |
The on-demand report history can store up to 50 reports.
If this number is exceeded, reports will be automatically deleted in chronological order.

If it is necessary to keep a report, click the Display button to open the display window, then use the File menu of the browser to save the report to any folder.
Contents
Index
 
|