

| ETERNUS SF Recovery Manager for Oracle EE 13.0.1 User's Guide - Solaris(TM) Operating System - |
Contents
 
|
This chapter explains the recovery function of Recovery Manager for Oracle.
This section gives an overview of the recovery procedure.
When a database is damaged, it can be recovered as follows:
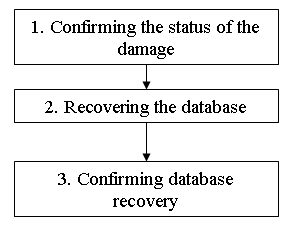
When a database is damaged, it is necessary to assess which file has been damaged.
When a database is damaged, information is output to the alert log (alert_ORACLE_SID.log). Refer to the alert log and check which file has been damaged.
Execute the DB check from the Recovery Main Menu screen to identify which file has been damaged.
After identifying the damage, execute the recovery operation from the recovery screen.
Recovery Manager for Oracle provides the following recovery functions:
|
Recovery function |
Explanation |
|
Auto recovery |
Determines the type of database damage and executes the appropriate restore and recover function. |
|
Full recovery |
Executes the restore of control files and all data files, and executes the recovery function. |
|
Custom recovery |
Executes the recovery of files selected on-screen. This database recovery function is suited to advanced users. |

Recovery Manager for Oracle supports disk-to-disk database restore and recovery operations. Restoring and recovery from a tape is not supported. If a backup volume on a disk is damaged, restore the volume from a tape using backup software prior to activating the recovery screen on the Recovery Manager for Oracle.
After the recovery operation has ended normally, check the transaction data.
This section explains the Recovery Main Menu screen.
Log in to the database server*1 as root.
*1: Log in to the primary node in the cluster operation (HA and RAC)
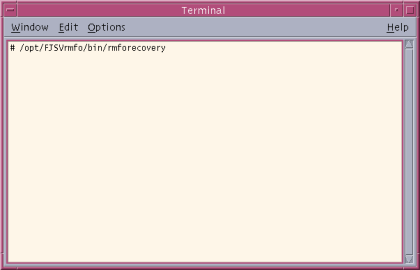
Execute the "/opt/FJSVrmfo/bin/rmforecovery" command from the terminal emulator or the file manager.
An example of command execution from the terminal emulator is shown as follows:

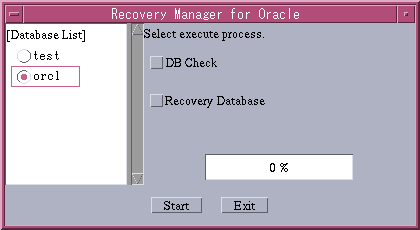
The database list displays the databases already configured for backup and recovery operations.
Select a database on which "DB check" or "recovery" is to be performed.
This operation confirms whether the database selected from the "Database list" is normal or damaged.
This operation recovers the database selected from the "Database list".
This section explains the DB check.
The DB check operation checks the status of files in the database (control files, online redo log files and all data files).

This section explains the procedure for DB check as follows:
Start the Recovery Main Menu screen as directed in the section, "Starting the Recovery Main Menu screen".
Confirm that the listener for target database connection has been activated.
Log in as the Oracle Install user of the target database, and confirm, using the "lsnrctl status" command, that the listener has been activated. Check if the target database can be connected to by specifying the connect strings with the "tnsping" command.
Example: Checking the listener (when the listener name is "listener")
|
% id |
Confirm that the listener service has been activated for the target database as shown above.
Example: Checking "tnsping" (when the connect string for the target database is "ora920")
|
% id |
Confirm, using '"tnsping", that the target database can be connected to as shown above.
Select the "Database name" subject to the check from the database list and "DB check" on the Recovery Main Menu screen, and click the [Start] button.
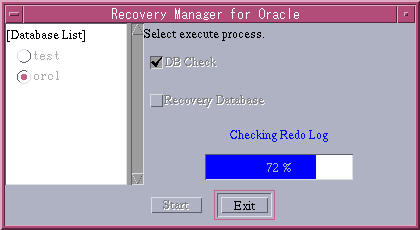
When the DB check has completed the screen will display whether or not the database is normal or abnormal.
When the DB check result is normal, the following DB Check Result screen will be displayed.
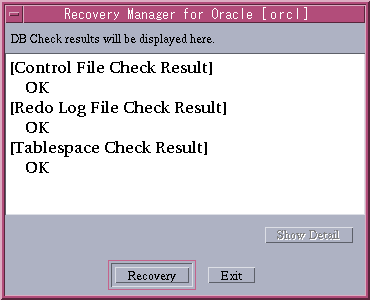
To terminate the processing, click [Exit].
When the DB check result is abnormal, the following DB Check Result screen will be displayed.
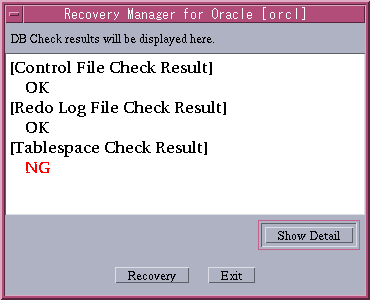
When the tablespace check result is [NG], the damaged tablespace can be checked by clicking [Show Detail].
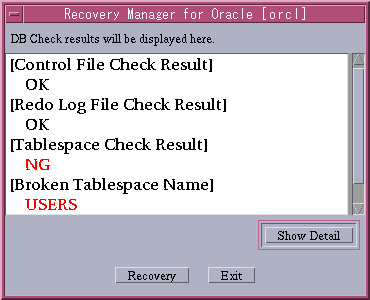
To recover the damage immediately, click [Recovery]. To terminate the processing, click [Exit].

Depending on the extent of the database damage, executing the DB check may cause the instance to terminate.
Prior to executing the recovery operation, follow the procedures in the sections, "Confirming activation of the listener for target database connection" and "Pre-check in the cluster operation (HA and RAC)". If an error is found, remove the cause of the error then execute the recovery operation.
From the DB Check Result screen, click [Exit] and the following screen will be displayed:
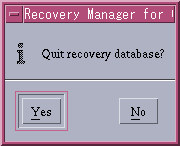
To terminate the processing, click [Yes]. To redisplay the DB Check Result screen without terminating the processing, click [No].
This section explains the action to take in the event of common errors generated during the DB check.
The listener may not have been activated if the following screen is displayed. Follow the procedure to confirm in the section, "Confirming activation of the listener for target database connection", activate the listener, and re-execute the DB check.
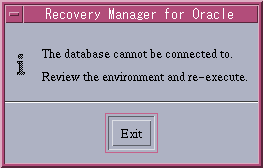
The database may not have been activated or damaged if the following screen is displayed.
Activate the database and re-execute the DB check if the database has not been activated.
Execute the recovery operation if the database has been damaged.
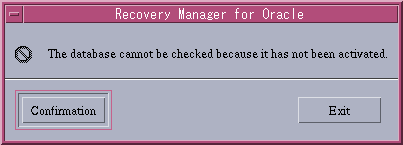
This section explains how to recover databases.
The procedure for recovering databases is explained as follows:
Start the Recovery Main Menu screen as directed in the section, "Starting the Recovery Main Menu screen".
Confirm by following the same procedure as described in the section, "Confirming activation of the listener for target database connection" in "DB check".
Confirm the status of each Reliant(R) Monitor Software (hereafter referred to as "RMS") resource through the Global Cluster Services of the PRIMECLUSTER Web-Based Admin View.
[Items to confirm]
If any of the above items is abnormal, recover the cluster resources.
For details on how to recover the cluster resources, refer to the "PRIMECLUSTER Web-Based Admin View Operation Guide".
Select the "Database name" to be recovered from the database list and "Recovery Database" on the Recovery Main Menu screen, and click the [Start] button.
The following recovery screen will be displayed:
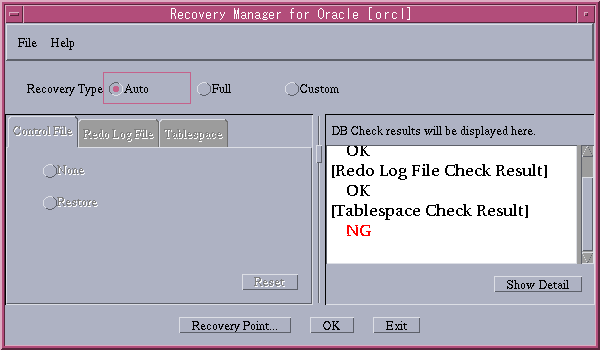
[Recovery type]
|
Auto |
Determines the type of database damage and executes the appropriate restore and recovery function. |
|
Full |
Executes the restore of control files and all data files, and executes the recovery function. |
|
Custom |
Executes the recovery of files selected on-screen. This database recovery function is suited to advanced users. |
[Button]
|
Recovery point |
Displays the Recovery Point screen. |
|
Start |
Executes the recovery processing. |
|
Exit |
Exits the application. |
|
Show Detail |
Displays the details of the DB check result. |
The auto recovery function assesses the status of the database damage, and executes the restore and recovery operation according to the status.

The recovery operation may not be performed normally under the following circumstances:
Select [Auto] as the recovery type on the Recovery Main screen, and click [OK].

A screen confirming the continuation of the recovery operation will be displayed.
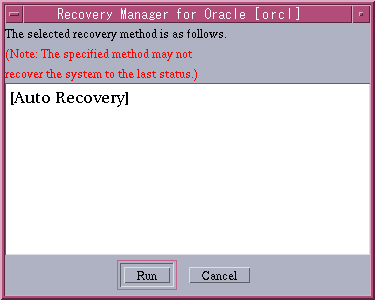
To execute the recovery operation, click [Run]. To cancel, click [Cancel].

The data cannot be recovered to the status immediately before the database damage if the current online redo log file has been damaged, or any of the archived redo log files generated after backup are missing.
The Recovery Executing screen will be displayed.
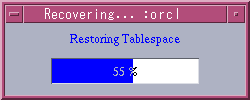
Wait until the recovery processing has completed.
The following screen will be displayed when the recovery processing has completed.
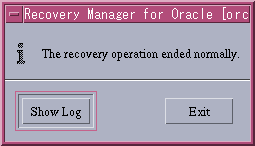
To display the execution log, click [Show Log]. To terminate, click [Exit].

Depending on the status of database damage, the redo log may sometimes be reset (resetlogs). If the redo log is reset, back up the database immediately because resetting invalidates the existing backup of the database.
The full recovery function restores all the control files and data files, and executes the recovery operation.
Select [Full] as the recovery type on the Recovery Main screen, and click [OK].
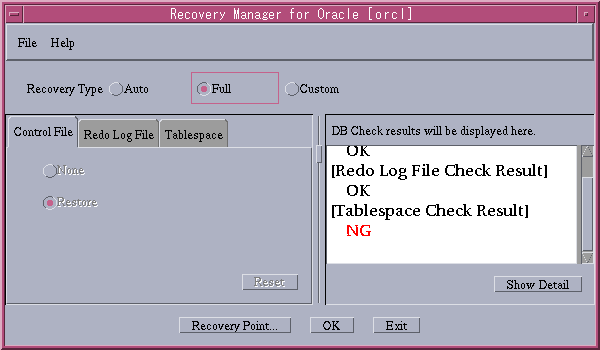
A screen confirming the continuation of the recovery operation will be displayed.
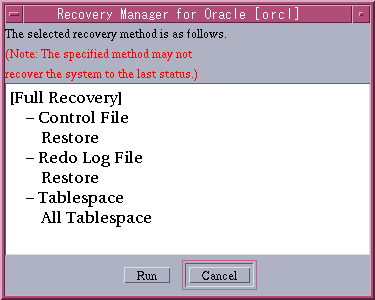
To execute the recovery operation, click [Run]. To cancel, click [Cancel].

The data cannot be recovered to the status immediately before the database damage if the current online redo log file has been damaged, or if any of the archived redo log files generated after backup are missing.
The Recovery Executing screen will be displayed.

Wait until the recovery processing is completed.
The following screen will be displayed when the recovery processing has completed.

To display the execution log, click [Show Log]. To terminate, click [Exit].

In the full recovery operation, the redo log will always be reset (resetlogs). Back up the database immediately because resetting invalidates the existing backup of the database.
The custom recovery function executes the recovery operation for the files and the method both selected on-screen. This database recovery function is suited to advanced users. If the files and the method of recovery are not specified correctly, the recovery operation will not be performed normally.
Those who are not familiar with the database backup and recovery function should select "Auto recovery" or "Full recovery".
Select [Custom] as the recovery type on the Recovery Main screen.
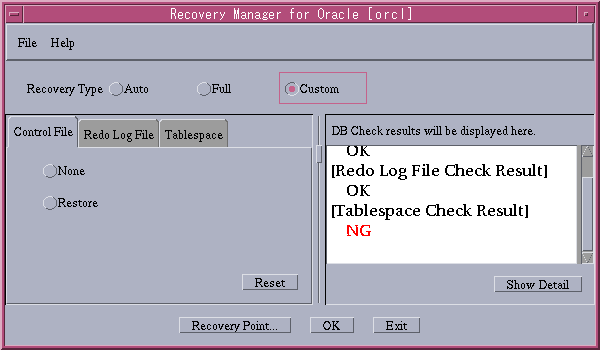
Click the tabs [Control File], [Redo Log File], and [Tablespace], and select files to recover.
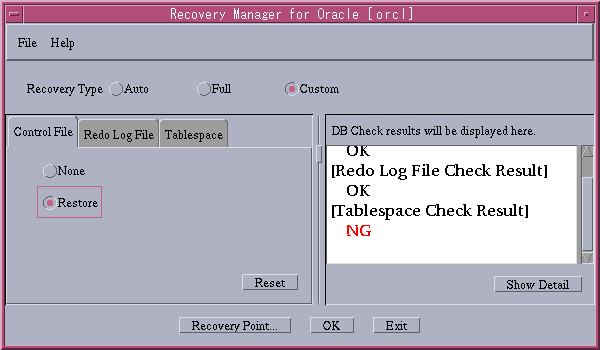
[Function]
|
None |
Does not recover the control files. |
|
Restore |
Recovers the control files. |
[Button]
|
Reset |
Cancels the function selection. |

When the control files are recovered, the redo log will always be reset (resetlogs). Back up the database immediately because resetting invalidates the existing backup of the database.
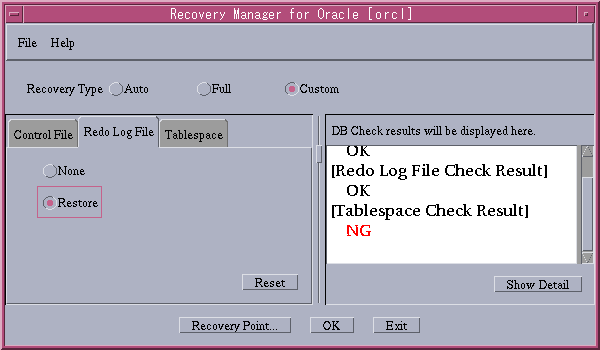
[Function]
|
None |
Does not recover the redo log files. |
|
Restore |
Recovers the redo log files. |
[Button]
|
Reset |
Cancels the function selection. |

All Tablespaces, Tablespace Specification, or Volume Name can be selected.
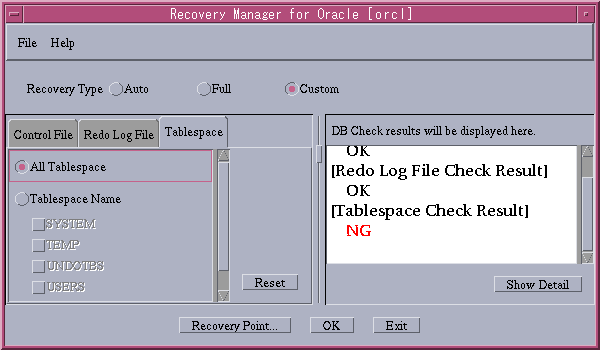
[Function]
|
Recovers all tablespaces. |
|
|
Recovers the selected tablespaces. |
|
|
Volume Name |
Restores the selected volume by the OPC and recovers it |
[Button]
|
Reset |
Cancels the function selection. |

When "Recovery by selecting the tablespace name" is selected and the tablespace is other than the "system tablespace, undo tablespace, or temporary tablespace (TEMPFILE)", the following inquiry will be made:
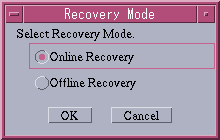
To recover online without terminating the database, select [Online Recovery] and click [OK]. To recover offline by terminating the database, select [Offline Recovery] and click [OK].
A screen confirming the continuation of the recovery operation will be displayed.
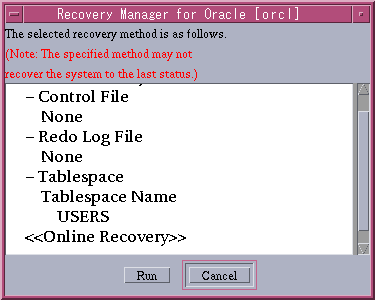
To execute the recovery operation, click [Run]. To cancel, click [Cancel].
The Recovery Executing screen will be displayed.

Wait until the recovery processing has completed.
The following screen will be displayed when the recovery processing has completed.

To display the execution log, click [Show Log]. To terminate, click [Exit].
The following screen will be displayed when [Recovery Point] is clicked on the Recovery Main screen.
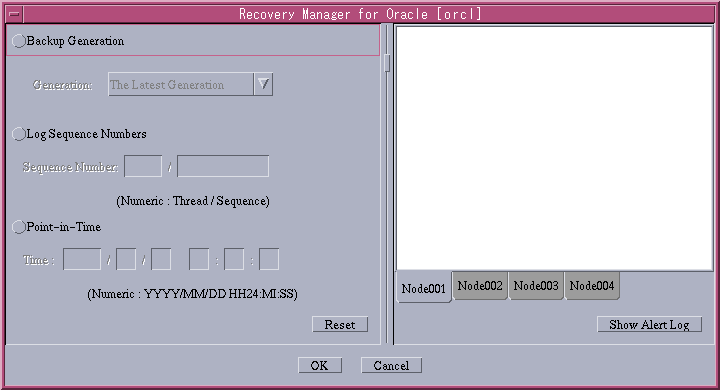
[Function]
|
Backup Generation |
Recovers to the backup point of the specified generation (The Latest Generation, The Previous Generation, or The Generation Beforehand). *1 |
|
Log Sequence number |
Recovers to the point of the specified log sequence numbers (Thread *2/Sequence). *3 |
|
Point-in-Time |
Recovers to the point in time specified. |
*1: The range of selection varies depending on the value of the number of backup generation managements (BK_GEN)
For 1, only the Latest Generation can be selected.
For 2, the Latest Generation or the Previous Generation (the Latest Generation only for EC) can be selected.
For 3, all (the Latest Generation and the Previous Generation only for EC) can be selected.
Specification must be within the specification range.
*2: Always specify "1" as the Thread for the single server or cluster operation (HA).
*3: Logs up to the specified log sequence number - 1 are applicable.
[Button]
|
OK |
Sets the specified recovery point, and returns to the Recovery Main screen. |
|
Cancel |
Returns to the Recovery Main screen without setting the recovery point. |
|
Reset |
Reset the recovery point selected. |
|
Show Alert Log |
Displays the alert log. *1 |
*1: Displays the number of lines (from the bottom) specified in ALT_ROWS of the backup basic information file (rmfo_bkcom.ini).
Confirm that the recovery operation has ended normally from the Recovery Completion screen and the recovery execution log files.
The following screen will be displayed when recovery processing ends normally:

The following screen will be displayed when recovery processing ends in error:
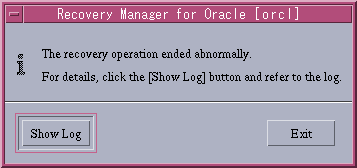
Refer to the execution log and remove the cause of the error. Then re-execute the recovery operation.
Detailed information is output to the log file at the time of recovery operation.
Log files are created under the "/opt/FJSVrmfo/log/recovery/DB_NAME" directory.
The log file names are as follows:
|
recf_YYYYMMDDHHMISS.log |
Recovery Screen Operation Log |
|
rec_YYYYMMDDHHMISS.log |
Recovery Execution Log |
YYYYMMDDHHMISS: Execution time (year/month/day/hour/minute/second)
When the recovery operation has ended in error, refer to the log file and remove the cause of the error. Then re-execute the recovery operation.

Example: Execution log showing the recovery operation to be normal but the DB check to be in error.
|
<snip> allocated channel: d1 |
When the recovery operation has ended normally, check the transaction data
Confirm the status of each RMS resource through the Global Cluster Services of the PRIMECLUSTER Web-Based Admin View for the cluster operation (HA and RAC).
Recover the cluster resources if the resources are abnormal.
Oracle resources may be in the warning status. In this case, ether execute the "hvoraenable" command for the each resources concerned and re-open the resource monitor function, or restart (OFFLINE/ONLINE) all the Oracle user applications from the Global Cluster Services screen of the PRIMECLUSTER Web-Based Admin View.
For details on how to recover the cluster resources, refer to the "PRIMECLUSTER Web-Based Admin View Operation Guide".
For Oracle RAC 10g, confirm using the server control utility (SRVCTL) that the status of the databases, instances, and cluster database services are normal.
For details on and how to use the server control utility (SRVCTL), refer to the manual "Oracle Real Application Clusters Management"
Back up the database immediately.
Contents
 
|