

| PRIMECLUSTER Installation and Administration Guide 4.2 (Linux for Itanium) |
|
Contents
Index
|
| Part 2 Installation | > Chapter 6 Building Cluster Applications | > 6.4 Initial GFS Setup |
This section explains how to create a file system.
 Operation Procedure:
Start the GFS management view.
Choose Global File Services on the Web-Based Admin screen, select a node from the node list, and then display the main screen of Global File Services.
Set up shared information.
Select Operation -> Create and then open the "Create File System Wizard (1)."
Set up the node information that is to be shared within the file system and then mount the information using the "Create File System Wizard (1)."
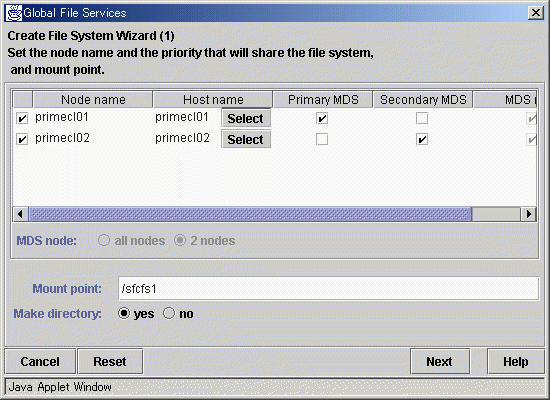
Owner: root
Group: sys
Access authority: 775
After setting or changing this information, click the Next button to open the "Create File System Wizard (2)."
To return each setup item to its default value, click the Reset button.
To stop the processing of the file system creation, click the Cancel button.
Select the configuration partition.
Using the "Create File System Wizard (2)," register the partition that is to be used as the file system.
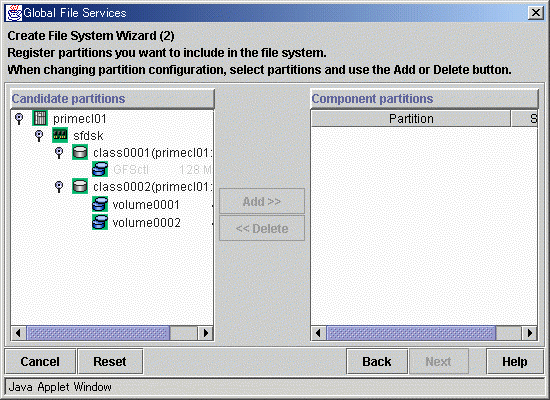
Select the partition to be used from the [Candidate partitions] list and then click the Add button.
Only one partition can be selected at a time. A partition that is already being used as a file system or as a management partition cannot be selected.
After the partition has been selected, click the Next button to open the "Create File System Wizard (3)."
To return to the "Create File System Wizard (1)," click the Back button.
To abandon file system creation, click the Cancel button.
Set up the partition information.
Using the "Create File System Wizard (3)," select the meta, log, and data areas that are to be allocated to each of the partitions selected with the "Create File System Wizard (2)."
The partition to which the meta data area is allocated is used as the representative partition.
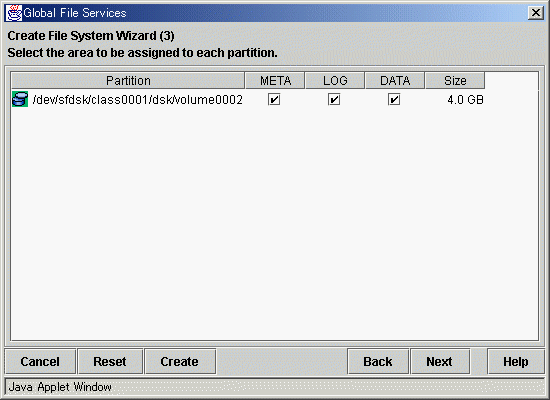
After setting the above information, click the Next button to open the "Create File System Wizard (4)."
No information can be set with the "Create File System Wizard (4)." Go to the "Create File System Wizard (5)."
To return each setup item to its default value, click the Reset button.
To return to "Create File System Wizard (2)," click the Back button.
To abandon file system creation, click the Cancel button.
To create the file system while leaving the default settings of the extended, detailed, and mount information as is, click the Create button.
Set up the detailed information.
Set up the "Detailed information" by using the "Create File System Wizard (5)."
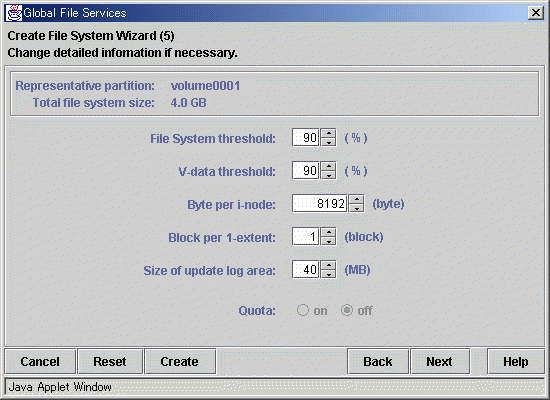
After setting the above information, click the Next button to open the "Create File System Wizard (6)."
To return each setup item to its default value, click the Reset button.
To return to the "Create File System Wizard (4)," click the Back button.
To abandon file system creation, click the Cancel button.
To create the file system while leaving the default setting of the mount information as is, click the Create button.
Set up the mount information.
Set up the "Mount information" by using the "Create File System Wizard (6)."
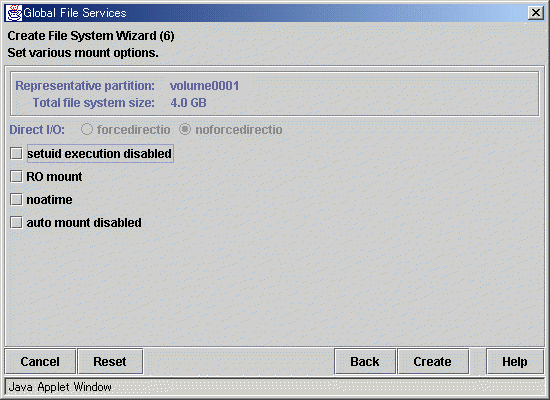
After setting the above information, click the Create button to create the file system. To return each setup item to its default value, click the Reset button.
To return to the "Create File System Wizard (5)," click the Back button.
To abandon file system creation, click the Cancel button.
|
Contents
Index
|