

| PRIMECLUSTER Global Disk Services Configuration and Administration Guide 4.1 (Linux) |
|
Contents
|
| Chapter 5 Operation | > 5.2 Settings | > 5.2.1 Operating from the Settings Menu |
In this section, how to create a new class is explained.
In the [Settings] menu, click [Class Configuration]. Class Configuration screen appears.
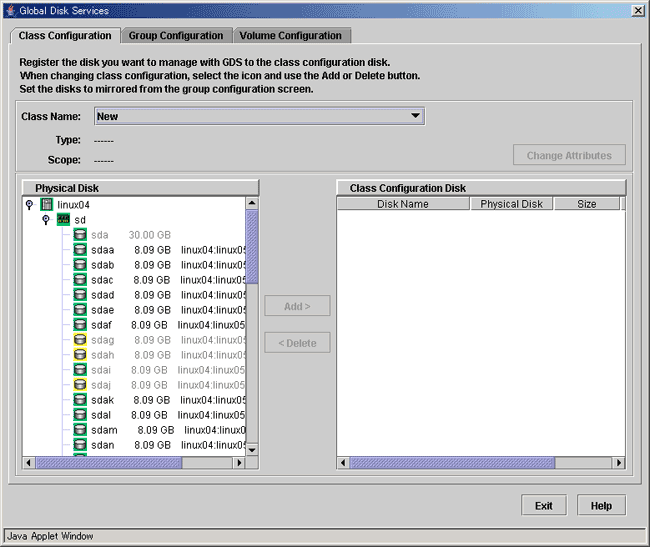
In the "Class Name" list, select "New".
In the <Physical Disk List>, select the physical disk you want to include in the disk class.
You can select more than one physical disk at a time.
Selecting a physical disk will make the <Add> button available.
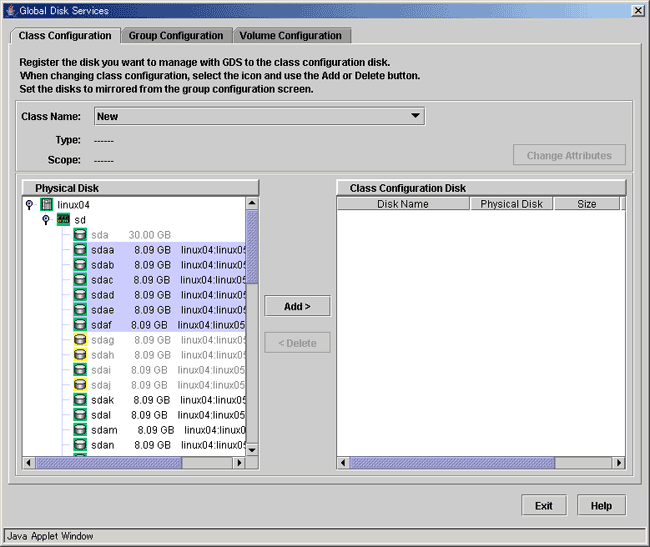
Press <Add>, and the message below appears.
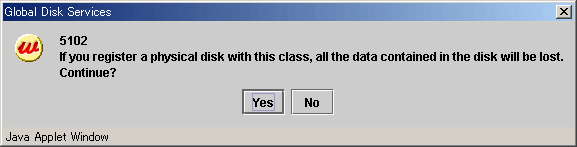
Press <Yes> to continue, and <No> to cancel.
Press <Yes>, and Class Attributes Definition screen appears.
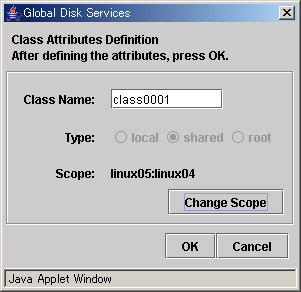
In the "Class Name" of Class Attributes Definition screen, an automatically created disk class name appears as default. Change the "Class Name" if necessary, and press <OK>.
The "Type" is "shared" and the "Scope" indicates a node that can share disks with respect to the class. To accept the settings, click the <OK> button.
 Inputting Class Name
Class name will be used for the device path name.
/dev/sfdsk/class name/[r]dsk/volume name
You must be careful when inputting the class name, as once the volume is created, it cannot be changed.
 For information on assigning a class name, see "Object Name."
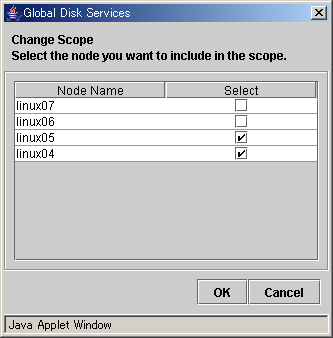
To change the scope, click the <Change Scope> button.
After clicking the <Change Scope> button, the [Change Scope] dialog box appears.
This operation determines the class name.
If you press <Cancel> in the Class Attributes Definition screen, registration of the physical disk itself will be canceled.
Selecting the "Disk Name" in the [Class Configuration Disk] field allows you to set the disk attributes. From here, you can change the "Disk Name" and "Type".
Double-click the "Disk Name" in the [Class Configuration Disk] field, and change the name.
Display the "Disk Type" in the [Class Configuration Disk] field and select the disk type you wish to change from the list. When specifying as a spare disk select "spare." When specifying as a single disk, select "single." Default is set to "undef."
After creating all classes, press <Exit> and close Class Configuration screen.
Class Resources
For the cluster system installation and initial setting procedures, see "PRIMECLUSTER Cluster Foundation Configuration and Administration Guide."
|
Contents
|