When file system is not created, you can start the unmirroring process from removing the volume.
The procedure for changing or removing the configuration settings is shown below.
Figure 9.4 Configuration Changing Operation
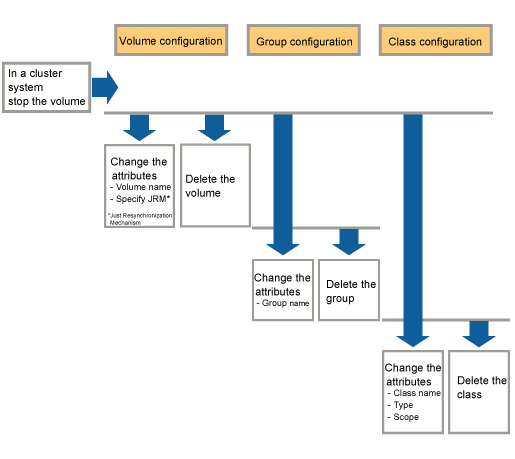
In this section, how to remove a volume is explained.
Stopping an operation
Stop the operation which is using the volume.
Unmount the file system on the volume when it has been mounted.
Removing the settings of a file system or an application
When a file system is created in the volume, delete the setting of the volume and the file system in the /etc/fstab file.
If the setting of a file system or an application other than /etc/fstab is performed, delete them.
Stopping the volume
When removing a shared class volume, stop the volume from [Operation]:[Stop Volume] on all nodes which belongs a class scope.
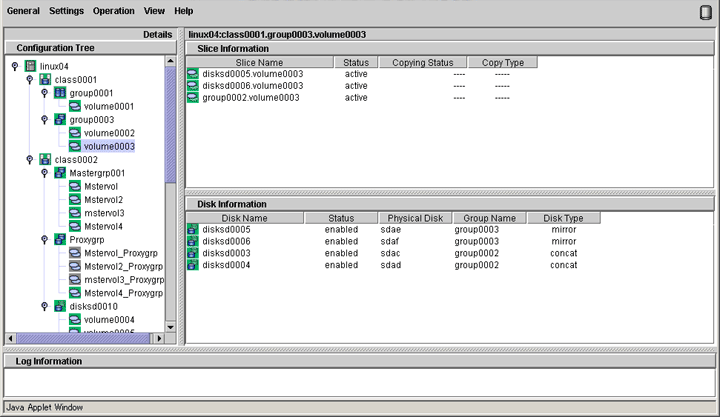
Confirming the volume status
A volume containing a temporarily detached slice cannot be removed.
When there is a temporarily detached slice, you must attach the slice before removing the volume.
Volume status can be confirmed in the Main screen.
Figure 9.5 Displaying Volume Information
Attaching a temporarily detached slice
When there is a temporarily detached slice, go to [Operation] menu and select [Attach Slice]. The detached slice will be attached again.
For information on Attach Slice operation, see "7.7.1.2 Operation Procedure."
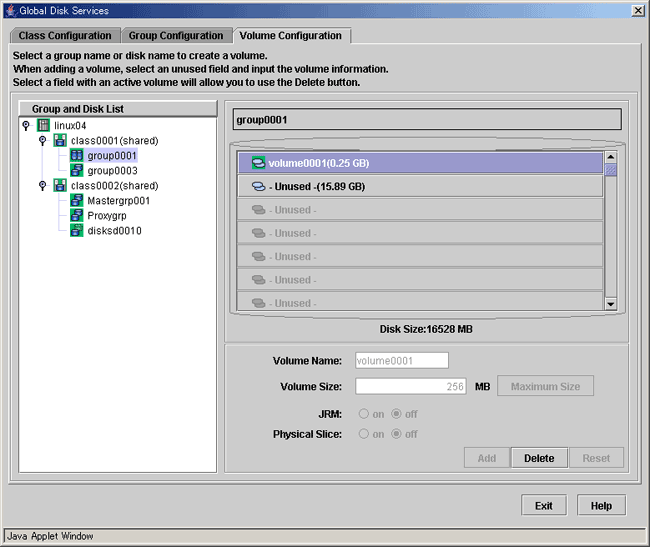
Removing volume
The procedures for removing a volume are explained below.
Displaying the Volume Configuration screen
In the Main screen [Settings] menu, select [Volume Configuration]. Volume Configuration screen appears.
Removing a volume
Select the volume you want to remove, and click <Delete>.
When removing more than one volume, select the next volume, and repeat the same process.
Note
Size displayed in the <Unused> field
The size displayed in the <Unused> field is the maximum size that can be created as a single volume.
Depending on the position of the volume to be removed, the maximum size and consequently the size displayed in the <Unused> field may remain unchanged.
Figure 9.6 Removing Volume
Disconnecting all disks/lower level groups registered with a group will automatically remove the group.
The procedures are explained below.
Removing all volumes within the group
If there is even a single volume, you cannot remove the group.
Remove all volumes within the group by following the procedures described in "9.3.1.2 Removing Volume."
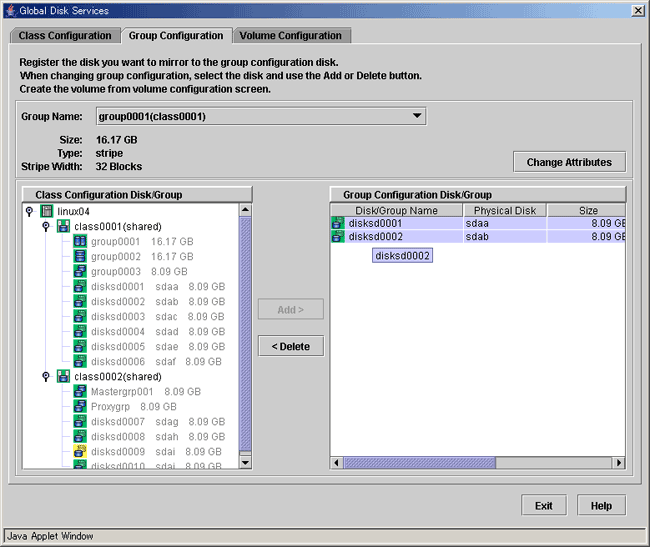
Disconnecting disks/lower level groups from group
Disconnect all disks/lower level groups by following the procedures below.
Displaying Group Configuration screen
In the Main screen [Settings] menu, select [Group Configuration]. Group Configuration screen appears.
Selecting group to remove
Select the group you want to remove from Group Configuration screen [Group Name] field.
Disconnecting disk/lower level group
Select the disk/lower level group you want to remove from [Group Configuration Disk/Group] field, and click <Delete>.
Figure 9.7 Disconnecting Disk/Lower level group
Removing all disks within a class will automatically remove the class.
The procedure is explained below.
Removing all groups within the class
Remove all groups within the class by following the procedure described in "9.3.1.3 Removing Group."
Removing all disks from class
Disconnect all disks by following the procedure below.
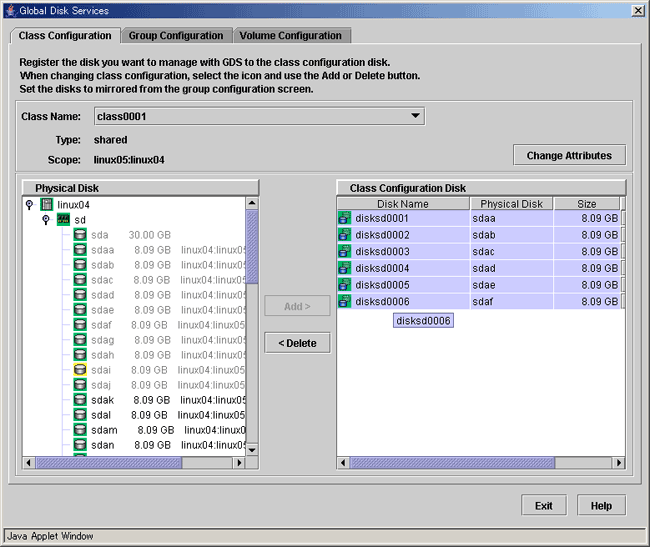
Displaying Class Configuration screen
In the Main screen [Settings] menu, select [Class Configuration]. The Class Configuration screen appears.
Selecting class to remove
Select the class you want to remove from Class Configuration screen [Class Name] field.
Removing disk
Select the disk you want to remove from [Class Configuration Disk] field, and click <Delete>.
Figure 9.8 Removing Disk
Note
In Cluster Systems
If a class resource is registered to the cluster application, delete the resource from the cluster application and then delete the class. For the method for deleting resources from cluster applications, refer to the "PRIMECLUSTER Installation and Administration Guide."