This section explains how to set up and use the Web browser.
Take the following steps:
Setup the Web browser.
Setup of the Web browser is not required if the GUI screen is started from the command.
Setup Java.
Perform this section only if starting the screen from the Web browser.
As the supported OS and Web browser varies depending on each operation management product, be sure to check the documentation first.
For the basic browser supported for Web-Based Admin View, refer to "3.1.2 Prerequisite client environment".
For the installation method and environment configuration, follow the instructions for each browser.
Web-Based Admin View uses a Web browser cookie to identify the client.
For the method of setup to handle cookies, follow the instructions for each browser.
Proxy setting
Setup method on Internet Explorer
Select [Internet Options] from the [Tools] menu of the Web browser.
Select the [Connections] tab, on the [Internet Options] screen.
Click [LAN setting] in the LAN setting area.
De-select all the check boxes on the [Local Area Network (LAN) settings] screen.
Select [OK] on the [Local Area Network (LAN) settings] screen.
Select [OK] on the [Internet Options] screen.
Setup when using Java Web Start from the Internet Explorer browser
Register the IP address of primary management server and secondary management server to the local intranet zone with the procedure below. If this setup is not performed, the file used for the screen startup will be downloaded without starting the screen directly during the startup of the screen. In this case, click the downloaded file and start up the screen.
Select [Internet Options] - [Security] tab and then [Sites] of [Local intranet] zone.
Select [Advanced] of [Local intranet].
Edit the Web site of the Local intranet zone.
When specifying the address of management server 192.168.10.1
http://192.168.10.1
Setup when using Windows Server(R) 2012, Windows Server(R) 2012 R2, Windows Server(R) 2016
Register IP addresses of primary and secondary management servers to the trusted site lists.
Without this procedure, the below pop-up appears when you start up the screen.
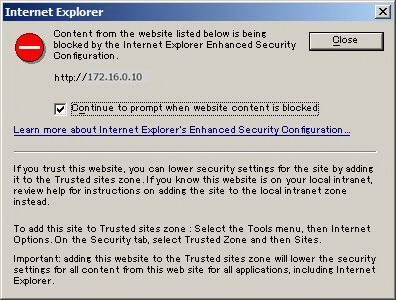
Take the following steps to allow the connection to Web-Based Admin View.
Select [Internet Options] - [Security] tab - Click on [site] button of [Trusted sites] zone.
Add the URLs of primary and secondary management servers to the web site.
When specifying the management server address 192.168.10.1 (Specified port is not necessary)
http://192.168.10.1
The supported Java versions are clarified in "3.1.2 Prerequisite client environment". Java, which Oracle provides for free, may come with some operation management product packages.
Follow the setup method described in "Conducting Java settings."
Check if Java is installed.
If Java 8 is displayed when clicking [Programs and Features] of the control panel, it is not necessary to install Java.
Install Java.
Download Java Runtime Environment from the Oracle download site, and start the installation.
Install following the procedure displayed on the screen.
Set Java Runtime Parameters. (only for displaying the GUI screen in English)
Follow the setup method described in "Changing the Language".
This completes the setup.
Note
If the version of the installed Java is older than that described above, install a recommended version.
Java should be installed after the Web browser. If you uninstall the Web browser after installing Java, uninstall the Java, and then reinstall it again.
In some Java versions on Windows(R), the cache files might remain in the client's system directory. In that case, delete these cache files by disk cleanup function on a regular basis.