Take the following setup procedures to enable system disk mirroring.
The setup values correspond to the values in "Setup (GDS System Disk Mirror)" of PRIMECLUSTER Designsheets. In the operation procedure, "Setup (GDS System Disk Mirror)" of PRIMECLUSTER Designsheets is abbreviated as "designsheet".
See
For setup details, see "System Disk Mirroring Settings [EFI]" in "PRIMECLUSTER Global Disk Services Configuration and Administration Guide."
Note
To mirror the system disk of a guest OS by using GDS in KVM environment, you need to configure a mirror volume of a local class or a shared class, which is created on the host OS, for the guest OS. For information on how to set up the host OS, see the following:
When building a cluster system between guest OSes on one host OS, see "1. Setting up disks and related devices" in "3.2.1.1 Host OS setup (before installing the operating system on guest OS)."
When building a cluster system between guest OSes on multiple host OSes without using Host OS failover function, see "1. Setting up disks and related devices" in "3.2.2.1 Host OS setup (before installing the operating system on guest OS)."
When building a cluster system between guest OSes on multiple host OSes using Host OS failover function, see "1. Setting up disks and related devices" in "3.2.3.1.3 Host OS setup (before installing the operating system on guest OS)."
For details on settings, see "PRIMECLUSTER Global Disk Services Configuration and Administration Guide."
Operation Procedure:
Select Global Disk Services at the Web-Based Admin View top screen.
The GDS Management screen (hereinafter main screen) is displayed.
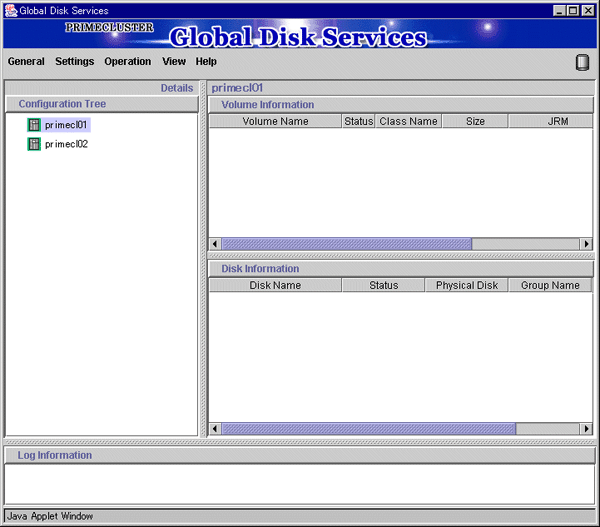
From the GDS configuration tree, select the node in which the system disk mirror is to be set, click the Settings menu, and select System Disk Settings.
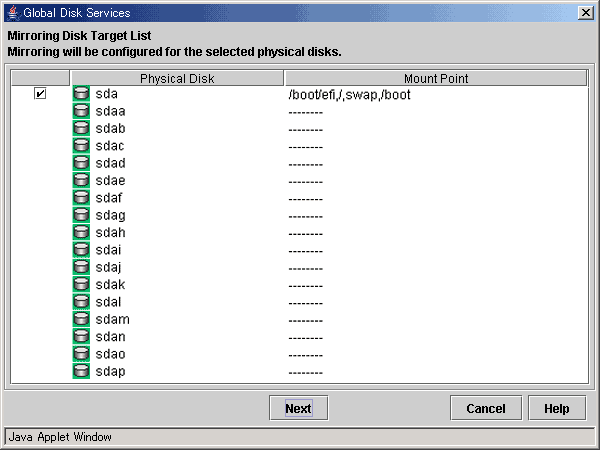
A list of disks that can be used for mirrored disks for the selected node is displayed.
Select the system disk ("Physical disk name" on the designsheet), and click Next.
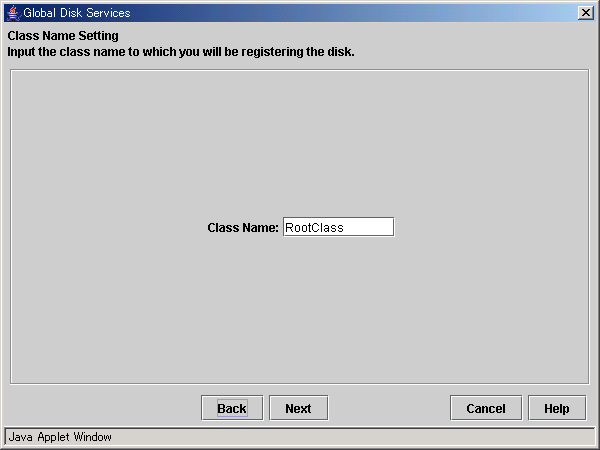
Specify class name of the root class.
Enter the class name ("Class name" on the designsheet) of the root class, and click Next.
Note
Specify the class name so that the class names of the root class are not duplicated among cluster nodes.
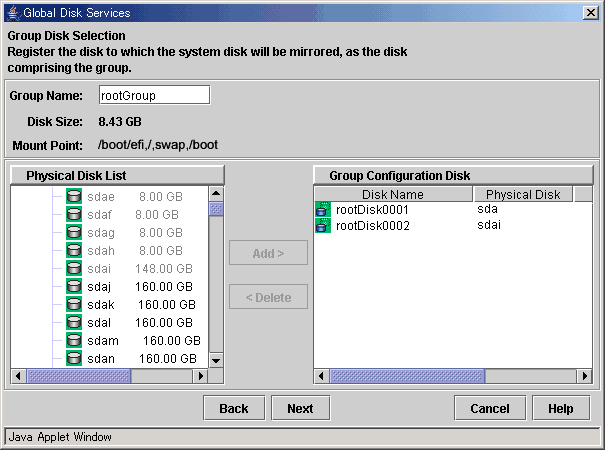
Add a mirror disk to the group.
Enter the "Group Name" ("Group name" on the designsheet), then from the "Physical Disk List," select the "mirror disk" ("Mirror disk name" on the designsheet) for the system disk, and click Add.
Check that the "mirror disk" that was selected is displayed in "Group Configuration Disk," and then click Next.
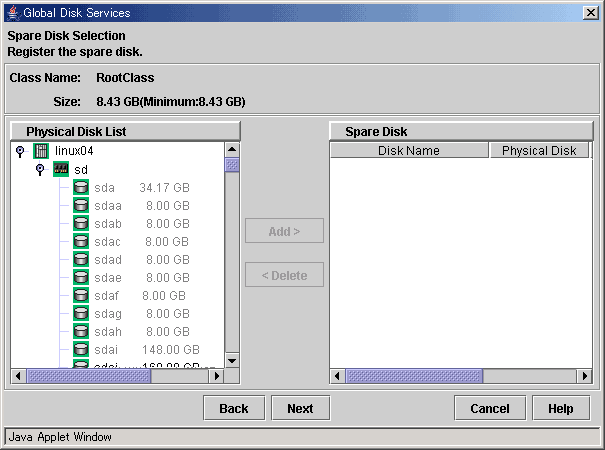
Select a Spare Disk ("Spare disk name" on the designsheet) from the "Physical Disk List," and click Add.
Check that the spare disk that was selected is registered to "Spare Disk," and then click Next.
If a spare disk is unnecessary, go to Step 6.
Check the system disk configuration.
Check the physical disk name and the mirror disk name, and then click Create.
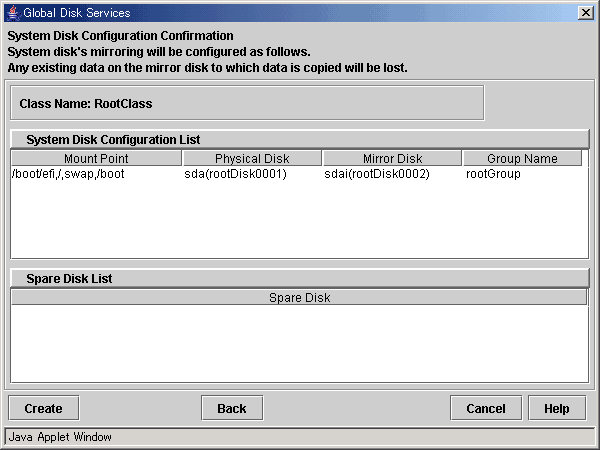
After creation of the system disk is completed, the following screen is displayed.
Check the screen contents, and then click OK.
Set up mirroring for the system disk of primecl02 on each node, and then, restart all the nodes.
