In order to configure mirroring for disks other than the system disk, use the following methods.
Using Automatic Configuration Wizard
Using the [Settings] menu
For details on operation using the [Settings] menu, see "5.2.3 Operating from the Settings Menu."
Automatic Configuration Wizard allows you to create a volume by simply clicking <Next>.
In order to ensure an environment which allows an application to continuously access data at the time of I/O adapter, controller or cable failure, Automatic Configuration Wizard mirrors disks connected to different I/O adapters.
When there is an add-on expansion mechanism within the expansion unit (Expansion File Unit or Expansion Disk Cabinet), expansion units are mirrored.
In order to ensure a safe mirroring environment, Automatic Configuration Wizard automatically creates one spare disk for every ten disks. For automatic configuration, make sure you have a minimum of three disks.
Note
Supported Disks
Disks that can be configured for mirroring with the Automatic Configuration Wizard are those disks whose physical disk names are in "cXtXdX" format. If all target disks are connected to one I/O adaptor, the Automatic Configuration Wizard cannot be used. There, perform configuration from the relevant configuration screen.
Note
Mirroring Expansion Units with Add-On Expansion Mechanism
When you are mirroring expansion units with add-on expansion mechanism, connect the two cables between one expansion unit and one I/O adapter in a server.
Note
Shared Disk Mirroring
Shared disks in cluster system cannot be mirrored using the automatic configuration feature. Perform configuration from the relevant configuration screen.
Note
System Disk Mirroring
System disk cannot be configured automatically. Instead, perform mirroring of the system disk as in "5.2.1 System Disk Settings."
To start Automatic Configuration Wizard, select [Automatic Configuration] in the [Settings] menu.
Figure 5.20 Automatic Configuration Environment Settings
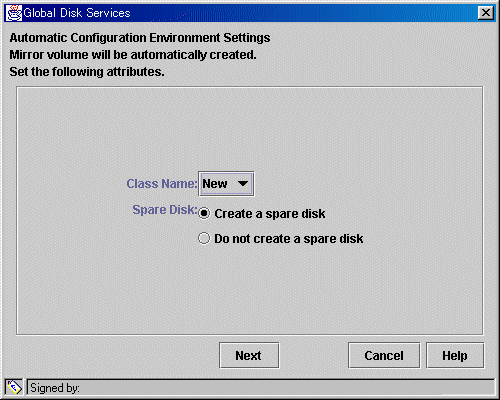
Selecting the Configuration Environment for Mirroring
Set the configuration environment in order to create a volume using the Automatic Configuration Wizard.
Selecting the [Class Name]
If you clicked <New> in the [Class Name] list, a new class will be created for the volume. If you are creating a volume within an existing class, select the appropriate class from the list. If no classes have been created, the only option available on the list will be <New>.
Selecting the [Spare Disk]
When creating a spare disk from the selected disk, select [Create a spare disk]. If a spare disk is unnecessary, select [Do not create a spare disk].
Click <Next>, and the message below appears.
Figure 5.21 Disk Selection
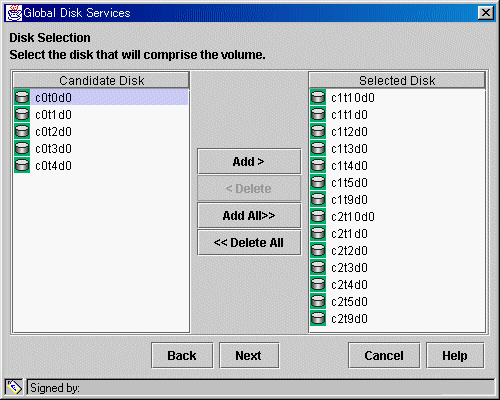
Selecting Disks to Mirror
Disks available for mirroring appear in [Selected Disk] field.
If there are disks you do not want to mirror, select the disk by clicking the icon, and click <Delete>. If there are disks you want to mirror in [Candidate Disk] field, select the disk by clicking the icon, and click <Add>.
When moving all disks in [Candidate Disk] field to [Selected Disk] field, click <Add All>.
When moving all disks in [Selected Disk] field to [Candidate Disk] field, click <Delete All>.
Click <Next>, and the message below appears.
Figure 5.22 Confirming Mirroring Configuration
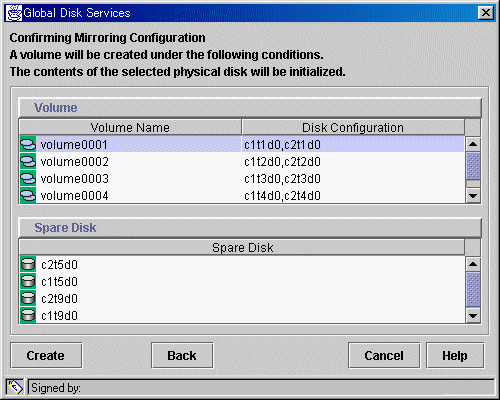
Confirming the Volume Configuration
GDS will automatically combine the disks selected in the previous screen and create a volume.
Volume name and its disk configuration, and the disk defined as spare disk will appear.
Click <Create> to continue.
Figure 5.23 Mirroring Configuration Complete
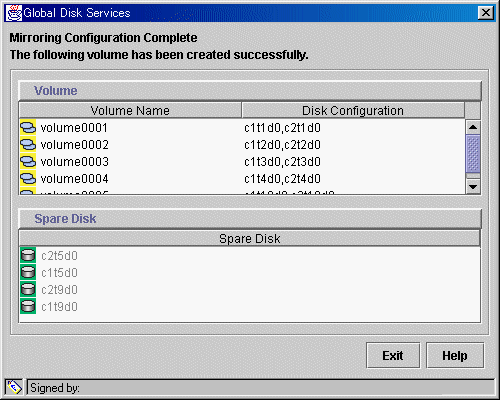
Confirm that the volume creation was successful, and click <Exit>.
Figure 5.24 Main Screen (after completing automatic configuration)
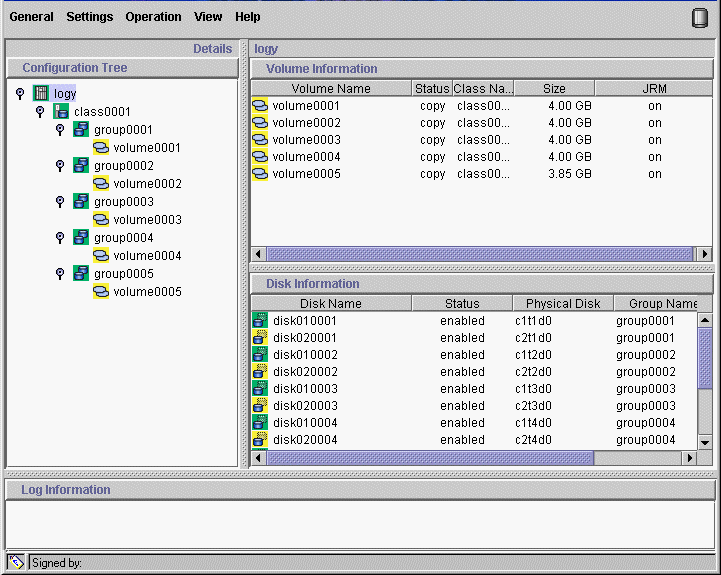
Volume information and disk information created using the Automatic Configuration Wizard will appear on the Main screen.