The following describes the procedure of using File Export Utility to export files or folders to a removable drive.
Note
Confirm the status of file
Do not access the file that is being exported through the export utility from another application. When the file in the export process is being accessed, an error may occur.
When decrypting the file in the export destination, the OS operation authority is required for encrypting files, and files cannot be decrypted without operation authority.
Note
When export to the folder with writing restriction is executed using the Export Utility, writing will not be performed, but the files will be placed into "%LOCALAPPDATA%\VirtualStore".
Example: C:\Users\User NameAppData\Local\VirtualStor
The procedure is as follows.
Start the File Export Utility window.
Add the file or folder to be exported with any of the following methods.
Use the menu of the File Export Utility window
Select Add file from the File menu to export a file.
Select Add folder from the File menu to export a folder.
The file selection window is displayed.
Select the file or folder to be exported and click the Open button.
Repeat a. and b. to export multiple files.
Drag and drop the file or folder to the File Export Utility window.
Note
When executing in Windows 7, Windows 8.1, Windows 10, Windows Server 2008, Windows Server 2012, and Windows Server 2016
If you right-click on Execute as Administrator when starting the File Export Utility, drag and drop cannot be performed. But with the administrator login, drag and drop can be performed from Execute as Administrator.
The File Export Utility window is displayed.
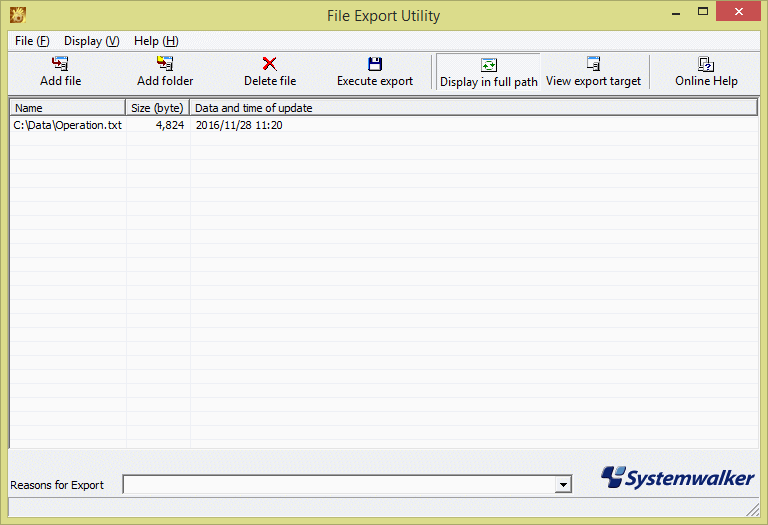
When folder export is selected, the total size of files under this folder will be displayed in Size.
When the input field of reasons for export is displayed, enter the reason.
Select Execute export from the File menu.
Depending on the policy settings, sometimes only removable disks and DVDs/CDs are displayed as options for the destination drive.
Click the OK button on the execution confirmation window.
The Select target for normal file export window is displayed.
Select the target to be exported, and click the OK button.
The completion window will be displayed after the file export has finished (the window indicating the executing operation will be displayed when the processing time is relatively long). Click the OK button.