Follow the steps below to install, to the smart device, the apk file of smart device CT distributed by the administrator. The example screens are from Android 4.1.
Installing
Open the distributed apk file and tap Install.

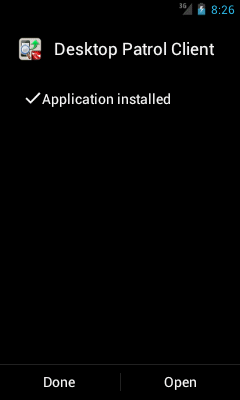
To start smart device CT after installation, tap Open. If you do not want to start smart device CT just yet, tap Finish.
Note
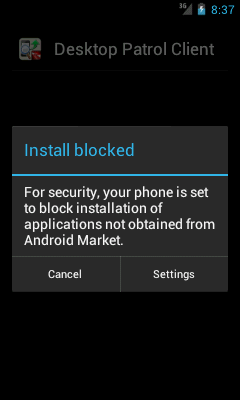
If a warning screen is displayed
If a warning screen is displayed during installation, you must change the settings and perform the installation again.
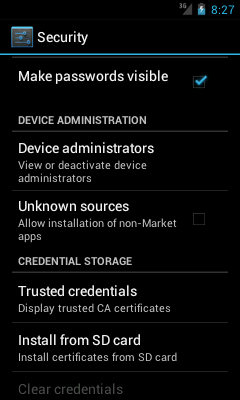
Tap Settings.
Select Unknown sources.
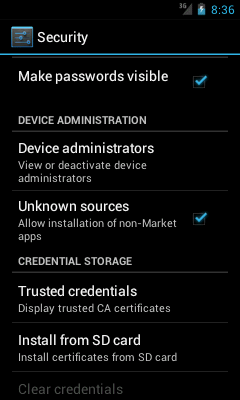
A confirmation dialog box will be displayed. Tap OK.
Perform installation again.
After installation is complete, open the settings screen and clear Unknown sources.
The Unknown sources setting depends on the version.
Android 3.0 to 3.2: Settings > Applications
Android 4.0 or later: Settings > Security
Setting
Start the installed smart device CT.
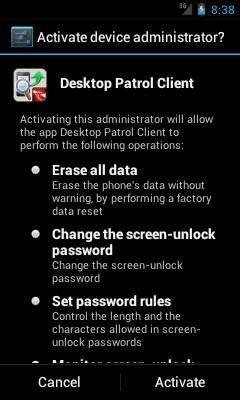
If the screen below is displayed when the installed smart device CT is started, tap (or click) Activate. After you have activated, this screen will not be displayed following startup.
After starting the installed smart device CT, tap (or click) the menu button to display the options menu. Then tap Settings.
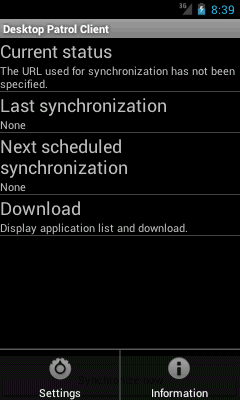
The setup screen will be displayed. Configure the following setting in accordance with the instructions from the administrator:
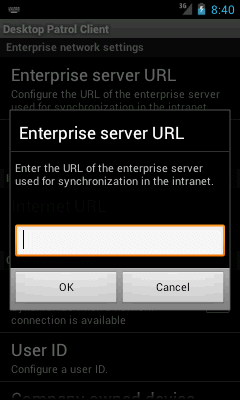
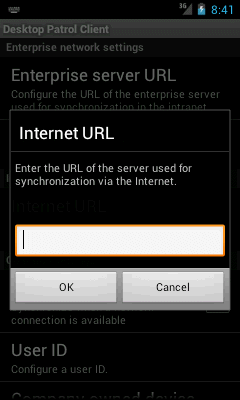
You must set Enterprise server URL or Internet URL.
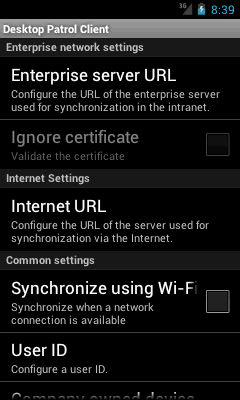
Enterprise network settings
Item | Description |
|---|---|
Enterprise server URL | Specify the URL of the enterprise server to be used for synchronization within the intranet.
Ask the administrator for the URL. Enter the URL and tap OK. If no URL is set, inventory information will not be synchronized in the enterprise network environment. |
Ignore certificate | Select this item when certificates will not be authenticated in the enterprise network. This option becomes available when you enter a URL beginning with "https://" for Enterprise server URL. By default, this item is not selected, so certificates will be authenticated. |
Internet settings
Item | Description |
|---|---|
Internet URL | Set the URL of the server to be used for synchronization via the Internet.
Ask the administrator for the URL. Enter the URL and tap OK. If no URL is set, inventory information will not be synchronized in the Internet environment. |
Common settings (optional settings)
Item | Description |
|---|---|
Synchronize using Wi-Fi connection | Select this item to synchronize inventory information only when the device is connected to a network by Wi-Fi. By default, this item is not selected, so inventory information will be synchronized when the device is connected to the network by Wi-Fi, 3G network, or other means. |
User ID | Register the user ID registered in user management of Systemwalker Desktop Patrol.
Registering the user ID enables you to identify, from the main menu, the smart device user and the department to which the user belongs. You can specify up to 20 halfwidth alphanumeric characters and the following symbols: - @ . _ Alphabetic characters are case-sensitive. If you omit the user ID, "MobileUser" is displayed as the user ID in smart device information referenced from the main menu. |
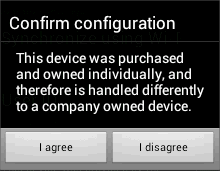
Company owned device | Select this item when using a company owned device. By default, this item is selected, so clear it if you are using a personal device. The confirmation screen shown below is displayed only when this item is cleared. Tap I agree if you are using a device you bought and own yourself.
|
Tap (or click) Back.
The first time you configure this setting, the Synchronize now? message will be displayed. To start synchronization immediately, tap Yes. To start synchronization the next time automatic synchronization is implemented, tap No.
Point
Timing of inventory information synchronization
Inventory information is automatically synchronized once a day, but you can also synchronize it at any time during operations.
Refer to "6.1.1 How to Synchronize Inventory Information" for details.