Set the software distribution target.
Create software Distribution Group
Create PC group for distribution
Connect the software group for distribution to the distribution target
The procedure is as follows.
Log on to the main menu, click Distribution, and then click Software Distribution.
The following window will be displayed.
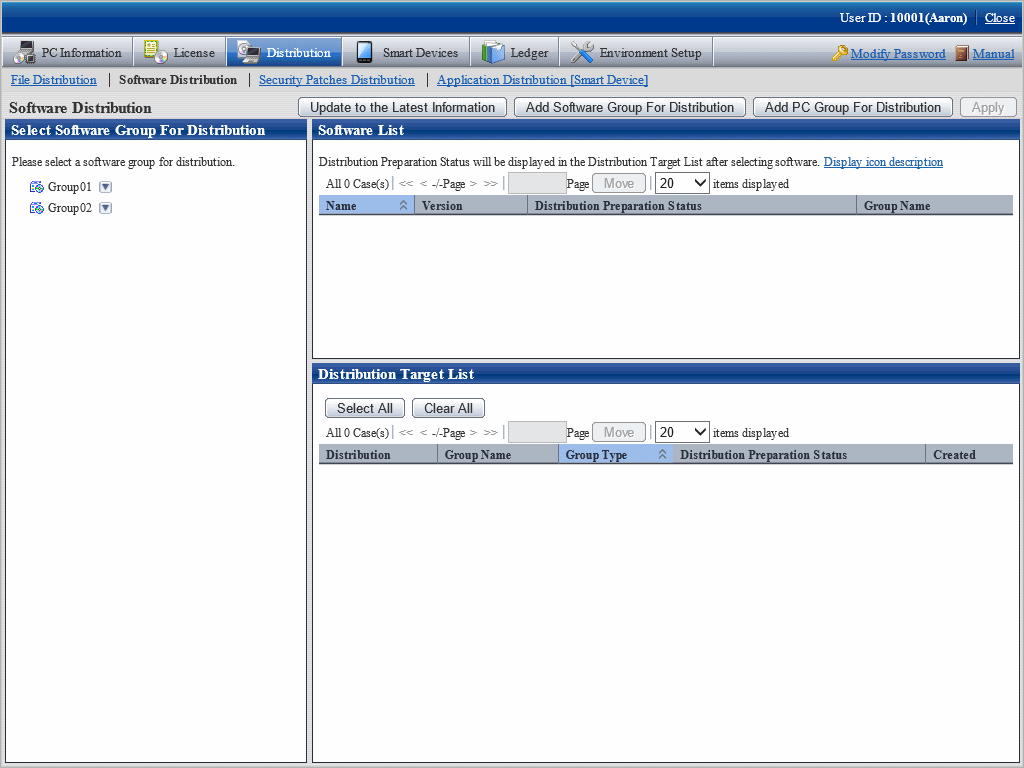
See below for definition of each button in the window.
Button name | Description |
|---|---|
Update to the Latest Information button | Update to the latest information of distribution preparation. |
Add Software Group For Distribution button | Create software group to be distributed. |
Add PC Group For Distribution button | Create PC group for distribution. |
Apply button | Save the message that is displayed currently. |
Add software group for distribution
Add software group for distribution.
The procedure is as follows.
Click Add Software Group For Distribution button in window of Software Distribution.
The following window will be displayed.
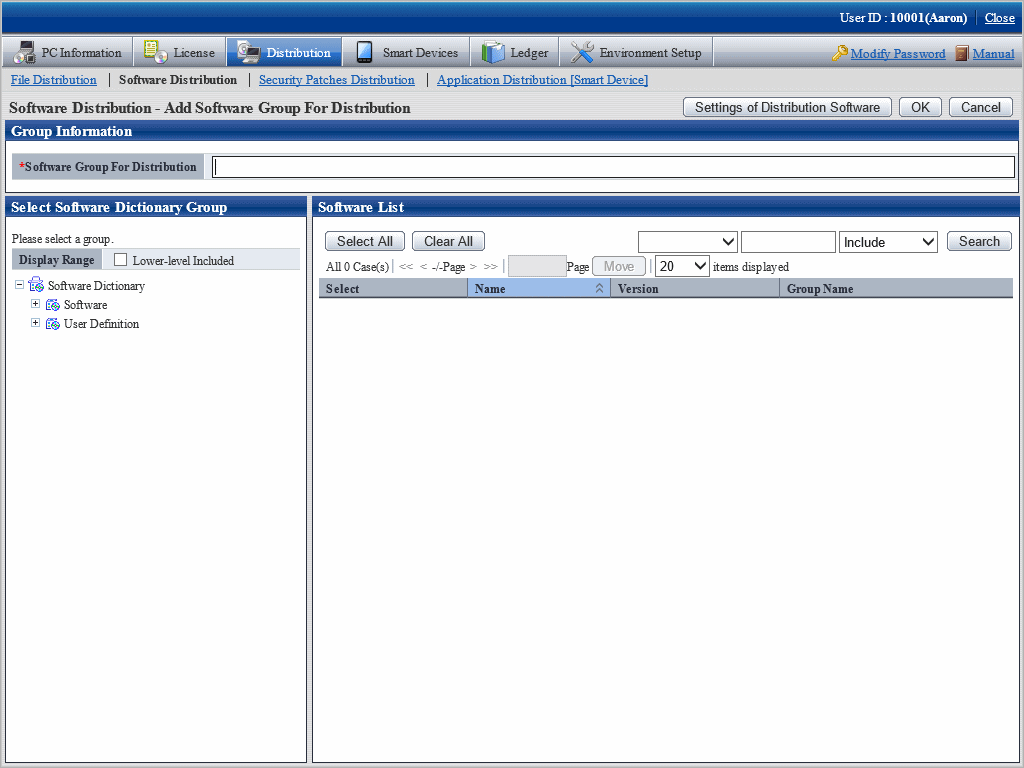
Input the following information.
Item | Description |
|---|---|
Software Group For Distribution | Specify the name of software group for distribution. Maximum entry of the group name shall be 30 multi-byte or 60 single-byte characters. The specified characters shall be alphanumeric characters and the following single-byte symbols. ("-" "@" "." "(" ")" "[" "]" "{" "}" "<" ">" ":" ";") |
Select software from the tree in the field on the left of the window.
List of software will be displayed in the field on the right of the window.
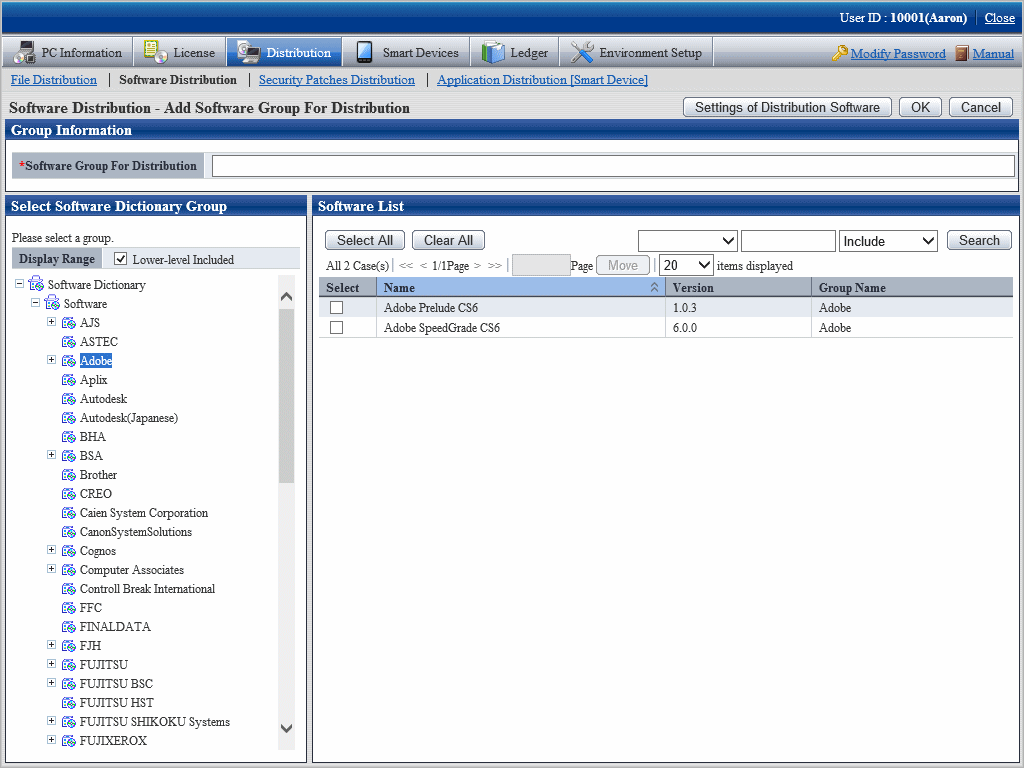
Select software in the software group to be distributed for log on, click the OK button.
Point
Modify and delete software group for distribution
After addition of name of the software group for distribution, take the following steps to modify and delete the software group for distribution.
After addition of name of the software group for distribution, the software group for distribution will be display in Select software group for distribution in bottom left corner in the window. Move the cursor to ![]() in the field on the right to the software group name for distribution, the options of Change and Delete will be displayed.
in the field on the right to the software group name for distribution, the options of Change and Delete will be displayed.
Modify: select this option to modify the name of the software group for distribution, or just modify and delete the software registered the software group for distribution.
Delete: select this option to delete the software group for distribution.
After the setting has finished, click the OK button to finish.
Add PC group for distribution
Select the PC of the software distribution target to perform group operations.
The procedure is as follows.
Click Add PC Group For Distribution in the Software Distribution window.
The following window will be displayed.
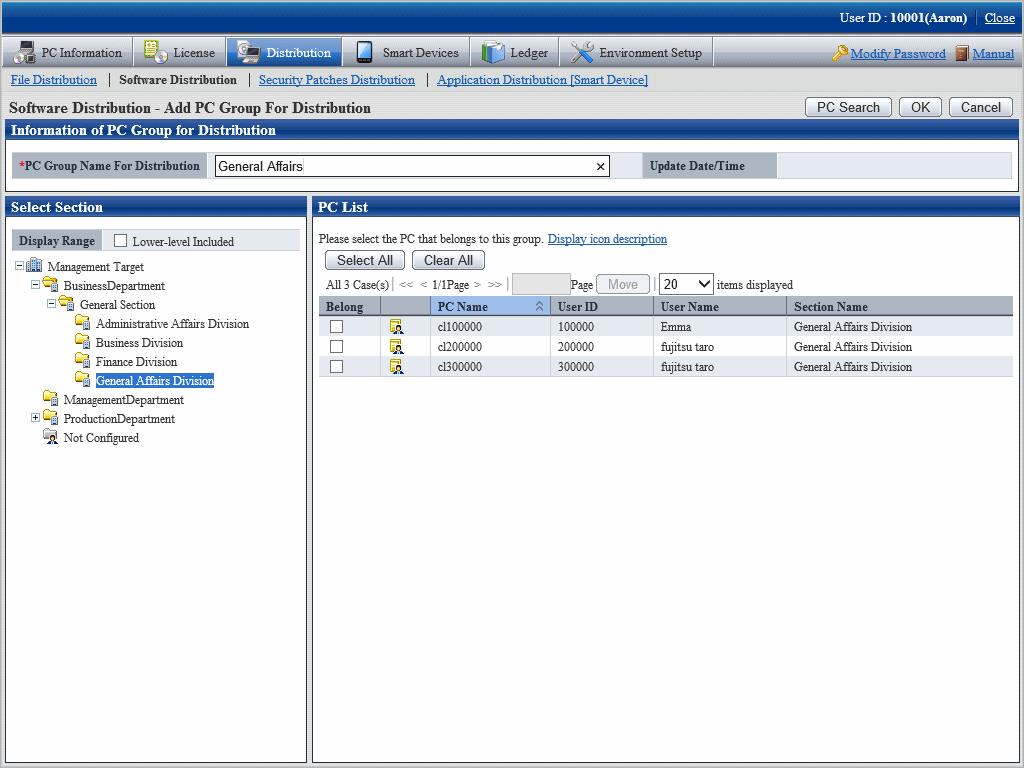
See below for definition of each button in the window.
Button name | Operation contents |
|---|---|
PC Search | For PC search. |
OK | Save setup of the PC group specified for distribution. |
Cancel | No storage of content, return to the previous window. |
Input information of PC group for distribution.
Item | Description |
|---|---|
PC Group Name For Distribution | Divide the PC for distribution in groups and specify a name to the group. Maximum entry of the group name shall be 30 multi-byte or 60 single-byte characters. The specified characters shall be alphanumeric characters and the following single-byte symbols. "-" "@" "." "(" ")" "[" "]" "{" "}" "<" ">" ":" ";" It cannot be omitted. |
Select the PC to be included in the PC group for distribution, click the OK button. But PC of CT command mode cannot be selected.
The group will be added.
Select name of the PC group for distribution from Distribution Target List to confirm the PC belongs to the PC group for distribution or change the setup content.
The following window will be displayed.
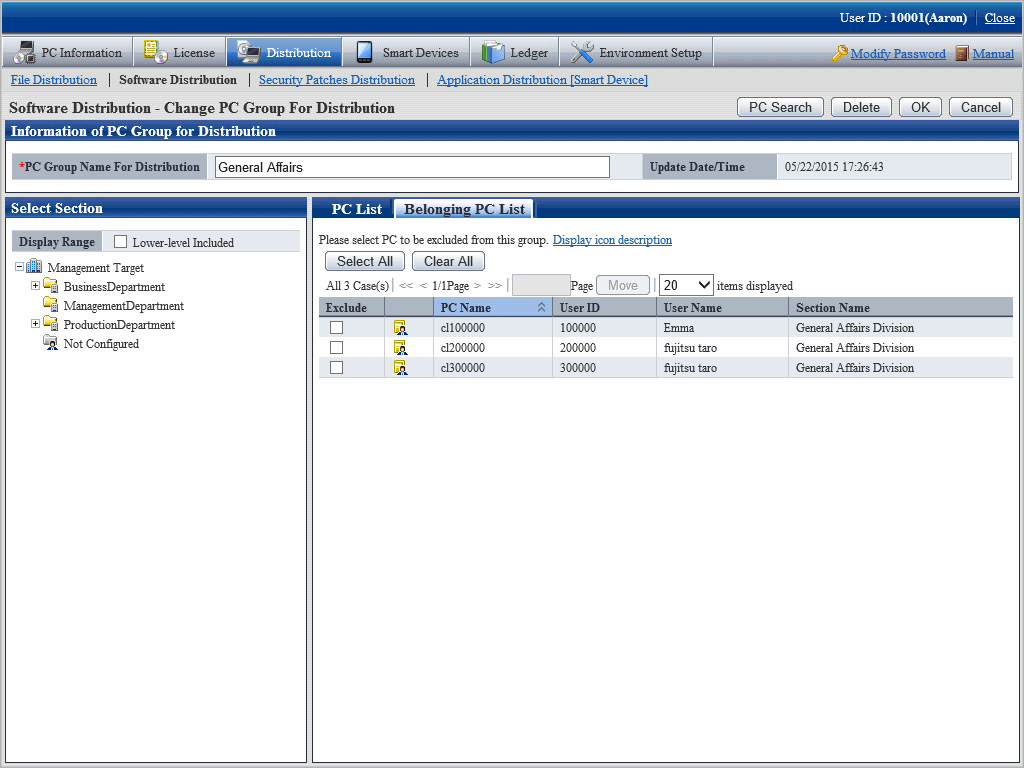
See below for definition of each button in the window.
Button name | Operation content |
|---|---|
PC Search | For PC search |
Delete | Delete the specified PC group for distribution |
OK | Save the setup of the PC group specified for distribution. |
Cancel | No storage of the setup content, return to the previous window. |
Change the setup content, click the OK button.
Connect the software suite for release to the release target
Select the software group to be distributed from the field on the left of the window of Software Distribution.
The following window will be displayed.

Select CS/DS or group to be distributed from Distribution Target List in the field on the right of the window.
See below for type definition of the distribution target.
Type | Description |
|---|---|
CS | Specify this item when releasing to CT connected under CS. |
DS | Specify this item when releasing to CT connected under DS. |
Policy group | Specify this item when releasing to PC registered the policy group. |
PC group for distribution | Specify this item when releasing to PC in the PC group logon for distribution. |
Click Apply button.