You are now ready to begin developing the graphical user interface. You should already be familiar with the PowerCOBOL 'drag and drop' development paradigm.
It is important that you follow the process defined below, but given PowerCOBOL's flexibility, you are welcome to move and resize fields on the fly and add any small enhancements you may want to experiment with.
Begin by opening the MainForm form (window) in the Form Editor. You do this by right clicking the mouse on MainForm in the left windowpane of the Project Manager window and selecting Open from the pop-up menu. An alternative way of opening the Form Editor on MainForm is to select the Object sub menu from the Edit pull down menu in the Project Manager and clicking on the Open option. Also note that if you check the Object Default Action option which is found in the design tab of the Project Manager's Options dialog window (found under the Tools pull down menu), you can simply double-click on the name of a form to open it up in the Form Editor.
When MainForm is opened for the first time in the Form Editor, it should appear as follows:
Figure 8.8 The Form Editor
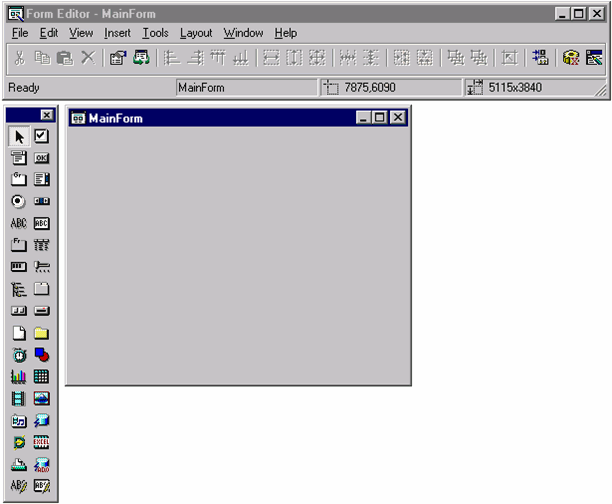
MainForm is the main and only window that this application will use. You will thus place controls on MainForm using the drag and drop programming paradigm, and insert event procedures as needed.
The first control you will add to the form will be the ODBC support.
Find the DB Access Control icon ![]() in the Toolbox palette on the left and click on it with the left mouse button. Move the mouse to the upper left corner of the form and click the left mouse button again to paste it on the form as shown in the following example:
in the Toolbox palette on the left and click on it with the left mouse button. Move the mouse to the upper left corner of the form and click the left mouse button again to paste it on the form as shown in the following example:
Figure 8.9 The form after adding ODBC Support
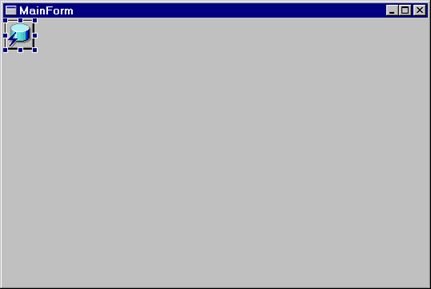
It does not matter where you actually paste the DB Access Control on the form. It will not be shown as part of the form when the application is executed. Instead, the icon shown on the form is to illustrate that ODBC support is being built into this application.
Now you need to customize the ODBC support for this specific application.
Right-click the mouse on the DB Access Control icon on the form and select Properties from the pop-up menu.
This will bring up the DB Access Control Properties dialog box as follows:
Figure 8.10 The DB Access Control Properties dialog box
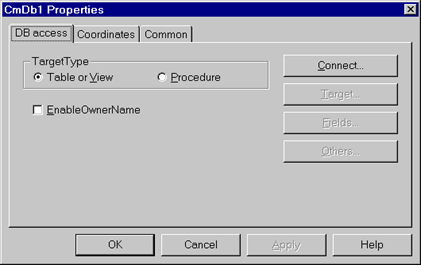
You will note that PowerCOBOL has assigned a name of CmDb1 to this control by default.
Also note the TargetType property that defaults to Table or View. You may alternatively access SQL stored procedures in database systems that support such via this property. For now, however, leave the TargetType property set to Table or View.
You will now connect to the external data source name you previously defined under ODBC Data Sources at the beginning of this chapter. Click on the Connect button in the dialog box.
The Select Data Source dialog box is displayed. Select the Machine Data Source tab and highlight the MYODBC data source name as follows:
Figure 8.11 The Select Data Source dialog box
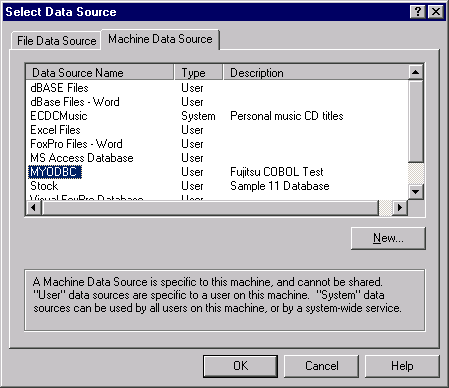
Note that you may actually define a new ODBC data source from here should you desire. In this case, you should have created an ODBC data source prior to accessing dialog window.
Click on the OK button. You have now connected your application with the specific ODBC Source driver that will access the "Test.mdb" database.
The DB Access Control Properties dialog box is redisplayed. Note that the Target button has now been enabled.
The "Test.mdb" database contains a single table named "Employee". Relational databases may contain multiple tables and/or custom views.
Click on the Target button to bring up the Select Table/View dialog box to specify the table(s) and/or views you wish to access from this application:
Figure 8.12 The Select Table/View dialog box
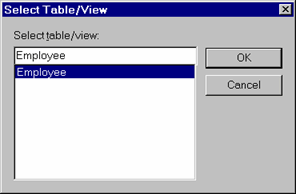
In this case, there is only one table available (Employee). Select it and click on the OK button to return to the DB Access Control Properties dialog box.
Note that the Fields button has now been enabled. Click on the Fields button. The Select Field dialog box is displayed. It shows you all of the individual database fields contained in the "Employee" table.
In some applications, you may not need to access all of the database fields. In this application, however, you will access all three fields, so you need to specify this.
If you want to add all of the database fields to the Selected fields list, as in this example, you can simply click on the >> button without selecting any individual field name first. You may alternatively select each field in the Field list box individually and then click on the > button to add it to the Selected fields list box one at a time.
When you have completed adding all three fields to the Selected fields list, the dialog box should appear as follows:
Figure 8.13 The Select Field dialog box with all fields selected
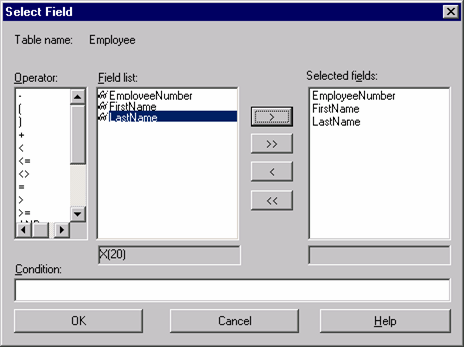
Do not select any of the operator options at this time. Click on the OK button to return to the DB Access Control Properties dialog box. The Others button has been enabled. Click on the Others button.
This brings up a dialog box containing other options for this ODBC connection.
Un-check the Read only check box. Now move the mouse to the Selected fields list box and double-click on "EmployeeNumber".
A small key icon will appear to the left of this field name, indicating that this will be the primary key field. Click on the OK button to close this dialog box and then click OK one more time to close the DB Access Control Properties dialog box.
You have completed the ODBC database definition and configuration phase of the project.