The PowerCOBOL development environment is a graphical user interface with standard visual components. The development environment is centered on the PowerCOBOL Project Manager.
Figure 2.1 The PowerCOBOL Project Manager
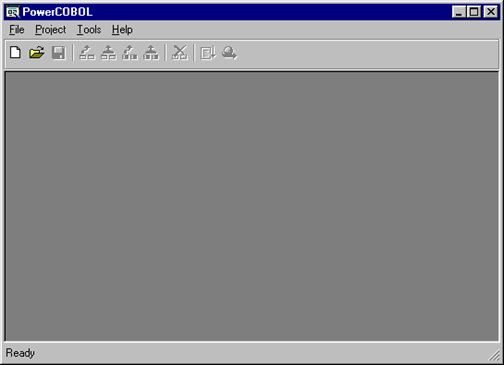
From within the PowerCOBOL Project Manager, you may open an existing application or create a new application using one of the supplied application templates.
All details about an application are kept and managed in a special project file (.ppj file). Projects created with the previous release of PowerCOBOL (.prj files) are upwardly compatible with this version of PowerCOBOL and may be loaded into the Project Manager as well.
When you create a new application within the PowerCOBOL Project Manager (by selecting New from the File menu), you are presented with the New Project wizard dialog box as follows:
Figure 2.2 The New Project wizard dialog box
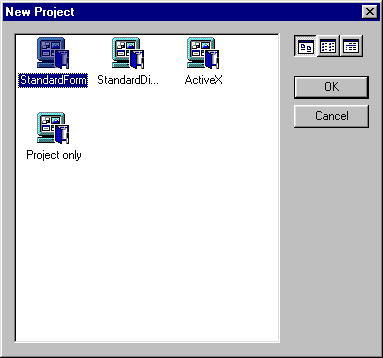
The New Project dialog box displays the project templates available to choose from. You may change the display format by clicking on any of the icons in the upper right portion of this dialog box.
In the example above, three project templates are available:
Standard Form - this creates a simple project containing a single module and a single form. The form created is entirely blank, and contains no controls.
Standard Dialog - this creates a simple project with a single module and a single form. Additionally, the form will have an "OK" and "Cancel" command button placed upon it. Both command buttons will additionally have a simple click event procedure created for it with a line of code deactivating it when clicked on.
ActiveX - this creates a project for an ActiveX control. It defines a module named "MyActiveX" and a form named "Control1". The scripting language becomes OO COBOL.
Project Only - this creates an empty project definition. The new project contains no objects such as modules or forms.
Once you create a new project or open an existing project, the Project Manager displays the application's components and their current properties as follows:
Figure 2.3 An application view in the Project Manager window of a Standard Form project created
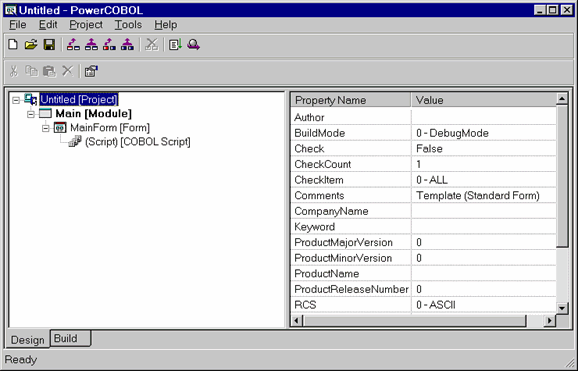
NOTE: When a newly created or opened application is initially displayed in the Project Manager window, it is not expanded to show all levels of detail. You can actually set an option to tell the Project Manager what level of expansion you would like by default when a project is initially loaded by selecting the Design tab from the Tools menu's Options option. You can manually expand the view to show all levels of detail by right clicking the mouse on the project name and selecting Expand All from the pop-up menu. This shows all of the project's current application objects.
You control various development activities from the Project Manager window. If you highlight an application component in the left windowpane by selecting it, all of the current properties associated with it will be displayed in the right windowpane.
You can change these properties by clicking on them and typing new values or in other cases selecting values from a predefined list.
Also note that while many options are available from the various Project Manager pull down menus, you can access these options and many others by simply right clicking the mouse on a project component in the tree view and selecting one of the available options from the context menu that will pop up.