Sample 1 demonstrates using the ACCEPT/DISPLAY function to input and output data. Refer to the “NetCOBOL User’s Guide” for details on how to use the ACCEPT/DISPLAY statements.
Function
Inputs an alphabetic character (lowercase character) from the console window, and outputs a word beginning with the input alphabetic character to the console window.
Files Included in Sample 1
SAMPLE1.COB (COBOL source program)
SAMPLE01. PRJ (COBOL project file)
SAMPLE01. CBI (COBOL compilation option file)
COBOL Statements Used
ACCEPT, DISPLAY, EXIT, IF, and PERFORM statements are used.
Building/Rebuilding the Program
Project manager's build function is used to create the executable program.
In the following screen snapshots, the sample program was installed to C:\NetCOBOL. Your installation folder may be different.
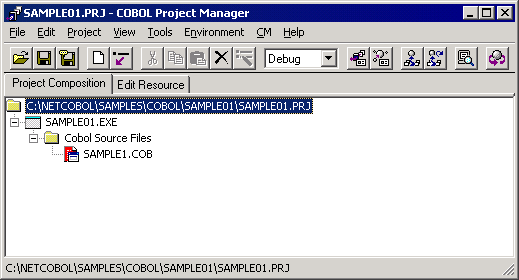
The project manager is started, project file "SAMPLE01.PRJ" is opened.
The project file is selected, and "Compiler options" is selected from "Project"- "Options" menu.
The "Compiler options" dialog is displayed.
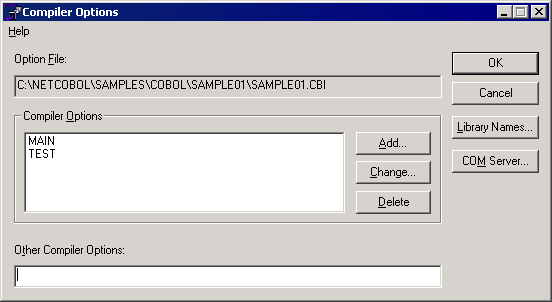
Confirm compiler option TEST is specified. After confirming the information, click the OK button.
You are now returned to the Project Manager window.
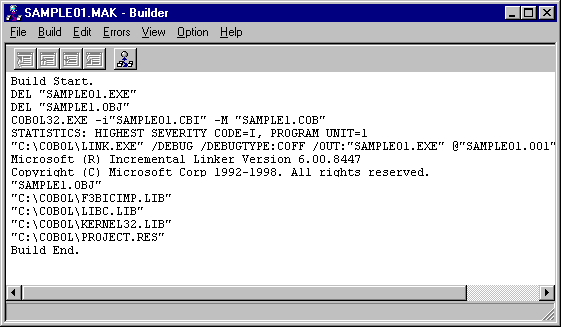
Select "Build" from Project Manager's "Project" menu or click on the Build button in the Project Manager toolbar.
After the build terminates, check that SAMPLE01.EXE is created.
Note
If the sample has already been built you will just see the “Build Start” and “Build End” messages.
The MAIN compile option is needed to indicate the main program in a NetCOBOL application run-unit. In COBOL Project Manager you select Main - Window or Main - Console from the pop-up menu when the COBOL source program is selected. All sample programs have the appropriate program set as the main program.
Debugging the Program
These instructions demonstrate starting the debugger, stepping through a program, changing a data item, setting and running to a breakpoint.
To start Sample 1 using the interactive debugger, do the following:
In COBOL Project Manager, from the Project menu select Debug.
The debugger starts and displays the Start Debugging dialog:
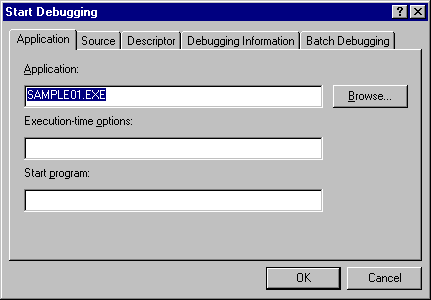
Click on the OK button to enter the COBOL Debugger window.
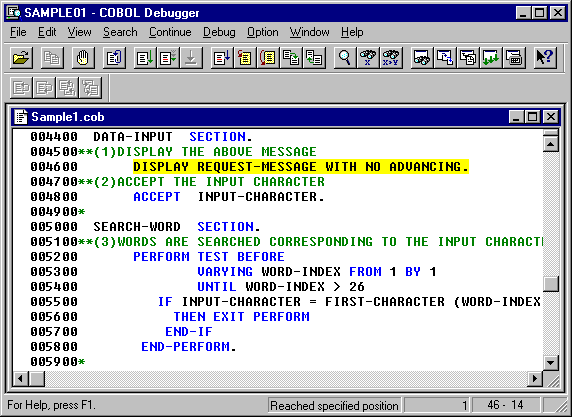
Step through the program.
The program automatically positions at the first executable statement (Line 46).
Select Step Into, from the Toolbar or press the F8 key to step (advance) to the next executable statement (Line 48). Step again to execute the Accept statement on Line 48.
Note
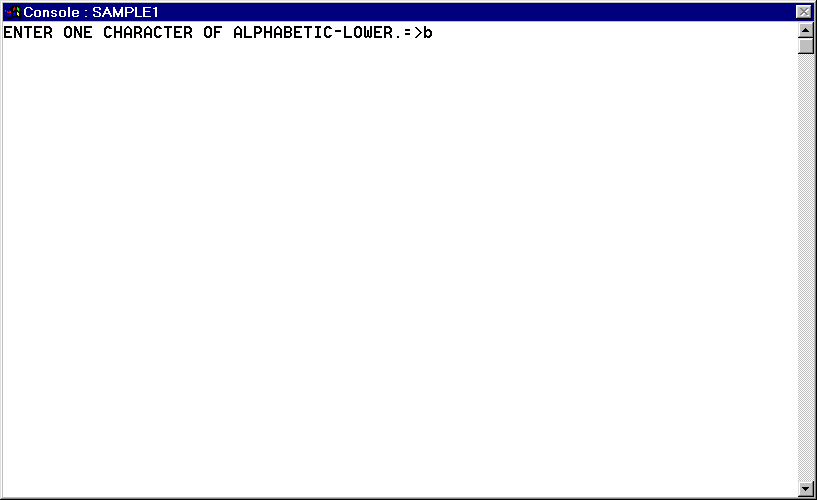
The Accept statement requires user input.
Input the data item (a letter of the alphabet).
Make the console window active.
Note
The console window may be hidden behind the COBOL Debugger window.
Type in any lowercase alphabetic character and then press the ENTER key. The debugger automatically returns to the next executable statement (Line 52).
Change the data name (input-character) to “A”.
Move the cursor to Line 48, inside the data name INPUT-CHARACTER. Click on the magnifying glass in the toolbar or select Data from the Debug menu. Alternatively, you can click on the right mouse button to select Data in the popup menu. The Data dialog box is displayed.
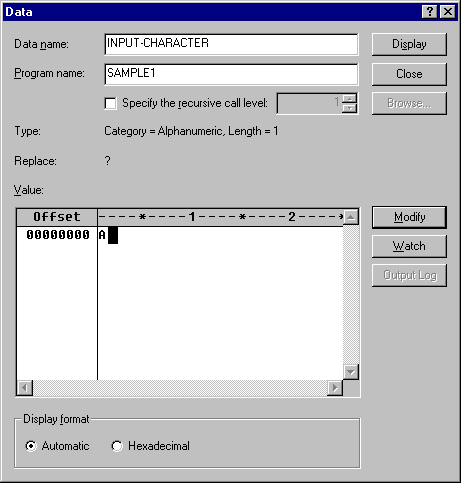
Change the value of the data in the data value area and click on the Modify button. Click on the Close button to exit the Data dialog box. (Answer “Yes” to save the changed data.)
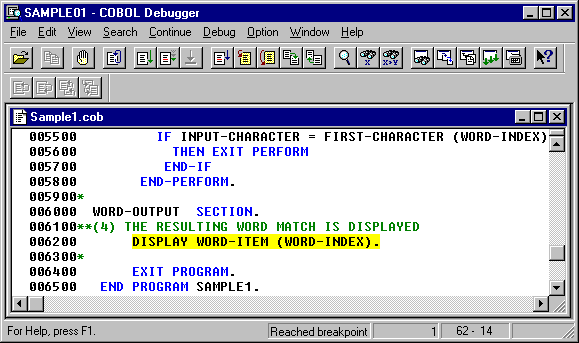
6. Specify a breakpoint.
Move the cursor to Line 62, click on the right mouse button and select Set Breakpoint from the pop-up menu.
Note that the statement changes color when a breakpoint has been applied.
To delete a breakpoint, right click on the line containing the breakpoint and select Delete Breakpoint to Cursor from the pop-up menu. You can also use the Breakpoint dialog box that is displayed by selecting Breakpoint from the Debug menu. Highlight the breakpoint you want to delete, click on the Delete button, and then click on the Close button to exit the Breakpoint dialog box.
Note
You can delete more than one breakpoint at a time by highlighting multiple items in the Breakpoint dialog box and clicking on the Delete button.
Execute the program up to the breakpoint.
Select Go in the Continue menu to execute the program to the breakpoint. Alternatively, you can press the F5 key. The program stops at Line 62.
Select Go or press the F5 key again to complete the debugging session.
To exit the Debugger, select Exit from the File menu.