Creating an ODBC data source is a simple and straightforward process. You first check that you have a 32 bit ODBC manager installed, then use the Data Source Administrator to create the ODBC data source. The following topics take you through these steps.
Checking for a 32 Bit ODBC Manager
To check for a 32 bit ODBC manager, you access the Windows Control Panel by clicking on the Windows Start button, moving the mouse over the Settings option and left clicking on the Control Panel option. Then you access Administrative Tools by clicking Administrative Tools icon on Windows Control Panel. Look in your Administrative Tools and ensure that you have a Data Sources (ODBC) icon as shown in Figure below:
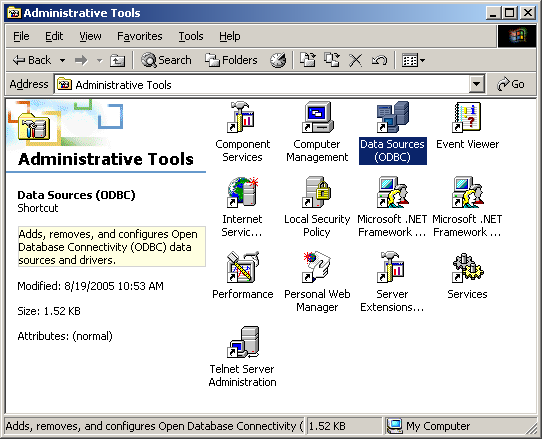
If you do not have Data Sources (ODBC) installed on your Windows machine, check with your software administrator about obtaining it and installing it properly.
An Overview of the ODBC Data Source Administrator
Double click on the Data Sources (ODBC) icon to bring up the ODBC Data Source Administrator as shown in Figure.
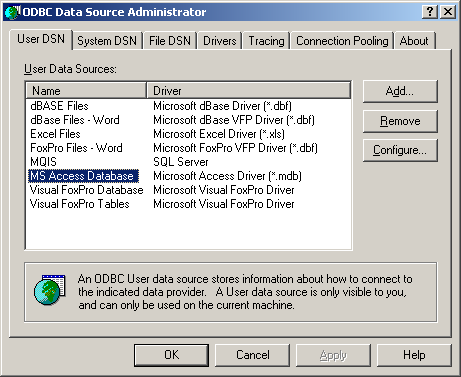
Note that your Data Source Administrator may appear differently depending on the Windows operating system that you are running and the version of ODBC you have installed.
There are three tabs in this window for accessing User DSN’s, System DSN’s, and File DSN’s.
A User DSN (Data Source Name) will only be visible to the same User ID who was logged onto the current machine and previously created the DSN. For example, if you log onto your Windows machine with a user ID of “Fred” create a new ODBC User DSN, log off and log back on as “James”, you will not see or have access to the just-created User DSN.
If you had instead logged on as Fred and created a System DSN, any subsequent user who logged onto the same machine, regardless of their user ID would both see and be able to access the newly created DSN.
While User and System DSN’s are specific to the current machine only, File DSN’s may be shared by other users who have the same ODBC drivers installed on their machines.
You can create ODBC DSN’s for any COBOL application using any of these three tabs, but remember the ramifications if you change user ID’s or wish to export the DSN to another machine.
Prior to creating a new DSN, you should click on the Drivers tab and ensure the ODBC database driver for the actual type of database you wish to access is installed. In the example below, we will set up a new DSN for connecting to a Microsoft SQL Server database. Note in the Drivers panel shown in Figure 4.3 below that a SQL Server driver is indeed installed as required.
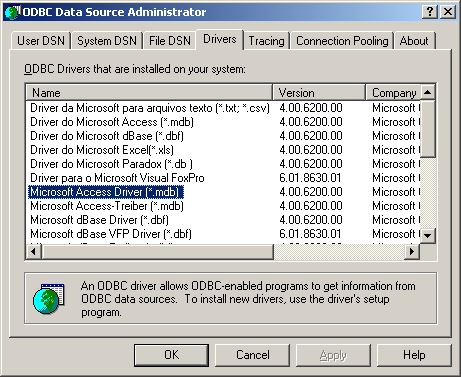
If your system does not contain the required ODBC driver for the type of SQL database system you wish to access, check with your SQL database administrator about obtaining and installing the current driver.
Once you are satisfied that you have a proper driver installed, click back on one of the three DSN tabs.
Creating a Data Source Name (DSN)
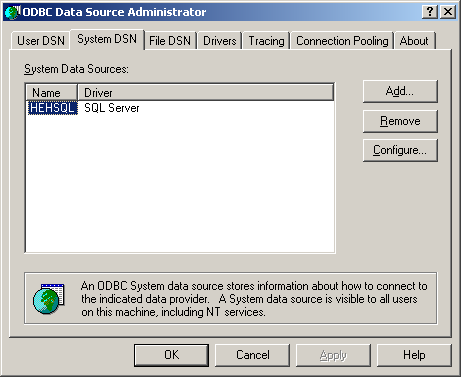
In the example below, a new System DSN will be created. The System DSN tab appears as shown in Figure.
To create a new ODBC data source:
Click on the Add button. A dialog box appears as shown in Figure.
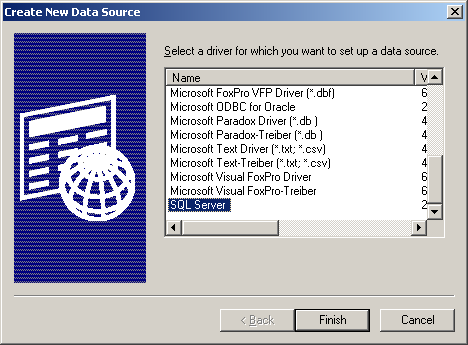
Move down the list of available ODBC drivers and select the one for which you wish to create the ODBC data source (in this example we will pick SQL Server).
Click on the Finish button. A dialog box appears as shown in Figure.
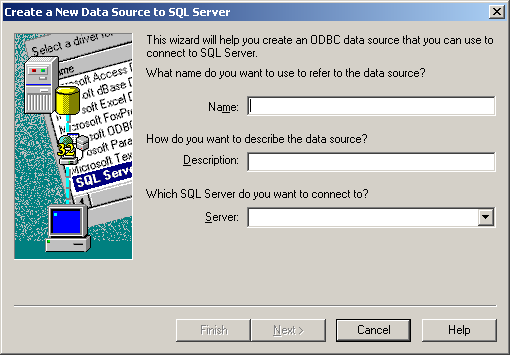
In the Name field, enter the name you wish to use to access this DSN. In this example, we will use “MySQL”.
In the Description field (which is optional), enter a meaningful description.
In the Server field, you can enter “(local)” if the database system resides on the same system you are developing your application on, or enter the name of any valid database server on your network. In this example, we will enter “(local)” to indicate that the SQL Server resides on the same server as the application being developed as shown in Figure.
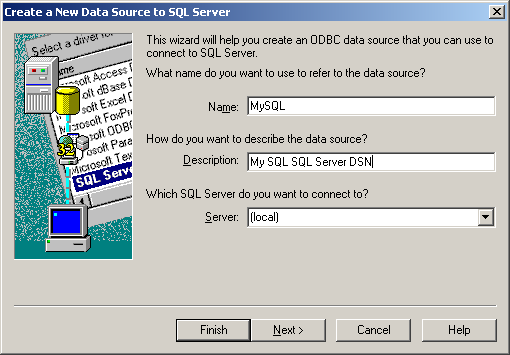
Now click on the Next button to bring up the dialog box shown in Figure.
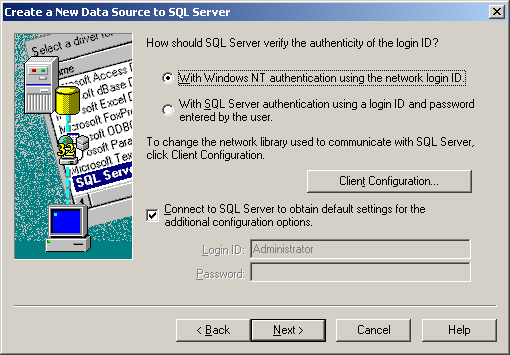
This is an important step in the process regarding security and user privileges.
The default for this is to login to the SQL Server you have previously specified using your Windows user ID and password (With Windows 2000 authentication using the network login ID).
The second option is “With SQL Server authentication using a login ID and Password entered by the user”. If you wish to have the user of this data source log in to SQL Server directly, you should select this second option. If you do so, you will be able to specify a Login ID and Password. In this example, we will do this and change the User ID to “sa” and leave the password blank.
Note that the Client Configuration button is for advanced users and will allow you to check certain driver information and to change the default network protocol to be used. You generally should not have to use this facility.
Once you have changed the authenticity option and altered the User ID and Password, click on the next button.
Because we did not change the selection for the “Connect to SQL Server to obtain default settings for the additional configuration options” checkbox, the ODBC DSN setup process will connect to SQL Server and allow us to specify some additional information. A dialog box appears as shown in Figure.
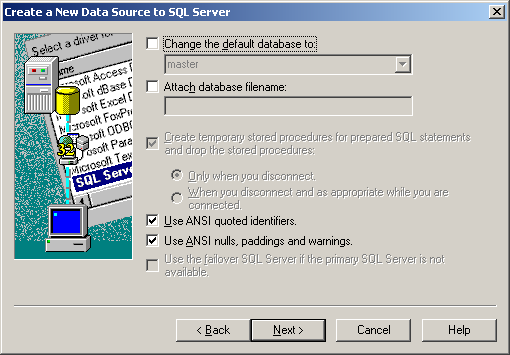
This dialog box allows you to change certain installation specific options, and to specify how to create and deal with temporary stored procedures. It also allows you to change the default database to be accessed. In this case, we will change the default database to be accessed to the Pubs database.
Select the check box “Change the default database to:”.
Select the Pubs database from the dropdown list that is enabled.
Click on the Next button and a subsequent dialog box appears as shown in Figure.
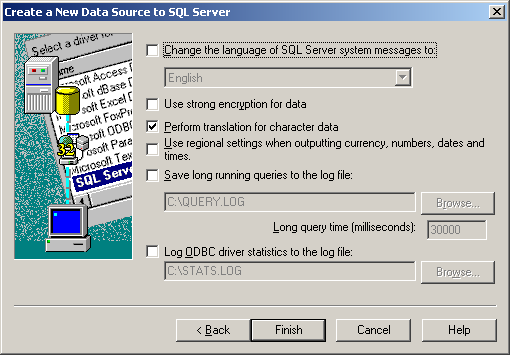
Once again some implementation specific options are made available to you.
This dialog box allows you to turn on some tracing options and to specify where you want the trace information to be output.
The “Save long running queries to the log file:” option allows you to identify long running queries so that you may examine them later. This is generally used for performance tuning.
“Log ODBC driver statistics to the log file:” option allows you to have ODBC statistical information recorded at run time. This can be useful in debugging ODBC specific problems. You may also turn a tracing option on or off at any time directly in the main ODBC Data Source Administrator window under the Tracing tab.
When you have finished with the configuration of the new ODBC DSN, you should click on the Finish button.
You will be presented with a dialog box containing an overview of the information associated with the new ODBC DSN you’ve just created as shown in Figure. More importantly, there is a Test Data Source button available. Note that some versions of the ODBC software do not provide this option, so don’t be alarmed if you do not have it.
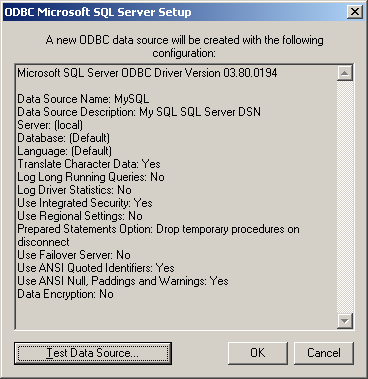
If you have it available, go ahead and click on the Test Data Source button. This connects to the SQL Server specified and tries out the data source. If it tests correctly, you will be presented with the dialog box shown in Figure.

If you do not have the Test Data Source option available in your version of ODBC, you can use a generic query tool such as Microsoft’s Query (MS Query) to quickly try out a new data source.
Once you have successfully set up a new ODBC DSN for your NetCOBOL application, you are ready to set up the NetCOBOL specific runtime configuration.