It is possible to set the print output items for the job net history and then print it.
Procedure
Acquiring the job net history
Selecting a print type displays the Obtain Job Net History window. Specify conditions in the Obtain Job Net History window, then click OK.
Figure 9.22 Obtain Job Net History window
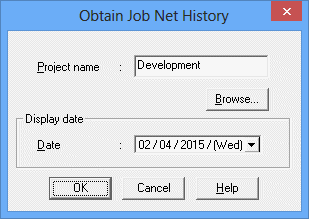
Specifies the project to output. When omitted, all the projects will be output.
Displays the Browse Registration Info window. For details, see "Displaying the Browse Registration Info window" in "Displaying the Browse Registration Info window."
Specifies the date to output.
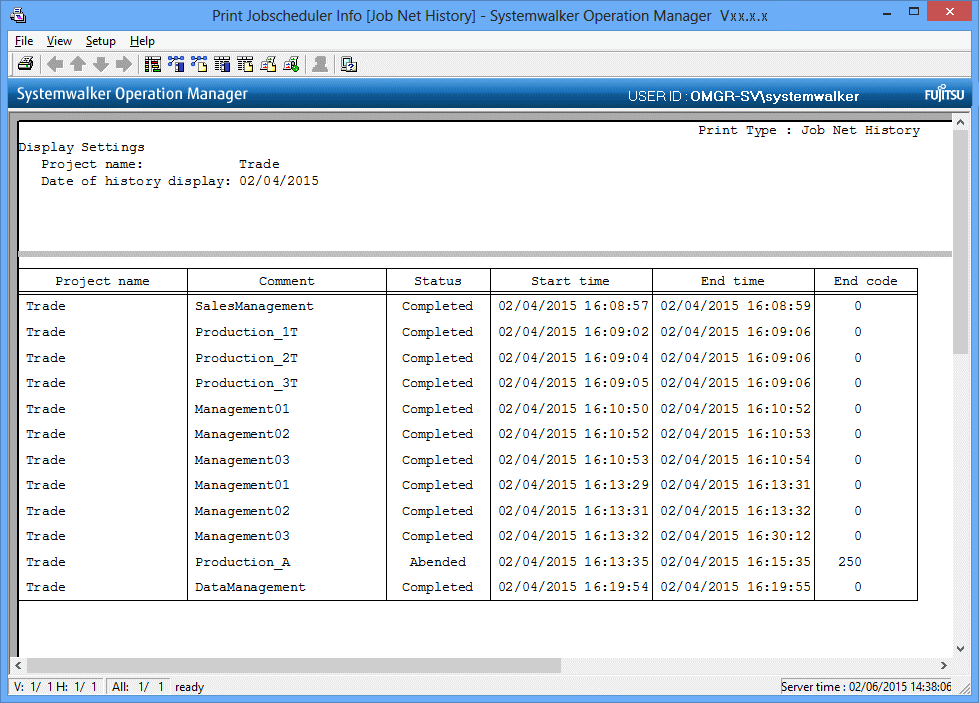
The Print Jobscheduler Info window displays a print image of the job net history.
Figure 9.23 Print Jobscheduler Info window (job net history)
Setting print items
Specify the print items as necessary. Select Print Items from the Setup menu in the Print Jobscheduler Info window. Note that the additional information displayed in the Job Net History window is not printed.
Specify the output items in the Job net history sheet of the Specify Print Items window, then click OK. The job net history print image in the Print Jobscheduler Info window will be refreshed according to the specified print items.
Figure 9.24 Specify Print Items window - Job net history sheet
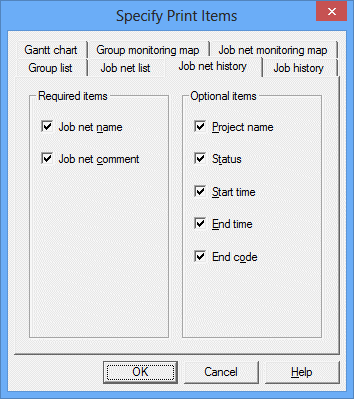
Selects whether to output the job net name and the job net comment. Select one or more items.
Selects the output items (Project name, Status, Start time, End time, End code) to be displayed in the job net history.
Printing
After setting up the print output contents, select Print from the File menu in the Print Jobscheduler Info window. The contents displayed in the Preview area will be printed by the printer connected to the client machine.