Set up a Schedule Definition for a process definition that has been published.
The procedure for creating a Schedule Definition from a Web console is shown below.
This operation is performed by an Operation Administrator or an operator.
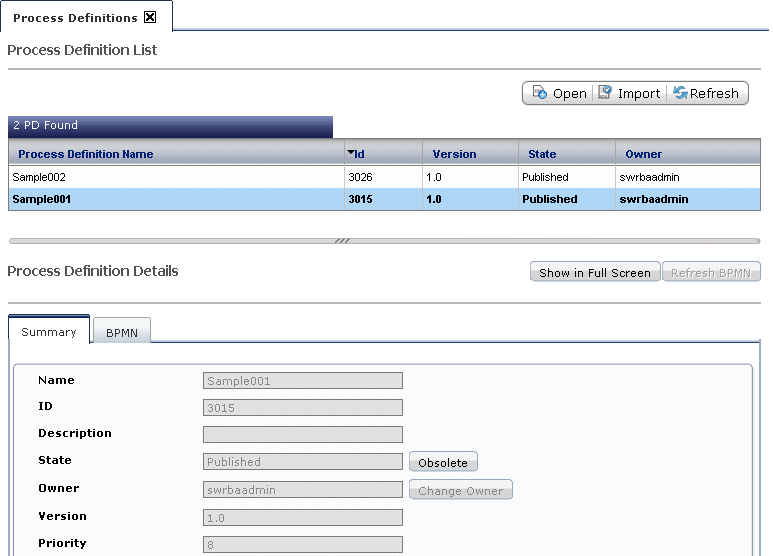
Click the Process Definition submenu of the Process Management tab and then select from the list panel a process definition for setting up a Schedule Definition.
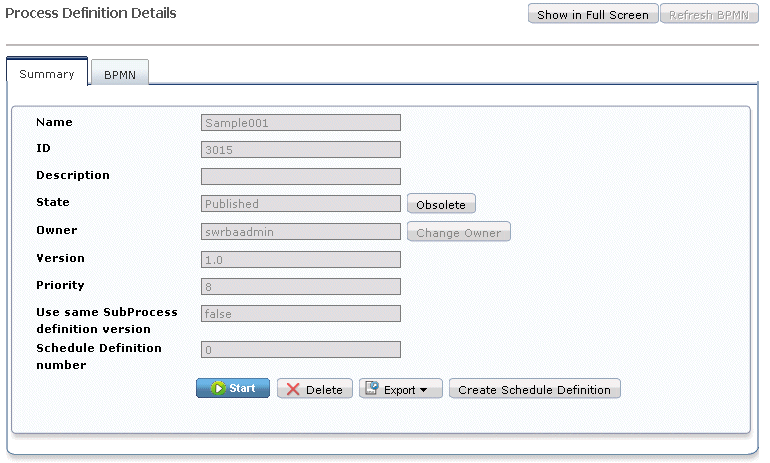
Click the Create Schedule Definition button from the Summary tab of process definition details, and create a new Schedule Definition.
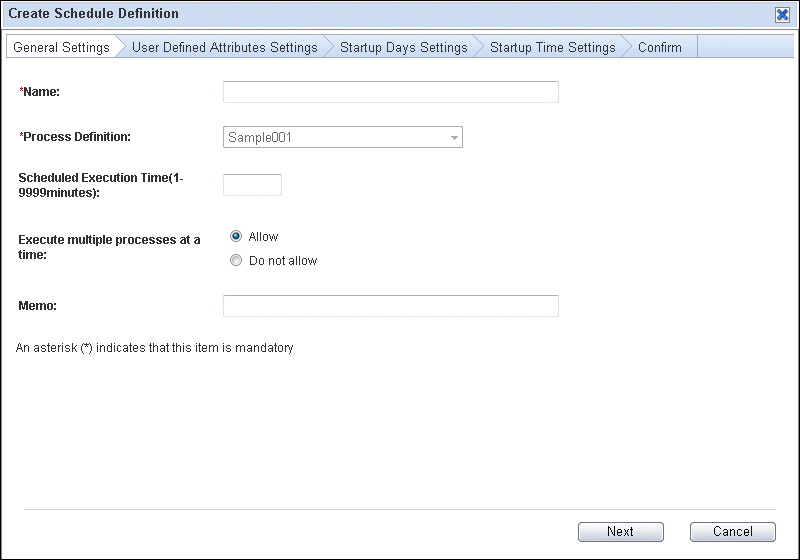
You can enter the following values in the General Settings panel. After entering the values, click the Next button.
Item | Input value |
|---|---|
Name | Name of the Schedule Definition (Mandatory) Specify this in up to 50 bytes. The characters listed below, blank spaces, and user-defined characters cannot be included. In addition, a hash (#) cannot be specified as the first character. ? \ * " < > | / : ; , ' . |
Process Definition | Name of the process definition. (Mandatory) |
Scheduled Execution Time | Expected execution time of the process (1 to 9999 minutes) (Optional) |
Execute multiple processes at a time(*1)(*2)(*3)(*4) | Choose either Allow or Do not allow for the simultaneous execution of process definition by Schedule Definition. |
Memo | Description of Schedule Definition (optional) Specify a maximum of 128 bytes. Spaces, and user-defined characters cannot be included. |
Schedule Patterns are set up with UDAS. To avoid simultaneous execution of process instances with the same set of UDAs select Do not allow. If choosing Do not allow, the simultaneous execution in the following cases will be inhibited:
Automatic execution according to Schedule Definition
Direct start from Schedule Definition details (operation) window
If a start from a process definition is performed by setting user-defined attributes, processes will be executed simultaneously even if Do not allow is selected.
In case of Do not allow, during the execution of the process instance you cannot perform the following actions on Schedule Definition, you have to wait for the process instance to finish.
Change the state (On Hold, Disable), immediately start, edit or delete the Schedule Definition.
In case of Allow, during the simultaneous execution of processes (when the process instance state is created) you cannot perform the following actions on Schedule Definition. You have to wait for the process instance to finish.
Change the state (On Hold, Disable), immediately start, edit or delete the Schedule Definition.
If there are multiple Schedule Definitions scheduled to start at the same startup time, the Management Server will start process instances in batches of 30, in the order in which the Schedule Definitions were registered. If there are more than 30 Schedule Definitions set for the same time, the additional Schedule Definitions will start once the startup process for the first 30 process instances is complete (when the status of the process instances is "executing").
However, if 30 Schedule Definitions with Do not allow selected are started, the next Schedule Definition will not start until one of the 30 process instances that were started first completes successfully or ends in error.
Accordingly, the startup time for the latter Schedule Definitions will be delayed until one of the process instances that were started first completes successfully, ends in error, or is canceled.
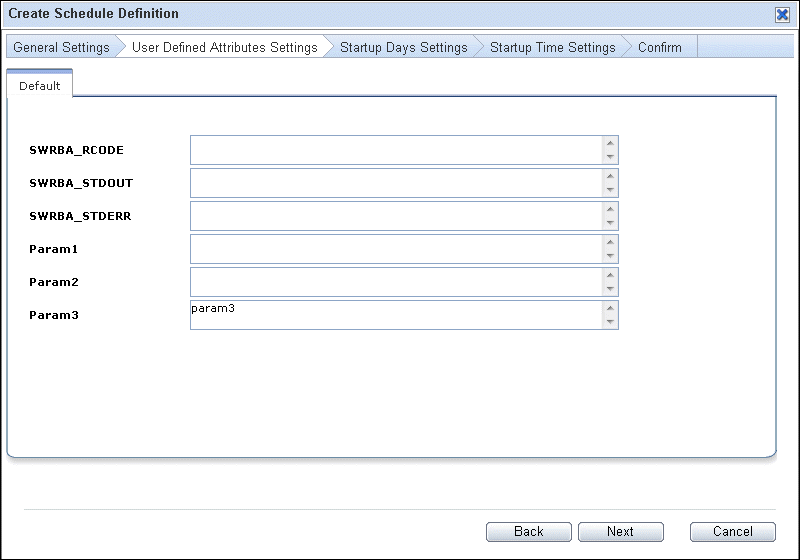
Enter the values that are to be passed to the operation component in the User Definition Attribute Setting panel. After entering the values, click the Next button.
In this example, the following value is passed to the operation component:
Example:
Inputparam3:Param1
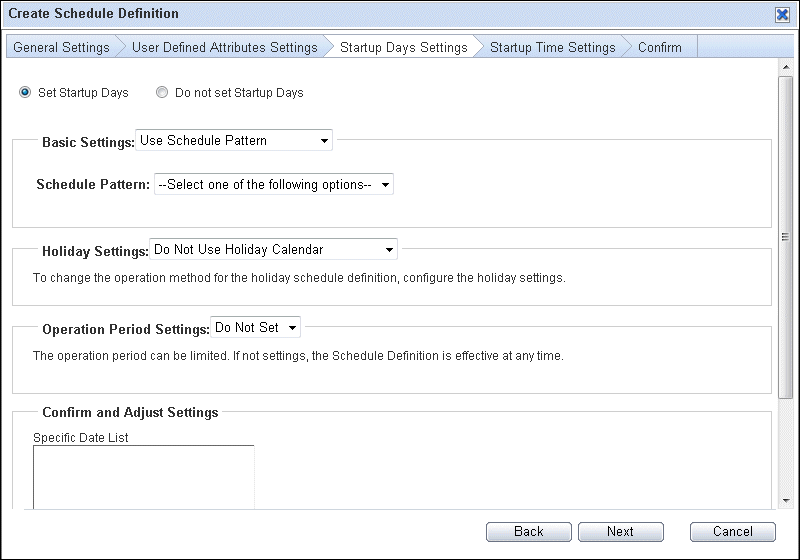
The values shown below can be entered after selecting Set startup days in the Startup Days Settings panel. After these values are entered, click the Confirm and Adjust button.
If Do not set startup days is selected, the start time cannot be set in the Startup Time Settings panel that follows.
Item | Input value |
|---|---|
Basic Settings | Select an already registered Schedule Pattern or a directly set a startup day (every day, every month, every week, date of a business day, or day of the week). (Mandatory) |
Holiday settings | Set the already registered holiday calendar and select the treatment of startup days that are holiday. (Optional) |
Operation Period Settings | Period for which a process is to be started by the Schedule Definition (optional). If no value is entered, the day of registration onwards will be used as the period for which a process is to be started by the schedule. |
In Confirm and Adjust Settings window set up the following items and press OK button. In Startup Days Setting window press Next button.
Item | Input value |
|---|---|
Specific Date Setting | This sets a day that is to have special handling in the Schedule Definition regardless of the Schedule Pattern or holiday settings. (Optional) |
Year & Month | Dates which can be checked and used. Up to 3 years can be checked in advance. (Mandatory) |
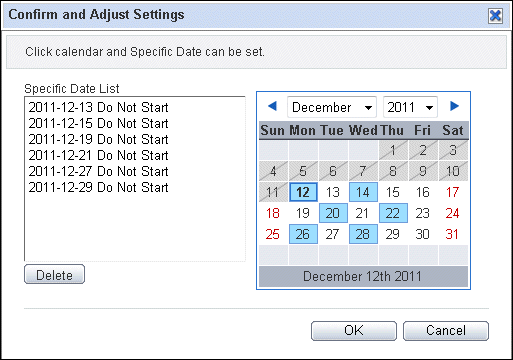
The following items can be displayed in calendar
Startup Day | Dates with blue background |
Holidays | Dates displayed by red numbers |
Dates outside Operation Period | Dates with hatched numbers |
Dates in past | Dates with a gray background |
Note
When a specific date is cleared
A specific date will be cleared when the operations listed below are performed (the target Schedule Definition will be re-created). After performing the change operations listed below, check and if necessary re-set the specific date in Confirm and Adjust Settings of the Schedule Definition Editings window.
When a holiday calendar being referenced by a Schedule Definition is changed
When a Schedule Pattern being referenced by a Schedule Definition is changed
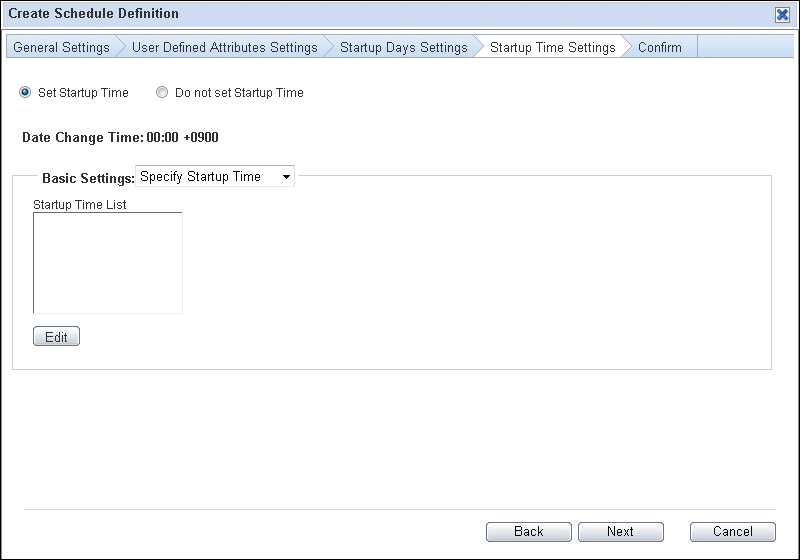
The values shown below can be entered after selecting Set startup days in the Startup Time Settings panel. After entering these values, click the Next button.
Item | Input value |
|---|---|
Basic Settings | Set start by time or start by interval. (Mandatory) |
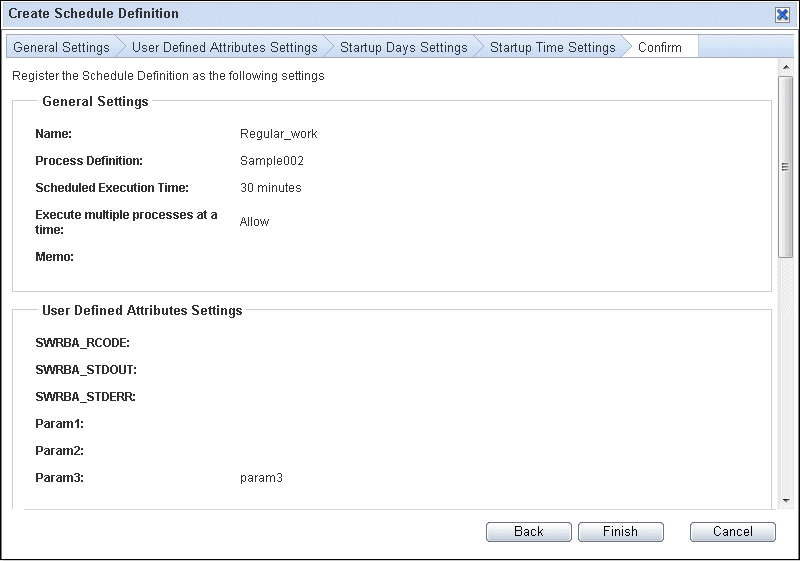
The set contents for the Schedule Definition will be displayed in the Confirm panel. When you click the Finish button, the Schedule Definition will be registered. If necessary click the Back button to move to previous windows and make changes. The name of Process instance which is started by Schedule Definition is the same as the process definition name.
