An example showing the creation of the operation task procedure as an Automated Operation Process is shown below:
Check whether the EventLog service is running.
Whether the EventLog service is running or not is checked automatically.
In this Automated Operation Process, processing is executed so that, after the Automated Operation Process is started, everything is automated until the process finishes. Human tasks, such as input from the form and checking the execution results in the form, are not included.
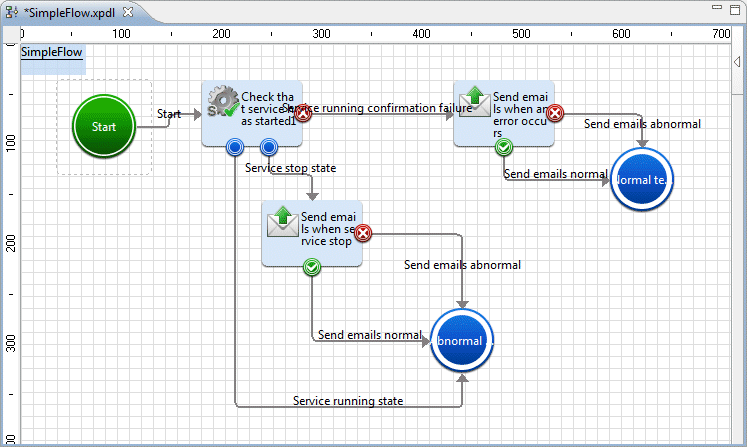
The procedure that is used to create the Automated Operation Process is shown below.

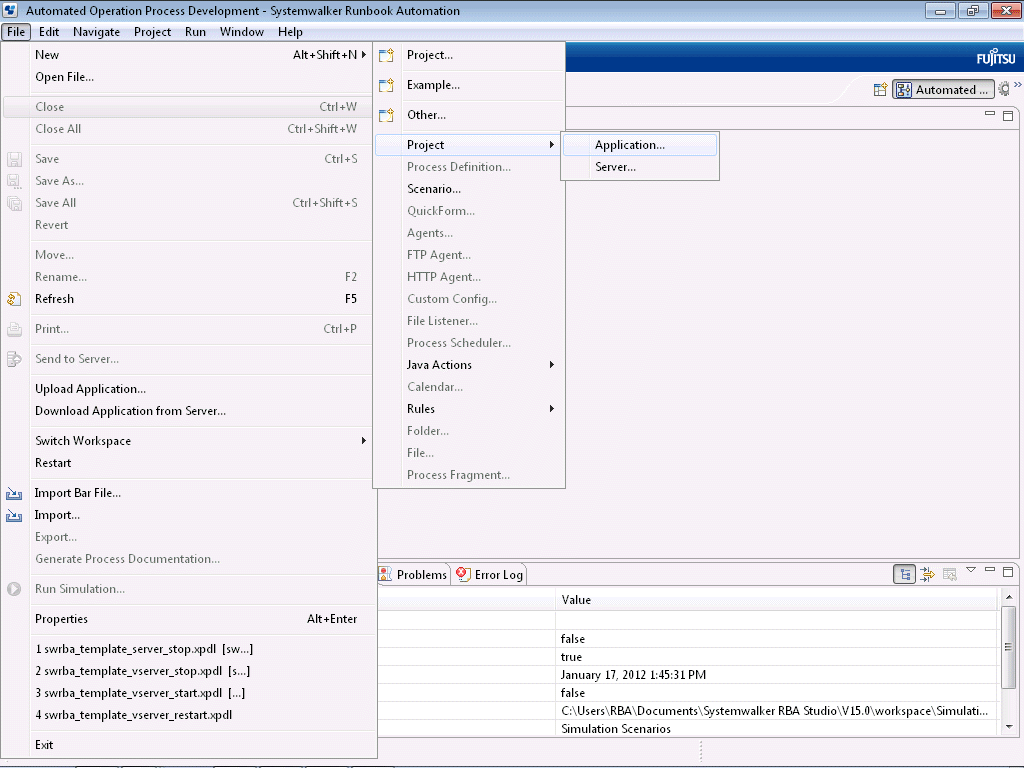
Select New, Project and then Application from the File menu.
Enter the name of the project in the Project name field. "Prac001" is entered in this example.
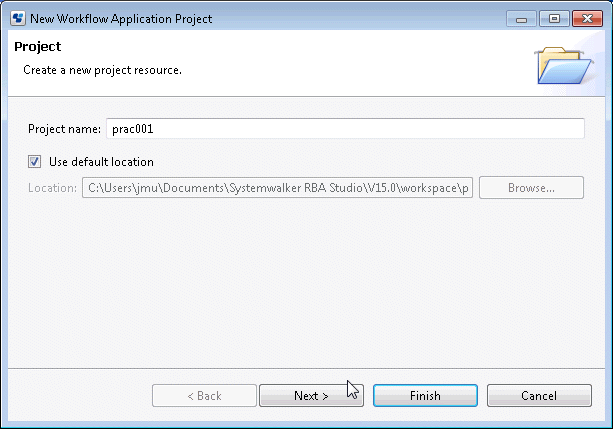
Click the Next button.
Enter the Description if necessary. There is no need to enter an Owner Group.
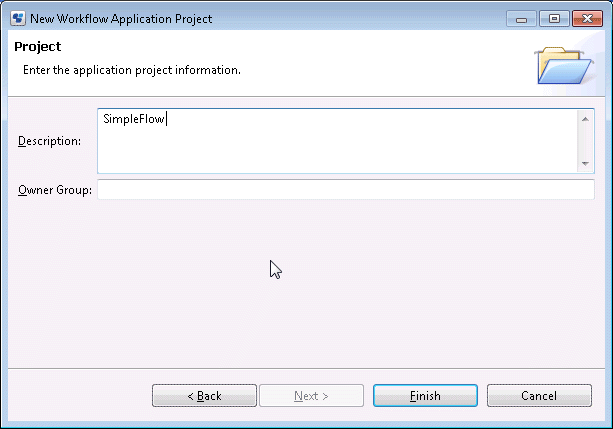
Click the Finish button.
The application project that has been created ("Prac001") will be added to the tree in the Navigator view on Systemwalker Runbook Automation Studio.
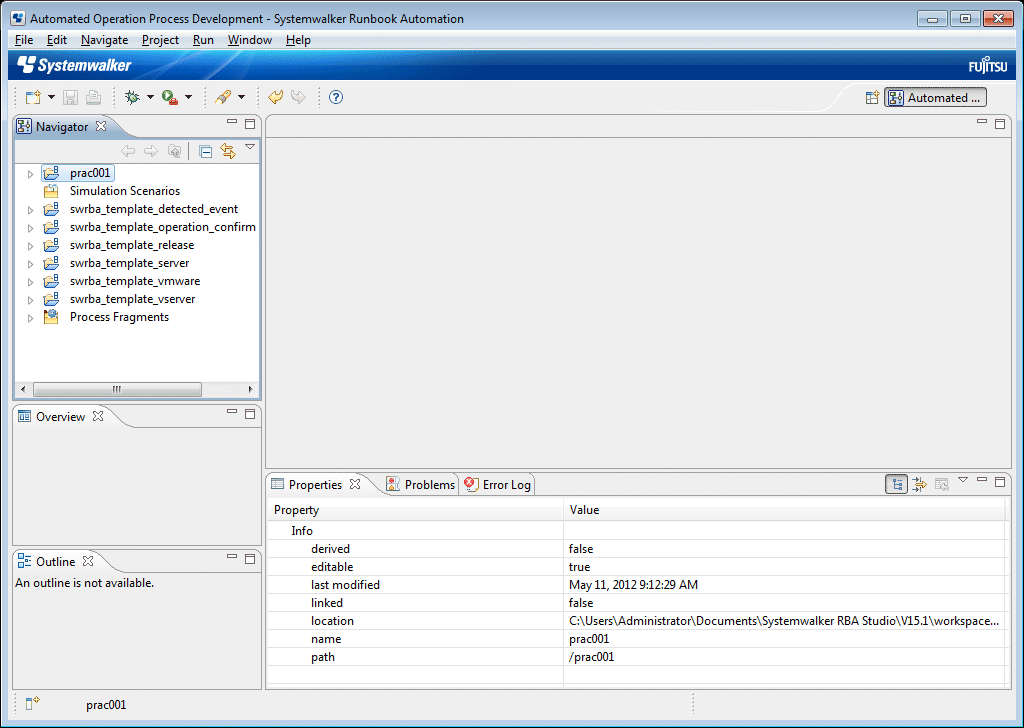
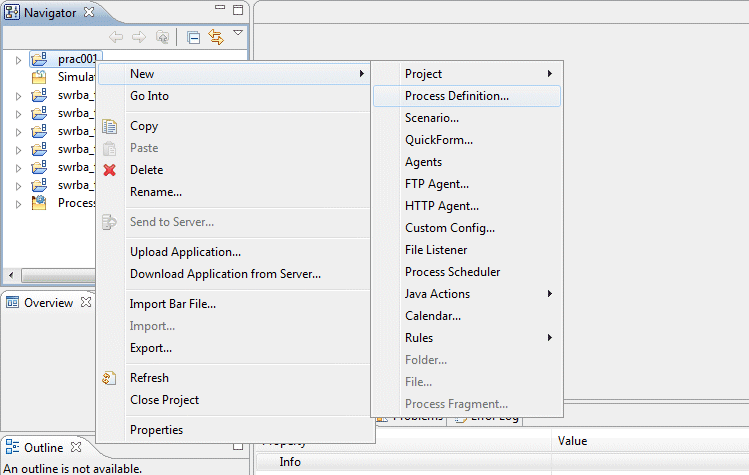
Select Application Project "Prac001" from the Navigator view. Then, in the menu displayed by right-clicking it, select New and then Process Definition.
In the New Process Definition dialog box, enter a name for the automated operation process in the Name field. In the Description field, enter a description.
Project: /Prac001 (Mandatory)
Name: SimpleFlow (Mandatory)
The name of project selected in Navigator view is displayed in Project as a default.
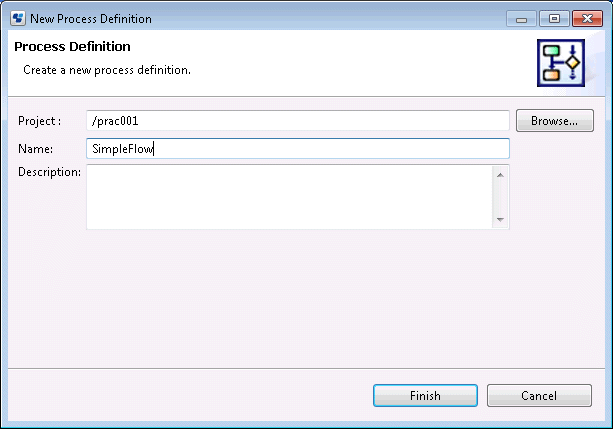
Click the Finish button.
The automated operation process that has just been created ("SimpleFlow") will be displayed in the Navigator view. When the Process Definition Editor is opened, a "Start" Node will be added automatically.
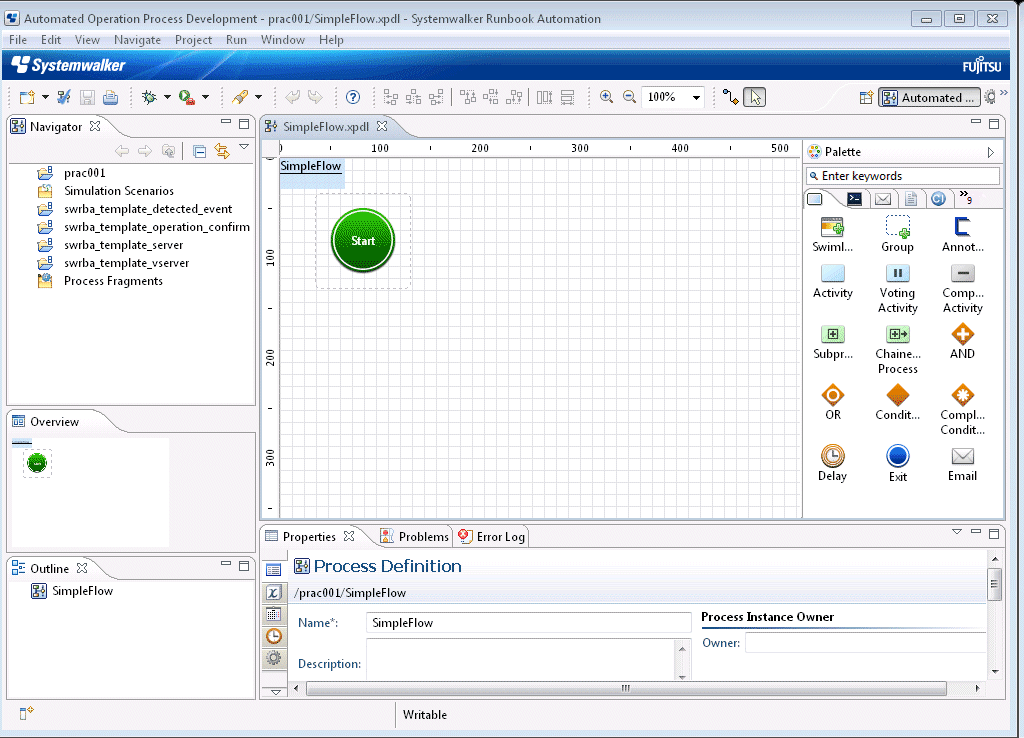
Select the Check that service has started of the Service/Process Operations tab in Palette. Move the cursor to the location where the operation component node will be placed on the Process Definition Editor, then click the mouse.
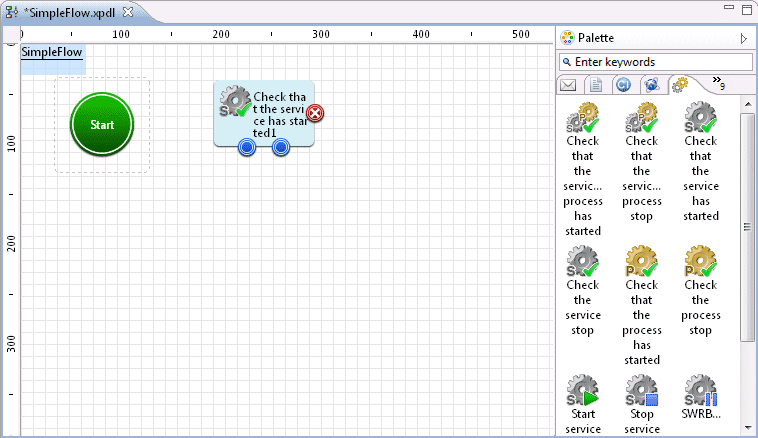
The operation component node (Check that service has started) is added.
Select the Send emails of the Send emails tab in Palette. Move the cursor to the location where the operation component node will be placed on the Process Definition Editor, then click the mouse.
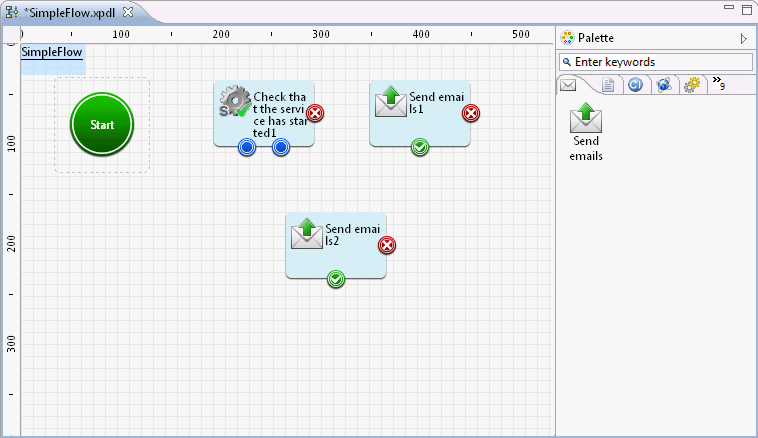
The operation component node (Send emails) is added.
Here, two "Send emails" nodes are added so that an email will be sent when the service has stopped, and also when an error occurs during confirmation of the service's active status. Change the node names as follows:
Send emails 1 | Send emails when an error occurs |
Send emails 2 | Send emails when service stop |
Add an Exit Node that indicates the terminal point of the Automated Operation Process.
Select the Exit of the Basic tab in Palette. Move the cursor to the location where the operation component node will be placed on the Process Definition Editor, then click the mouse.
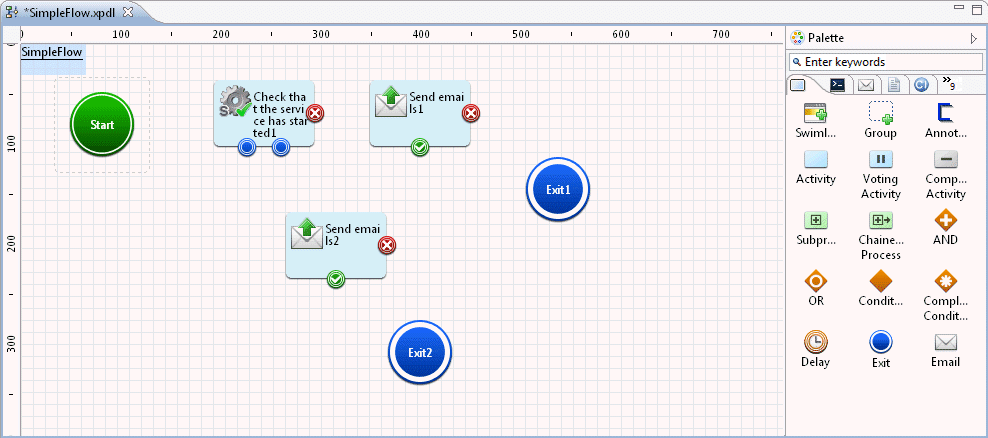
The Exit Node is added.
Here, two Exit Nodes are placed - one for normal exit, the other for abnormal exit. Change the node names as follows:
Exit1 | Abnormal termination |
Exit2 | Normal termination |
Information
It is recommended you position at least one Exit Node at the end of the automated operation process.
By positioning two or more Exit Nodes, it is possible to distinguish whether the automated operation process ended by a normal route or by an erroneous route.
Arrows are used to link the nodes.
Click the Arrow icon.
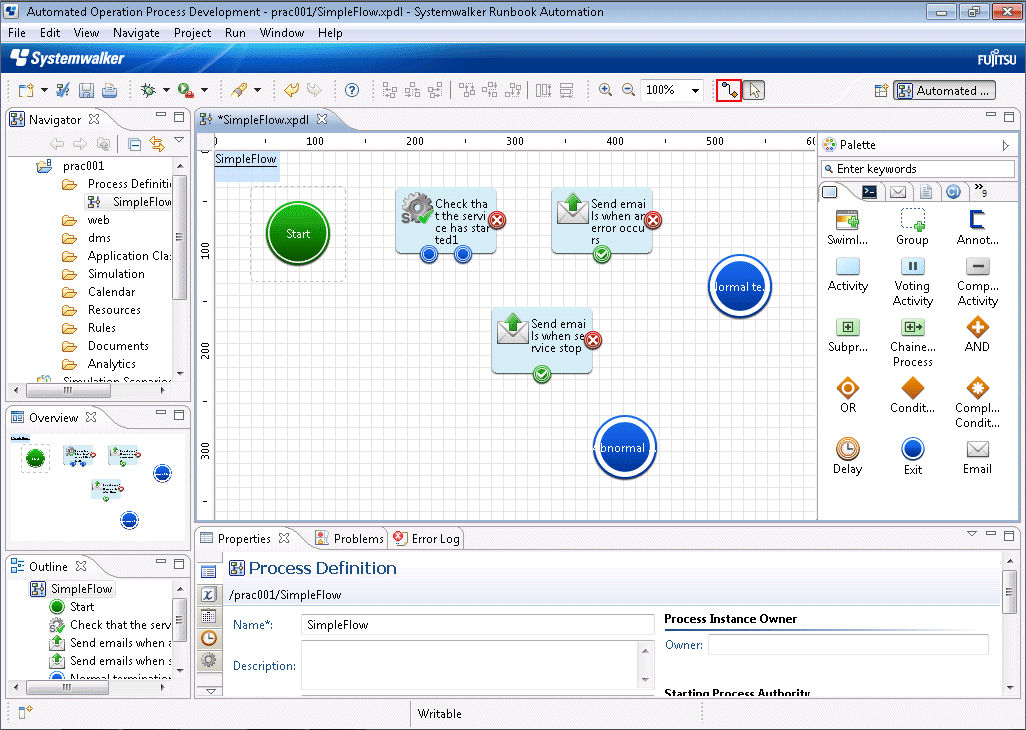
Set the transition route of the automated operation process. Set the route by connecting nodes with arrows.
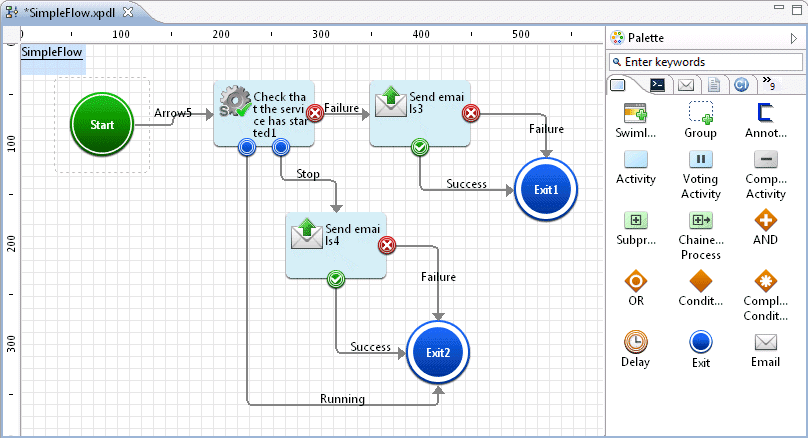
Change the arrow names as follows:
Node name | Arrow name before change | Arrow name after change |
|---|---|---|
Start | Arrow1 | Start |
Check that service has started 1 | Running | Service running state |
Stop | Service stop state | |
Failure | Service running confirmation failure | |
Send emails when an error occurs | Successful | Send emails normal |
Failure | Send emails abnormal | |
Send emails when service stop | Successful | Send emails normal |
Failure | Send emails abnormal |
Do not specify only spaces for the arrow name.
Note
When an Automated Operation Process is designed using the AND and OR nodes with multiple operation component nodes, indicated by arrows in the following figure, the operation components will be executed as parallel processing. However, an inconsistency might occur between the values of the execution result stored in the UDA.
Note
If the arrow from the Start or OR nodes is branched and the Activity Nodes in the process definition are placed in parallel, transaction commit must not be executed for any of the nodes in the process definition.
If a node is selected in Commit transaction after completion, the error "Unable to find the work item" may occur when the process is executed.
If you do not want to execute a transaction commit, clear the Commit transaction after complete check box on the Properties >> General tab.
Set the I/O information for the operation component that was positioned.
Click the operation component node (Check that the service has started) on the Process Definition Editor.
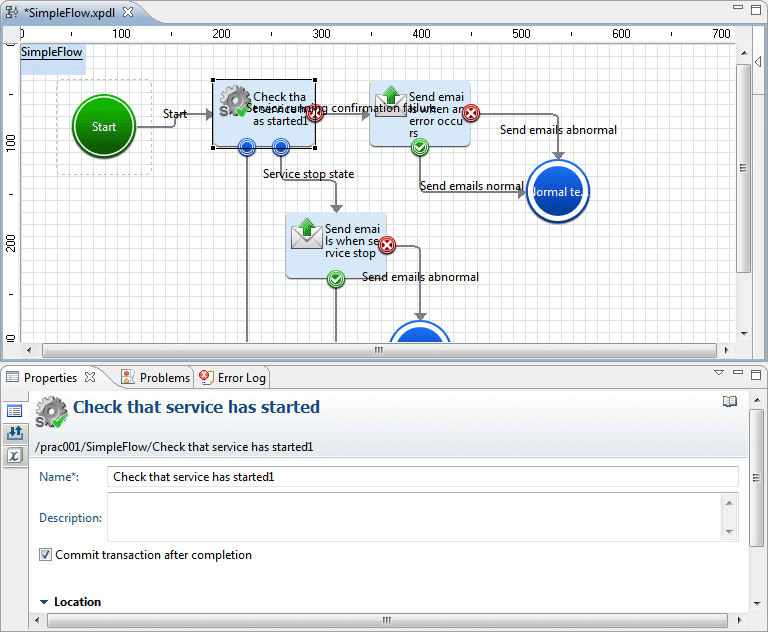
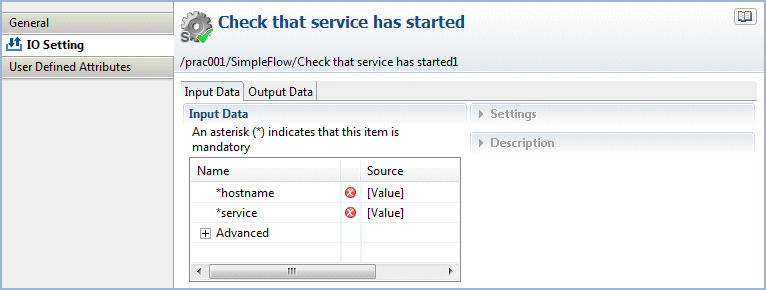
Click the Properties >> IO Setting >> Input Data tabs.
In the Check that the service has started component, specify the host name and the service name.
hostname: host name or IP address
service: Name of the service which start status is to be confirmed
From the Input Data section list, select hostname.
The Settings and Description sections will be displayed in the right half of the Properties view.
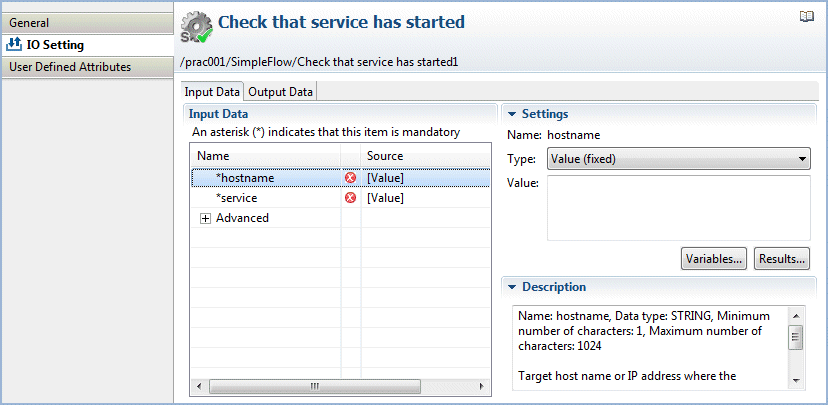
From the Type combo-box, select Value (fixed) to enter the host name as the value. Here, "localhost" has been specified for hostname.
Type: fixed
Value: localhost
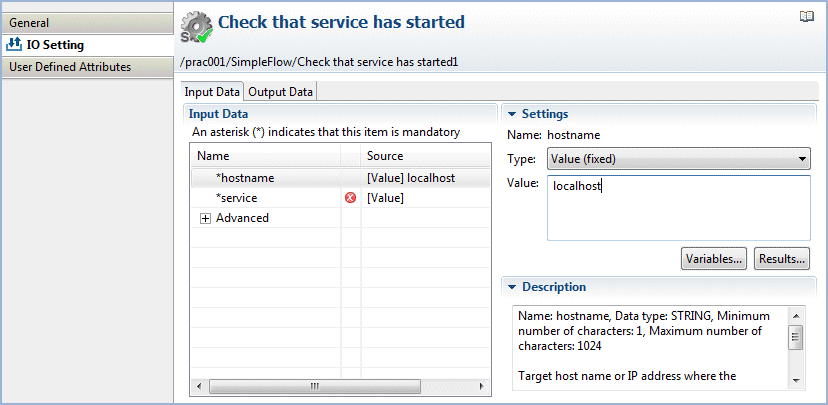
Select the method of input for the input information in Type. After selecting the Type, input or select the values corresponding to the input type:
Type | Description | Input Value |
|---|---|---|
Value (fixed) | The character string entered in the Value field is passed as input information to the operation component. The value selected in the Value combo-box is passed as input information to the operation component. | In the Value field, enter the actual value that is required to execute the operation component. Example: 192.0.2.0 If the Value combo-box is used, select the value that is passed to the operation component from the combo-box. |
Variable (uda) | The character string held by the user-defined attribute (UDA) specified in the Variable list is passed as input information to the operation component. | Select the name of the UDA from the list. Example: UDA_NAME Note: In the list, types added using the Properties >> User Defined Attributes tabs are displayed in the list of "STRING/INTEGER/BOOLEAN/DATE/XML" UDA names and types. The UDA types that are displayed in the list will depend on the input information data type:
|
Execution results (result) | Other operation component execution results are passed as input information to the operation component. | Select the name of the operation component node from the Node Name combo-box. Select the execution results from the Execution results list. |
Note
The maximum size of process instances (except for execution results) is 4 MB.This size is the total of the process instance history information, number of placed nodes, number of UDAs, and stored values. If this size exceeds 4MB because large amounts of data are stored in the UDA while the process instance is being executed, the following message will be output to the custom message and the process instance will end abnormally.
FSP_SW/RB-A_BASE: [ERROR]: 03012: Cannot set data because data exceeds the limit.
If the process instance ends abnormally and the above error message is output, take the following action:
Reduce the size of the value that is output to the UDA by the operation component.
Use a subprocess to balance the processing that is executed in one process instance.
The maximum size of each execution result is 4 MB. If the size exceeds this defined limit, the following error message will be output to the custom message and the process instance will terminate abnormally.
FSP_SW/RB-A_BASE: ERROR: 03055: The volume of data stored in the execution results has exceeded the upper limit.
If the process instance ends abnormally and the above error message is output, take the following action:
Reduce the size of the value that is output to the UDA by the operation component.
Note
If the password information that can be set in the Input Data list, Advanced tree is a specified value for the input information of the automated operation process, this information can easily be accessed from the outside, and so from a security perspective it is not recommended to make password settings in this way.
It is recommended to omit this information as input information for the automated operation process, as information previously set on the Operation Management Server can safely be used even if password input is omitted.
In this product, the setting of the password has been made simple for use in test environments and other situations when security is not an issue.
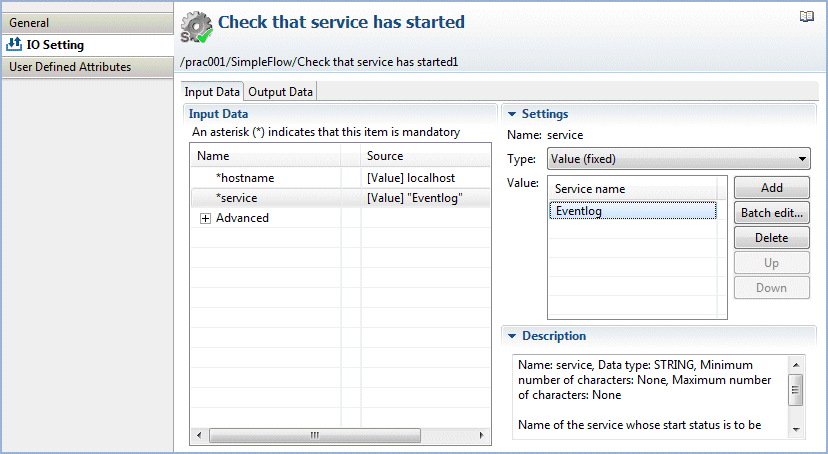
Select service from the Input Data list, select fixed from the Type box, type the service name command in the Value box, and click the Add button.
Here, "Eventlog" has been specified for service.
Type: fixed
Value: Eventlog
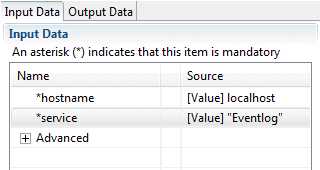
Check that the information has been entered as shown below.
Click the operation component node (Send emails) on the Process Definition Editor, then click the Properties >> IO Setting >> Input Data tabs.
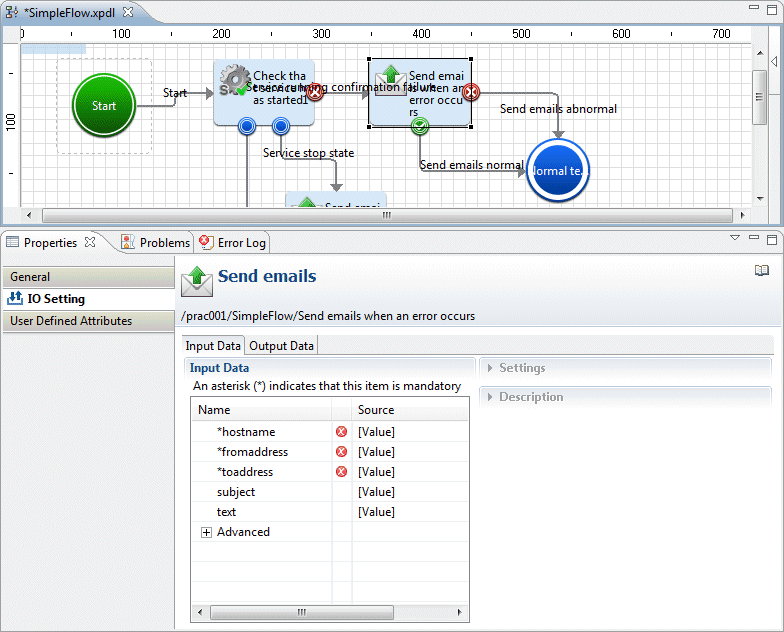
In the "Send emails" component, specify the following input information:
hostname: Host name or IP address of the (SMTP) server sending emails
fromaddress: Email sender's address
toaddress: Email recipient's address
subject: Email title
text: Email text body
This completes the creation of the Automated Operation Process without human tasks included.