An applet is a program that is embedded in and run on HTML when that HTML is displayed in a Web browser. In Interstage Studio, you can develop applets, which are a type of Java application.
Follow the instructions below to develop an applet that works in the same way as the application you created in Lessons 1 to 3 of "F.2 Client Application".
Creating an Java Application Project
Start the workbench.
Select [File] > [New] > [Project] from the menu bar.
The [New Project] wizard is displayed. Select [Java Application Project] from the tree.
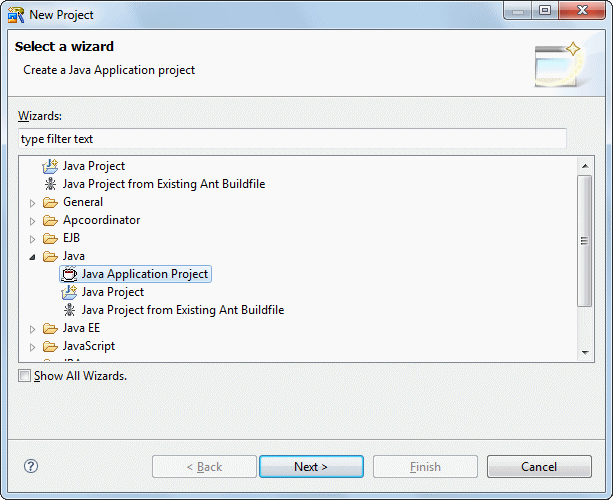
Click [Next].
The [Java Application Project] page is displayed. A project is created according to the information entered for items on this page.
Enter the project information as follows.
Setup Items | Setup Content |
|---|---|
Project name | MyCalApplet |
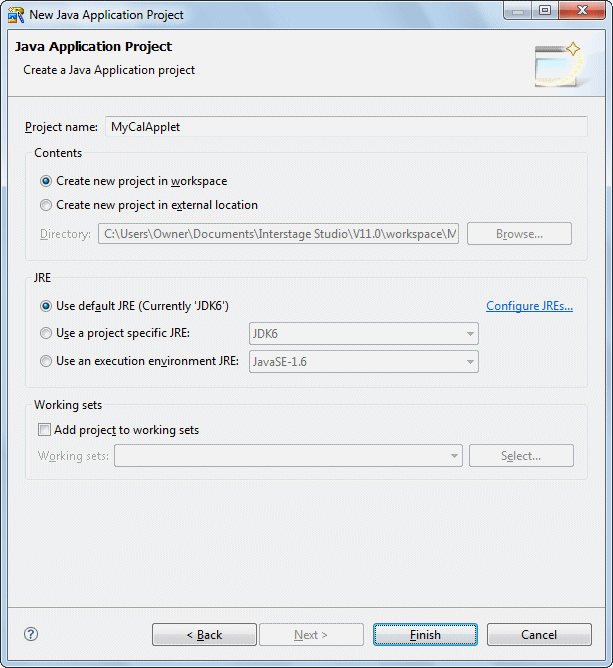
Click [Finish].
The next step is to create an applet. Select [File] > [New] > [Other] from the menu bar in workbench. Then, select [Java] > [GUI] > [Applet] from the tree in the [New] wizard that appears.
The [Applet Information] page is displayed. Enter information as follows.
Setup Items | Setup Content |
|---|---|
Package | myapp.applet |
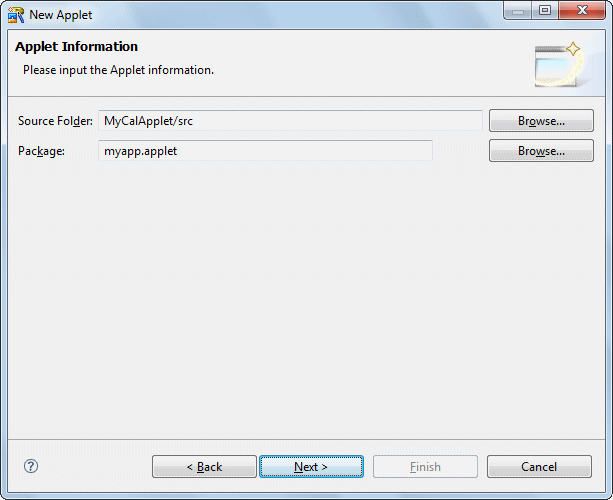
Click [Next].
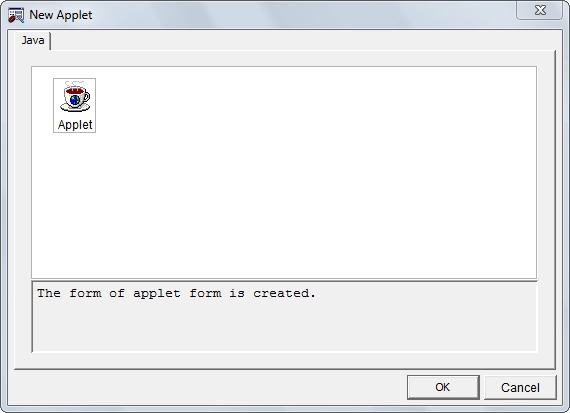
The [New Applet] dialog box is displayed.
Select [Applet] on the [Java] tab, and then click [OK].
The page for entering applet class information is displayed. Enter "Applet1" in the [Applet Name] field.
Select [javax.swing.JApplet] as the base class.
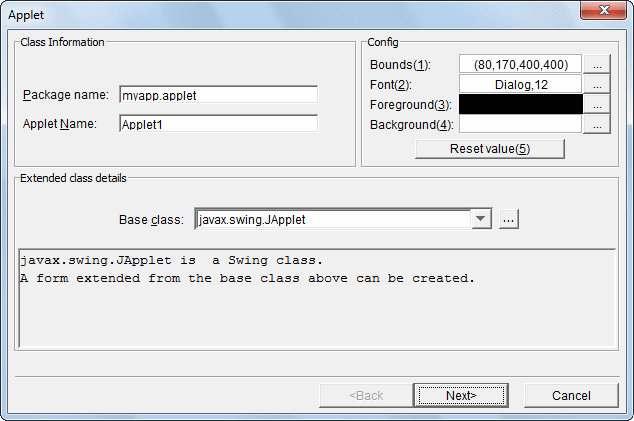
Click [Next].
The [Create HTML] page is displayed. You can create an HTML template in which the applet is pasted.
Specify the following settings.
Setup Items | Setup Content |
|---|---|
Generate HTML | Checked |
Generate HTML for JBK plug-in | Checked |
Page title | Applet1 |
Width of applet | 400 |
Height of applet | 400 |
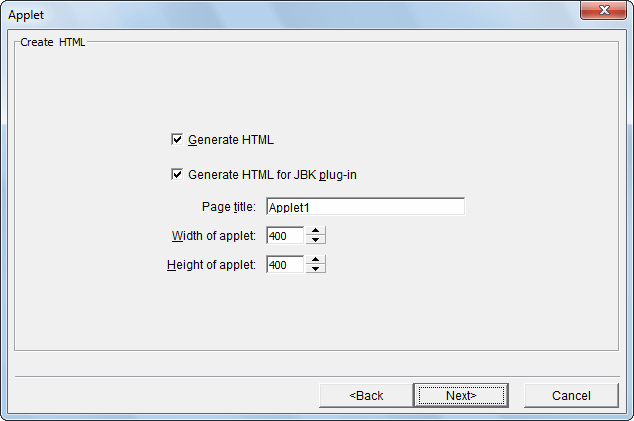
Click [Next].
The [Parameter Information] page is displayed.
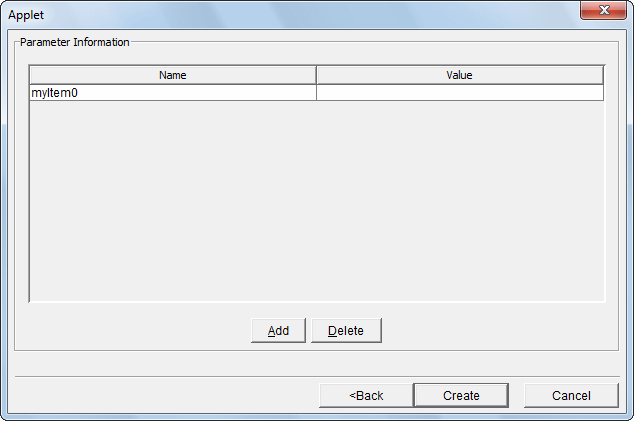
Parameters are not used, so you can delete "myItem0." Click [Delete].
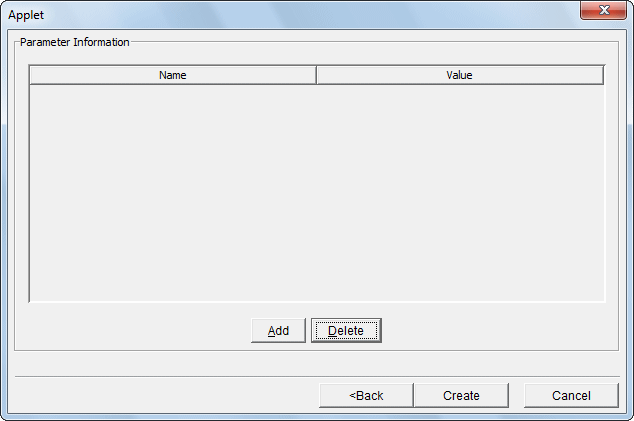
Click [Create].
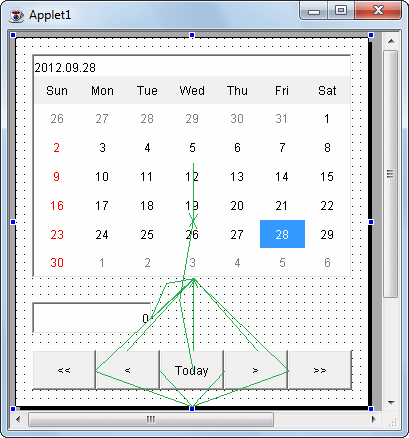
Java Form Designer starts.
Editing an Applet
Refer to Lessons 1 to 3 of "F.2 Client Application" and, define properties, and describe event processes for the applet.
Building
Building is executed automatically when resource files (such as the Java files) are saved if the [Build Automatically] item is enabled in the [Project] menu.
If [Build Automatically] is disabled, right-click on the project and select [Build Project] or select [Build Project] in the [Project] menu.
A JAR file is required so create it.
Use the export wizard to create the JAR file.
Select [File] > [Export] to start the export wizard.
Select [Java] > [JAR file] in the export wizard.
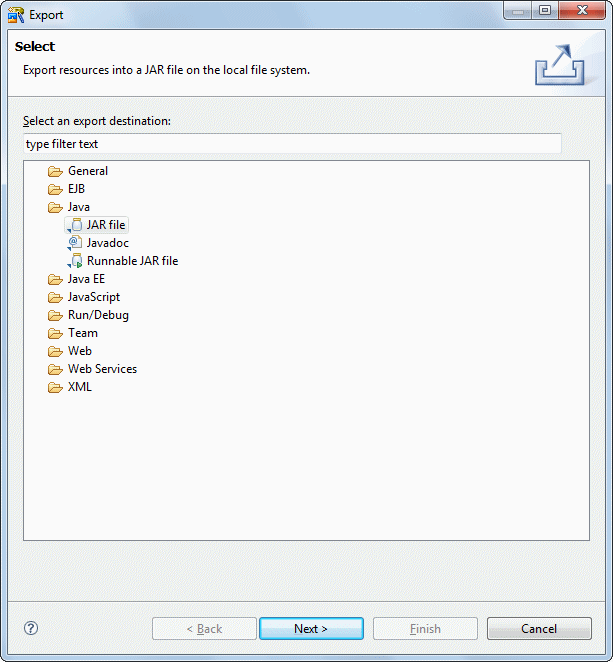
The JAR export wizard is displayed.
Select [MyCalApplet] > [src] folder in [Select the resources to export] and enter the following settings.
After setting the information, click [Finish].
Setup Items | Setup Content |
|---|---|
Select the resources to export | src/ |
Export generated class files and resources | Checked |
JAR file | MyCalApplet/MyCalApplet.jar |
Compress the contents of the JAR file | Checked |
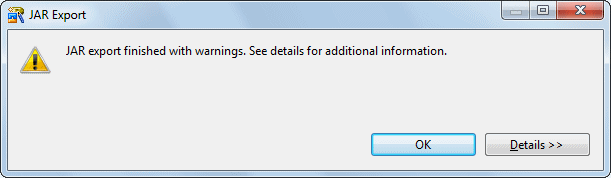
The following message is output when exporting JAR, but this does not indicate a problem.
Running
Select the file (class) to be run. Then, click [MyCalApplet] > [src] > [myapp.applet] > [Applet1.java] in the [Package Explorer] view in workbench.
Select [Run] > [Run] on the workbench menu bar.
The [Run] dialog box opens.
Select [Java Applet] from the [Configurations] tree. Then, click [New] at the bottom. A new configuration is added.
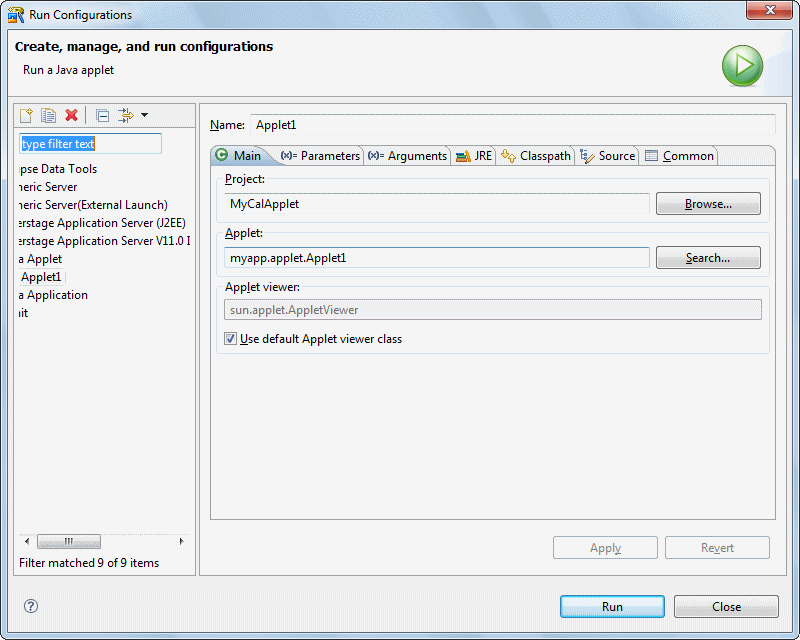
Set the following in the [Main] tab:
Setup Items | Setup Content |
|---|---|
Name | Applet1 |
Project | MyCalApplet |
Applet | myapp.applet.Applet1 |
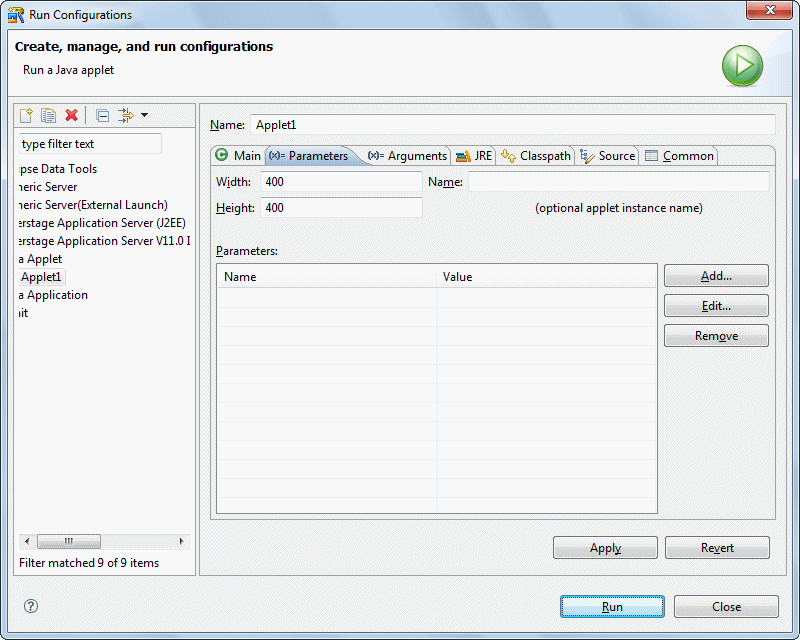
Specify an applet width and height. Click the [Parameters] tab, and specify 400 in [Width] and [Height].
Click [Run]. Applet Viewer opens with the applet displayed.
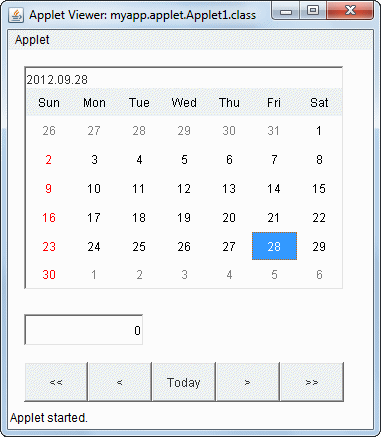
Close Applet Viewer by clicking the [Close (X)] button on the title bar.
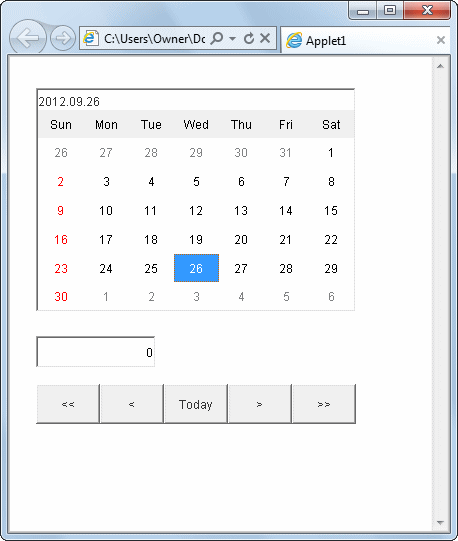
Next, confirm that the applet runs correctly in a Web browser.
To do this, open the "Applet1-JBKPlugin.html" file stored in the project folder in Internet Explorer.