Dialog is the auxiliary screen using for input of information and display of message etc.
The calendar Bean has a function for setting a memo that is displayed as a tool tip for a single date. This lesson describes how to implement a screen to enter a memo for a date, using a dialog.
The section also describes how to specify settings so that a dialog for entry of a memo is displayed when a date on the calendar is double-clicked. The dialog is added to the project created in Lesson 3.
Creating a dialog
In workbench, open the "MyCalendar" project created in Lesson 3.
Select [File] > [New] > [Other] from the menu bar.
The [New] wizard is displayed. Select [Java] > [GUI] > [Form] from the tree.
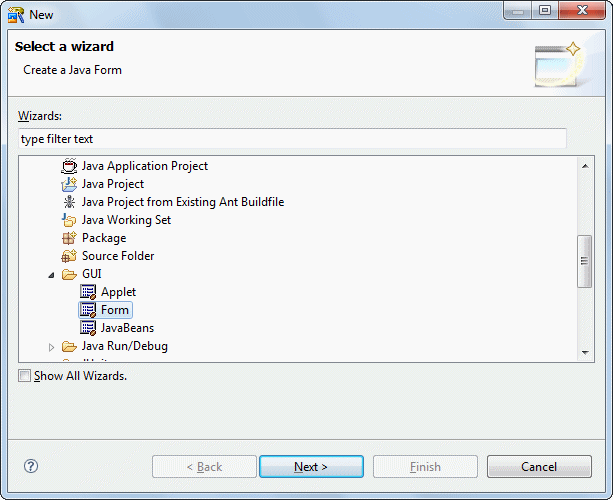
Click [Next].
The [Java Form Information] page is displayed. Enter information as follows.
Setup Items | Setup Content |
|---|---|
Package | myapp.javaform |
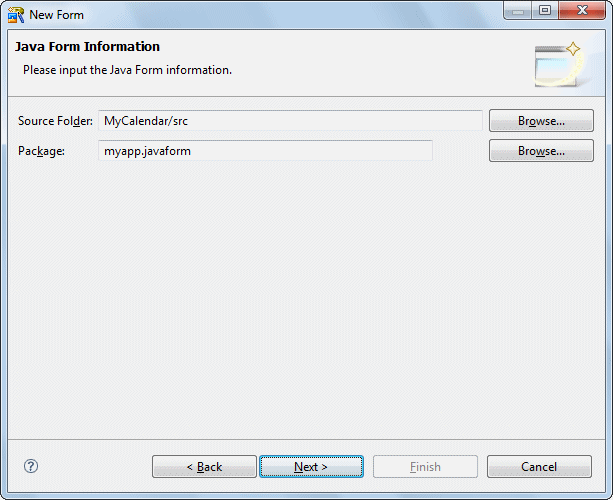
Click [Next].
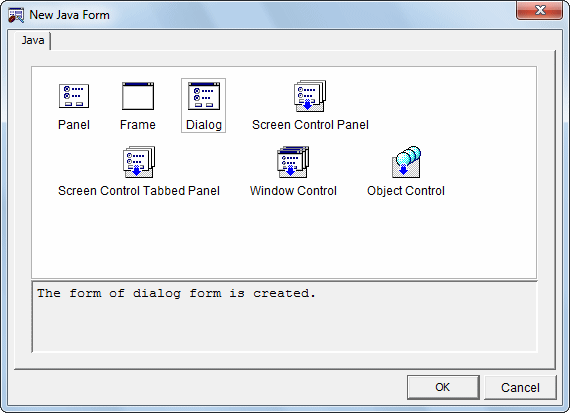
The [New Java Form] dialog box is displayed.
Select [Dialog]. Click [OK].
Point
About Java Form types
The three types of Java Form are listed below. For each type, there is a class extended form. Note that form layouts that are often used can be registered in advance. To use such forms, click the [Wizard] tab, and select the type of form to be automatically generated.
Frame
A form may contain a general screen frame consisting of pulldown menus, title bars, and other parts. Such a form is used as the basic initial screen of an application.
Dialog
Although similar to a frame, a dialog has certain differences from a frame: for example, a dialog can be made modal, and it cannot contain a title bar icon. A dialog works as an auxiliary to a frame. It is displayed temporarily for user input and output of information.
Panel
A panel is a form without a frame. One or more panels can be pasted into frames and dialogs. Two or more Beans are pasted into a panel to create a compound GUI part.
Create a new System Dialog.
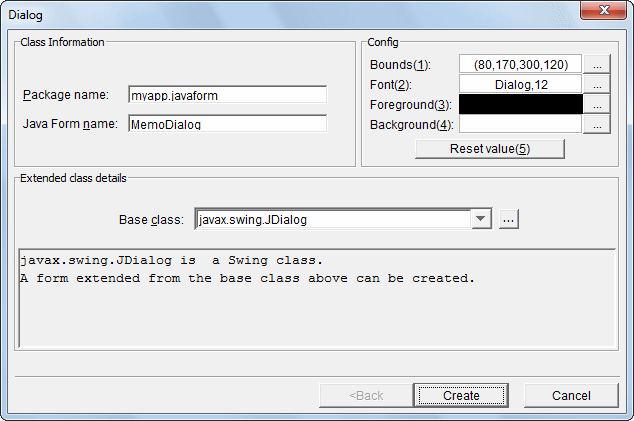
The [Dialog] page is displayed. Enter information as follows.
Setup Items | Setup Content |
|---|---|
Package name | myapp.javaform |
Java Form name | MemoDialog |
Base class | javax.swing.JDialog |
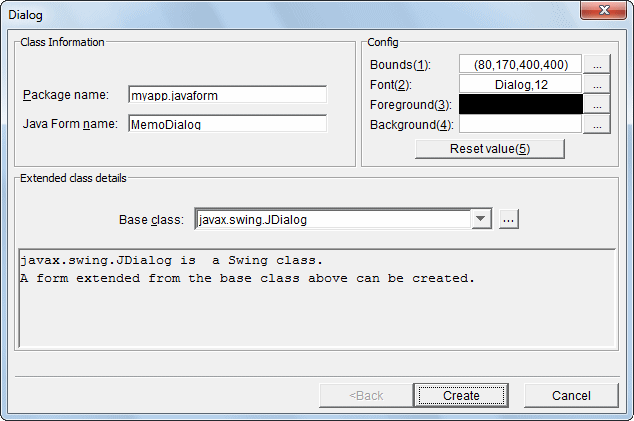
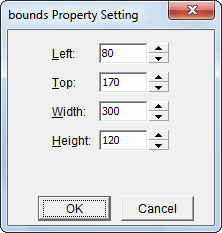
To set up Bounds, click [...].
The [bounds Property Setting] dialog is displayed.
Specify the following properties, then click [OK].
Property name | Value |
|---|---|
Width | 300 |
Height | 120 |
Click [Create].
Java Form Designer starts.
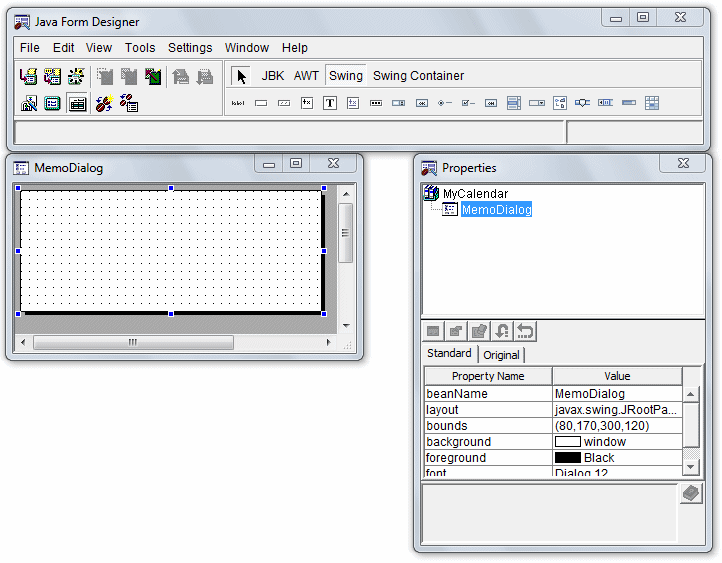
Placing Beans
Change the [layout] property of the created MemoDialog to [BorderLayout].
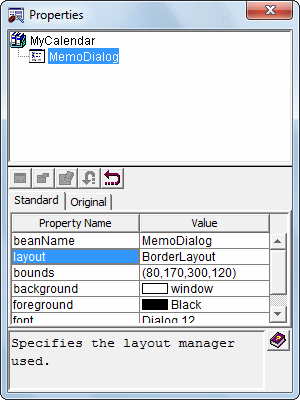
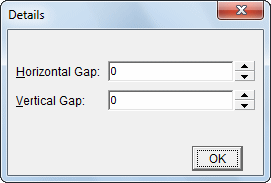
The [Details] dialog box is displayed when you change the [layout]. Click [OK].
Select [Swing Container] in the object palette if it is not already selected.

Click [JPanel] in the object palette.

Place on the Java Form by dragging with the mouse.
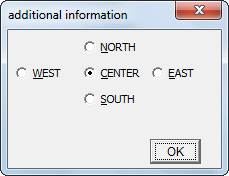
Select [CENTER] in the [additional information] and click [OK].
Change the layout of the created panel.
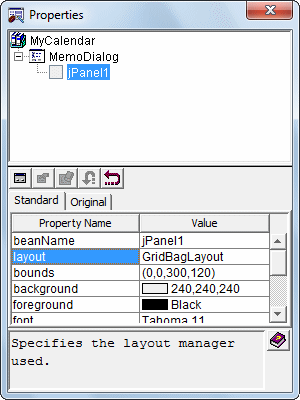
Change the [layout] property of the panel to [GridBagLayout].
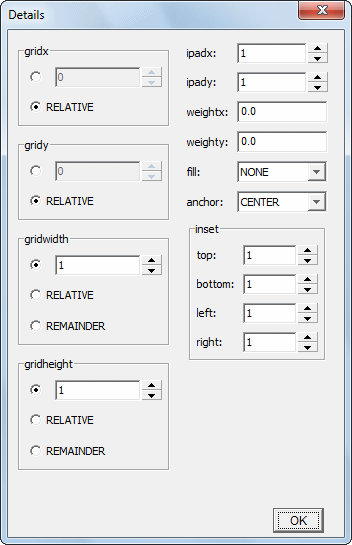
Click [OK] when the [Details] dialog box is displayed.
Place the second panel.
As this is to be placed directly under the dialog box, do not drag onto the panel that was just created, but rather drag to the grey area outside the dialog box.
Select [SOUTH] in the [additional information] and click [OK].
Place the label.
Select [Swing] in the object palette if it is not already selected.

Click [JLabel] in the object palette.

Drag to the top of the created dialog so that it is placed on the panel that was created first.
Click [OK] when the [additional information] dialog box is displayed.
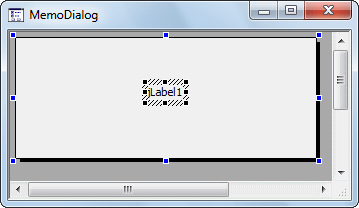
Change the text of the created label.
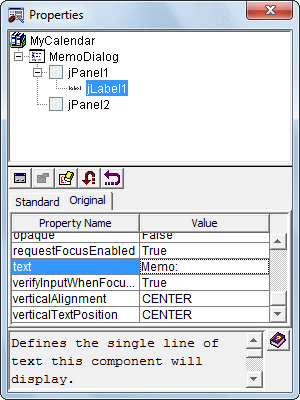
Select the created label and select the [Original] tab of the Properties window.
Change the [text] property to [Memo:].
Place the text field.
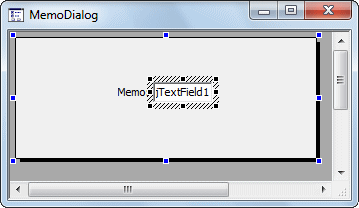
Click [JTextField] in the object palette.

Drag to the top of the created dialog so that it is placed on the panel that was created first.
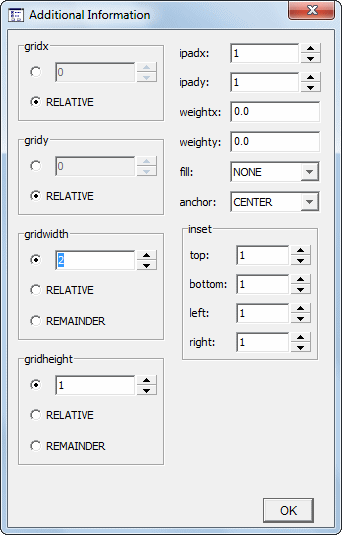
Change [gridwidth] to [2] in the [additional information] and click [OK].
Change the [beanName] of the created text field.
Select the created text field and select the [Standard] tab of the Properties window.
Change the [beanName] property to [Memo].
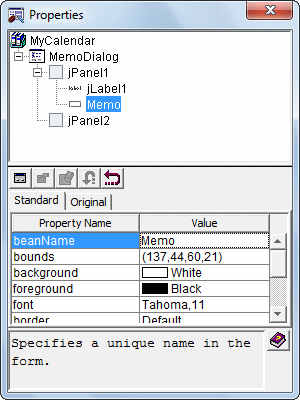
Change the text of the created text field.
Select the created text field and select the [Original] tab of the Properties window.
Change the [text] property to [Memo].
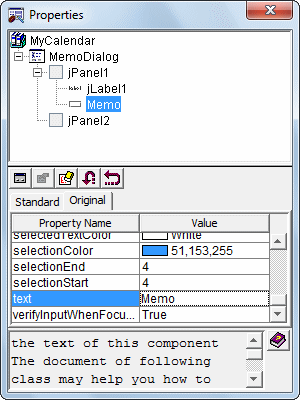
Place the button.
Click [JButton] in the object palette.

Select the [jPanel2] that is in the tree in the Properties window so that it is placed on the panel that was created second.
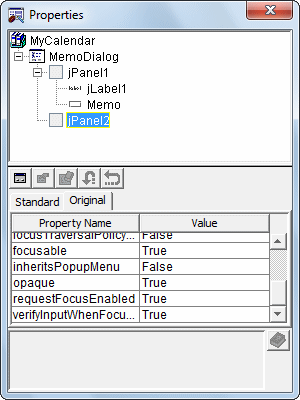
The border of the panel is displayed when it is selected.
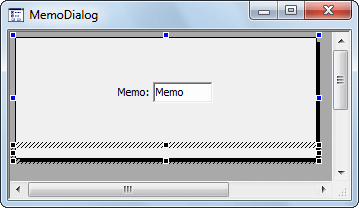
Drag into the border.
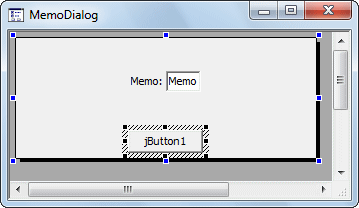
Change the [beanName] of the created button.
Select the created button and select the [Standard] tab of the Properties window.
Change the [beanName] property to [jButtonOk].
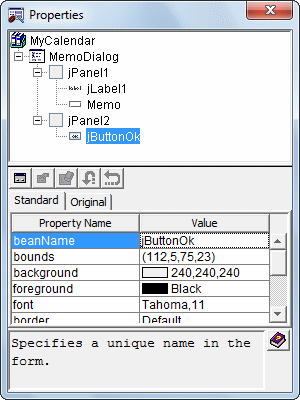
Change the text of the created button.
Select the created button and select the [Original] tab of the Properties window.
Change the [text] property to [OK].
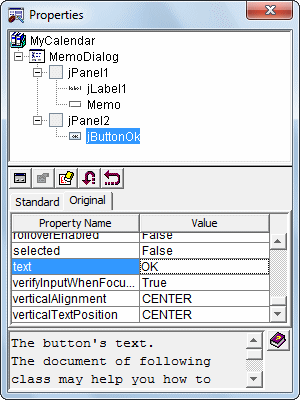
Place the second button.
Click [JButton] in the object palette.
Select the [jPanel2] that is in the tree in the Properties window so that it is similarly placed on the panel that was created second.
The border of the panel is displayed when it is selected.
Drag into the border.
Change the [beanName] of the created button.
Select the created button and select the [Standard] tab of the Properties window.
Change the [beanName] property to [jButtonCancel].
Change the text of the created button.
Select the created button and select the [Original] tab of the Properties window.
Change the [text] property to [Cancel].
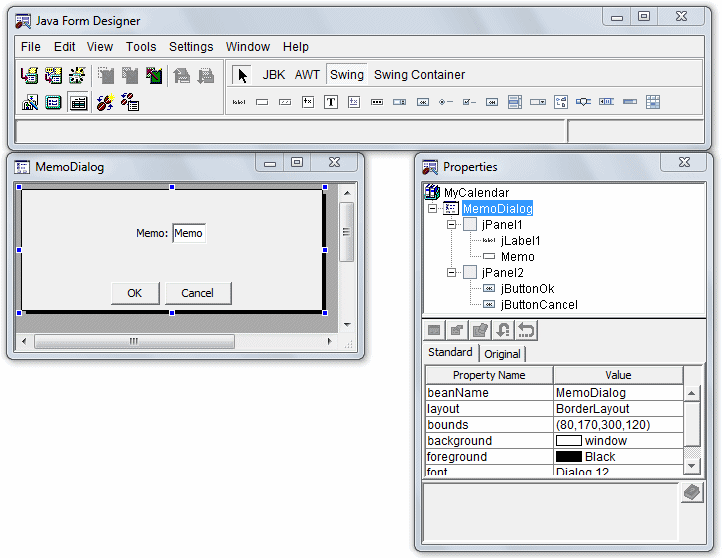
To start the Java editor, select [View] > [Java Editor] from the Java Form Designer menu bar.
Since the JBK class is used, add the import keyword.
Add the text shown below in red.
import com.fujitsu.jbk.gui.JFCalendarView;Add a field to the MemoDialog class.
This field is used to save the calendar class of the calling frame. Add the text shown below in red.
//@@Form Design Information end

JFCalendarView cv;
/**
 * The form is constructed.
 */
public MemoDialog(java.awt.Frame owner, boolean modal) {
    super(owner, modal);
}
Add processes to the MemoDialog class constructor.
The constructor is a method that is automatically called when an object is generated. It usually performs the initial processing of an object. A method with the same name as a class name is regarded as a constructor. Add the text shown below in red.
public MemoDialog(java.awt.Frame param0, boolean param1) {
       // Invokes the constructor of the base class.
       super(param0, param1);
       cv = ((Frame1) param0).jFCalendarView1;
       // initialize form
       init$();
       // call user definition initialization
       initUser$();
}
Point
Scrolling in Java editor
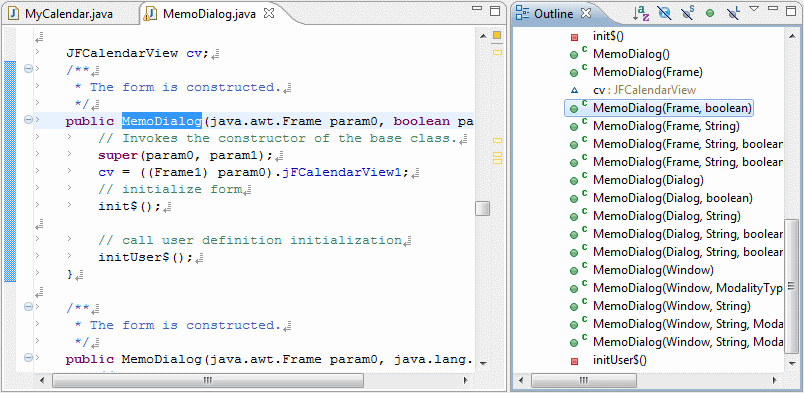
To easily scroll to a method or field you want to edit in Java editor, you can use the [Outline] view.
Clicking "MemoDialog(Frame, boolean)" in the [Outline] view causes the Java editor display to scroll to the constructor.
Add processes to the MemoDialog class initUser$ method, and define the memo settings in the calendar so that it appears initially.
Add the text shown below in red to the processing procedure of initUser$().
    protected void initUser$() {
        // The user definition initialization is described at this position.
        Memo.setText(cv.getMemo(cv.getDate()));
        Memo.setColumns(10);
    }
Code the process in which [OK] is clicked.
Double-click [MemoDialog] > [jPanel2] > [jButtonOk] > [Event] > [action_actionPerformed] in the [Bean List] view.
When an event process creation confirmation dialog is displayed, click [Yes].
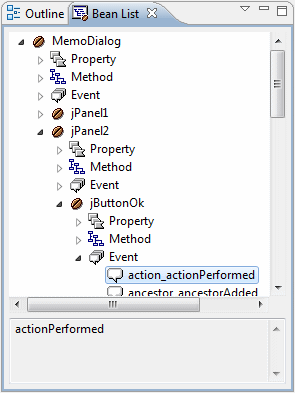
When the processing procedure of "jButtonOk_action_actionPerformed$" is displayed, code the text shown below in red.
    public void jButtonOk_action_actionPerformed$(java.awt.event.ActionEvent e) {
        if(!defaultEventProc(e)) {
            // The procedure when the event is generated is described below.
            cv.setMemo(cv.getDate(), Memo.getText());
            dispose();
        }
    }
Next, code the process in which [Cancel] is clicked.
Double-click [MemoDialog] > [jPanel2] > [jButtonCancel] > [Event] > [action_actionPerformed] in the [Bean List] view.
When an event process creation confirmation dialog is displayed, click [Yes].
When the processing procedure of "jButtonCancel_action_actionPerformed$" is displayed, code the text shown below in red.
    public void jButtonCancel_action_actionPerformed$(java.awt.event.ActionEvent e) {
        if(!defaultEventProc(e)) {
            // The procedure when the event is generated is described below.
            dispose();
        }
    }
Save the Java Form.
Select [File] > [Save] from the workbench menu bar.
To close the Java Form, select [File] > [Close] from the Java Form Designer menu bar.
Adding processes to the calendar
Define settings so that a dialog for entry of a memo is displayed when a date on the calendar is double-clicked.
Open [Frame1.java] in Java Form Designer. To display the context menu, right-click [MyCalendar] > [src] > [myapp.javaform] > [Frame1.java] in [Package Explorer] view of workbench. Then, select [Open With] > [Graphical Editor].
To start the Java editor, select [View] > [Java Editor] from the Java Form Designer menu bar.
An action event occurs when a date on the calendar is double-clicked. Code processes for the action event.
Double-click [Frame1] > [jFCalendarView1] > [Event] > [action_actionPerformed] in the [Bean List] view. When an event process creation confirmation dialog is displayed, click [Yes].
When the processing procedure of "jFCalendarView1_action_actionPerformed$" is displayed, code the text shown below in red.
    public void jFCalendarView1_action_actionPerformed$( java.awt.event.ActionEvent e) {
        if( !defaultEventProc(e) ) {
            // The procedure when the event is generated is described below.
            MemoDialog dlg = new MemoDialog(this, false);
            dlg.setVisible(true);
        }
    }
Modify the calendar Bean properties.
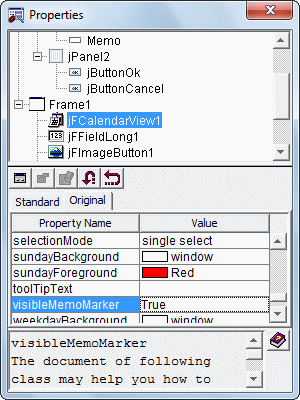
Modify the following properties of the [Original] tab, using the property sheet:
Property Name | Value |
|---|---|
displayMemo | True |
visibleMemoMarker | True |
Save the Java Form.
Select [File] > [Save] from the Java Form Designer menu bar.
To close the Java Form, select [File] > [Close] from the Java Form Designer menu bar.
Building
Building is executed automatically when resource files (such as the Java files) are saved if the [Build Automatically] item is enabled in the [Project] menu.
If [Build Automatically] is disabled, right-click on the project and select [Build Project] or select [Build Project] in the [Project] menu.
A JAR file is required so create it.
Use the export wizard to create the JAR file.
Select [File] > [Export] to start the export wizard.
Select [Java] > [JAR file] in the export wizard.
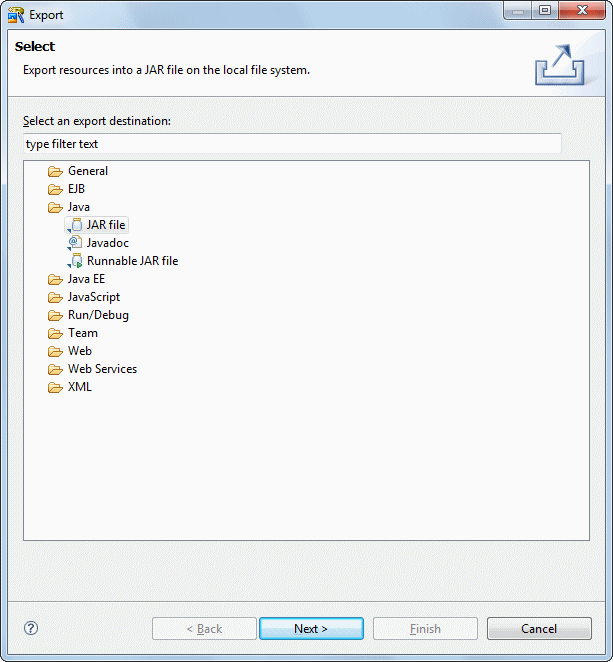
The JAR export wizard is displayed.
Select [MyCalendar] > [src] folder in [Select the resources to export] and enter the following settings.
After setting the information, click [Finish].
Setup Items | Setup Content |
|---|---|
Select the resources to export | src/ |
Export generated class files and resources | Checked |
JAR file | MyCalendar/MyCalendar.jar |
Compress the contents of the JAR file | Checked |
The following message is output when exporting JAR, but this does not indicate a problem.

Running
Select the file (class) to be executed. Click [MyCalendar] > [src] > [myapp.javaform] > [MyCalendar.java] in the [Package Explorer] view of workbench.
Select [Run] > [Run As] > [Java Application] from the menu bar. As a result, the application starts, and the Java Form is displayed.
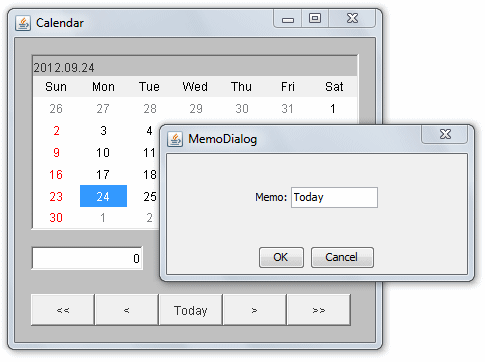
Double-click a date on the calendar. The dialog is displayed.
Enter a memo, then click [OK].
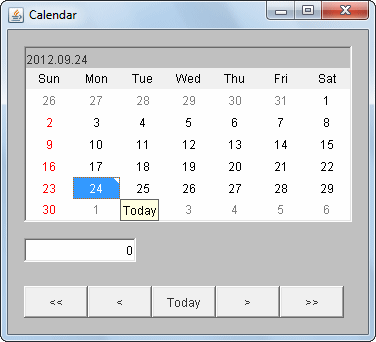
A marker is displayed on the date that has the memo.
When the cursor passes over that date, the memo is displayed as a tool tip.
To close the application, click the Close [X] button on the title bar.