This section explains by means of a simple example how to develop a simple application using the JBK (J Business Kit) calendar Bean, create a new project, and run the created application.
Creating a Java Application Project
Start the workbench.
Select [File] > [New] > [Project] from the menu bar.
The [New Project] wizard is displayed. Select [Java Application Project] from the tree.
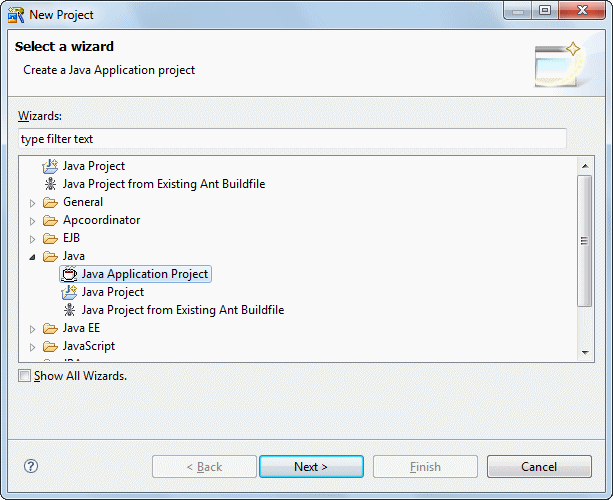
Click [Next].
The [Java Application Project] page is displayed. Enter the project information as follows:
Setup Items | Setup Content |
|---|---|
Project name | MyCalendar |

Click [Finish]. This step creates the project.
The next step is to create the frame.
Select [File] > [New] > [Other] from the menu bar. Then, select [Java] > [GUI] > [Form] from the tree in the [New] wizard that appears.
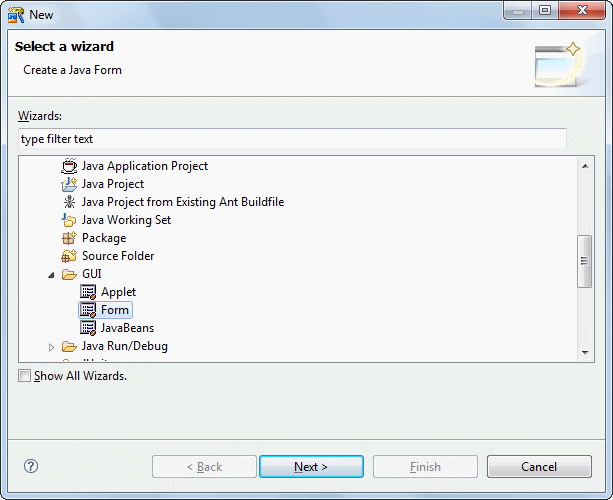
Click [Next].
The [Java Form Information] page is displayed.
Enter information as follows.
Setup Items | Setup Content |
|---|---|
Source folder | MyCalendar/src |
Package | myapp.javaform |
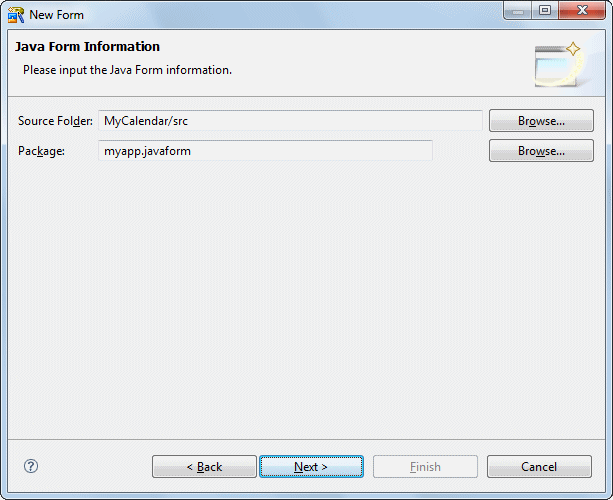
Click [Next].
The [New Java Form] dialog box is displayed.
Select [Frame].
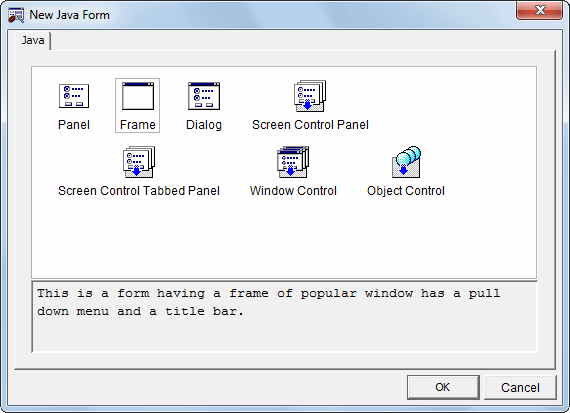
Click [OK].
The [Frame] dialog box is displayed.
On this page, specify the information required to create the frame.
Enter information as follows.
Setup Items | Setup Content |
|---|---|
Package name | myapp.javaform |
Java Form name | Frame1 |
Base class | javax.swing.JFrame |
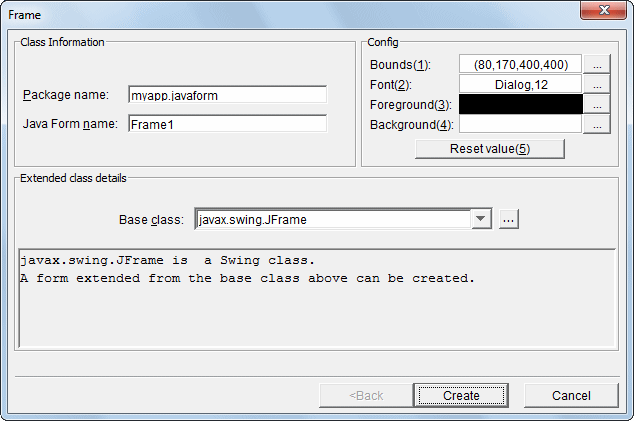
Click [Create].
Point
Heavyweight components and lightweight components
There are two types of containers for Beans: heavyweight (AWT) and lightweight (Swing). You are strongly advised to be consistent with your use of heavyweight and lightweight components when creating Java Forms and applets. If heavyweight and lightweight components are mixed in the same application, the following problems may occur: overlap (the heavyweight component is always displayed on top of the lightweight one) and creeping of the menu into a Bean.
The next step is to create a class of the form and an executable class that will display the form.
Select [File] > [New] > [Class] from the menu bar.
The [Java Class] page is displayed.
On this page, specify basic information for the Java class to be created.
Enter information as follows.
Setup Items | Setup Content |
|---|---|
Source folder | MyCalendar/src |
Package | myapp.javaform |
Name | MyCalendar |
Inherited abstract methods | Checked |
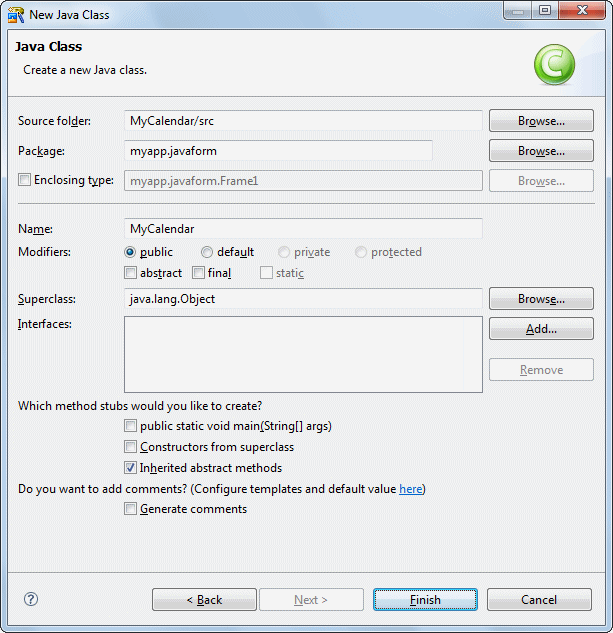
Click [Finish].
The source created in the [Java Editor] is displayed.
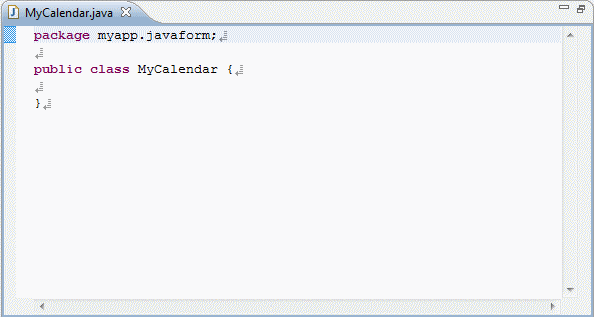
Edit the source that was created. Add the parts in red.
    //Constructor
    public MyCalendar() {
    }

    public void run() {
        //Create new form project
        Frame1 form = new Frame1();
        //Show form
        form.setVisible(true);
    }
    //Main process
    public static void main(String[] args) {
        // Create MyCalendar class instance
        MyCalendar object = new MyCalendar();
        // Call run method of the MyCalendar class instance
        object.run();
    }
The above steps have created a class of the form and an executable class that can display the form.
Defining Java Forms
A Java Form has a specific screen shape and layout defined in a Java class.
This section explains how to edit this Java Form and make it complete.
In Java Form Designer, place Beans, define properties (attributes), and code processing procedures to complete the form.
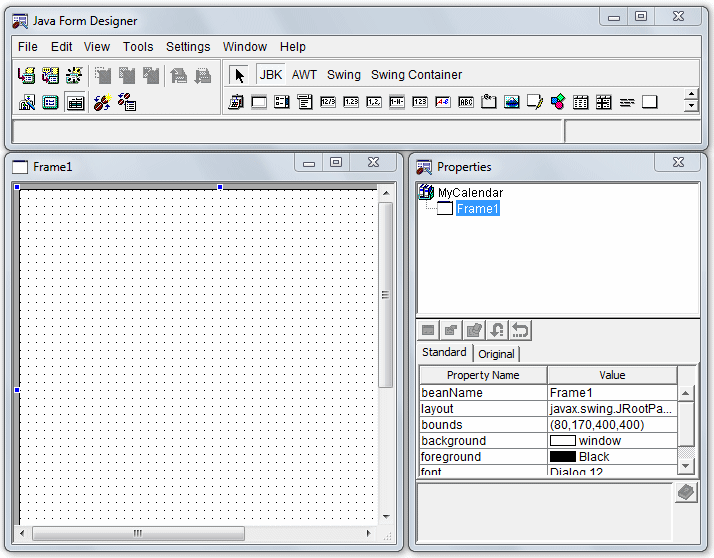
Modify Frame1 properties.
You can browse and define properties in "Property Sheet" of the Properties window.
If the Properties window is not displayed, select [View] > [Properties] from the Java Form Designer menu bar. The Properties window then is displayed.
Property Sheet lists properties of the selected Bean. If no Bean is selected, properties of the Java Form are listed.
Define the properties of Frame1 as follows:
Property name | Value |
|---|---|
layout | <NONE> |
background | Lightgray |
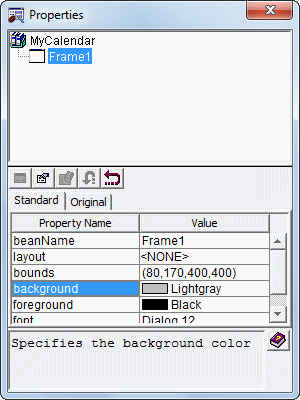
Bean information is displayed on two pages: Standard and Original.
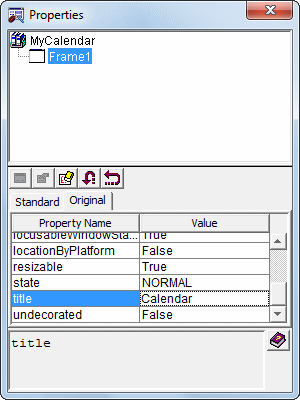
Click the [Original] tab, and specify the following:
Property name | Value |
|---|---|
title | Calendar |
Placing the Calendar Bean
Beans such those for a button and listbox are used to control input and output between a user and the screen displayed.
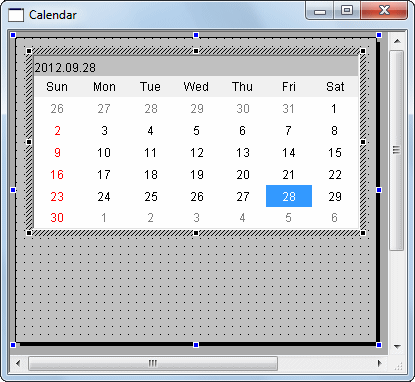
This section explains how to place the JBK calendar Bean on a Java Form. Using the mouse, edit the Bean by placing, resizing, and moving it.
If [JBK] is not selected on the Object Palette, click [JBK].
Point
Object Palette

Use the Object Palette to place components (Beans and controls) on the form. Click an icon on the palette to select a component.
Click [Calendar] on the Object Palette.
Place the Bean on the Java Form.
Click and hold down the left mouse button at the point where you want to paste the Bean on the Java Form.
Drag the mouse and release the button of the mouse at an appropriate point. The Bean can thus be pasted on the form.
Coding an event process
An operation performed by clicking the mouse or using the keyboard is referred to as an event.
A processing procedure coded for an event is referred to as an event process.
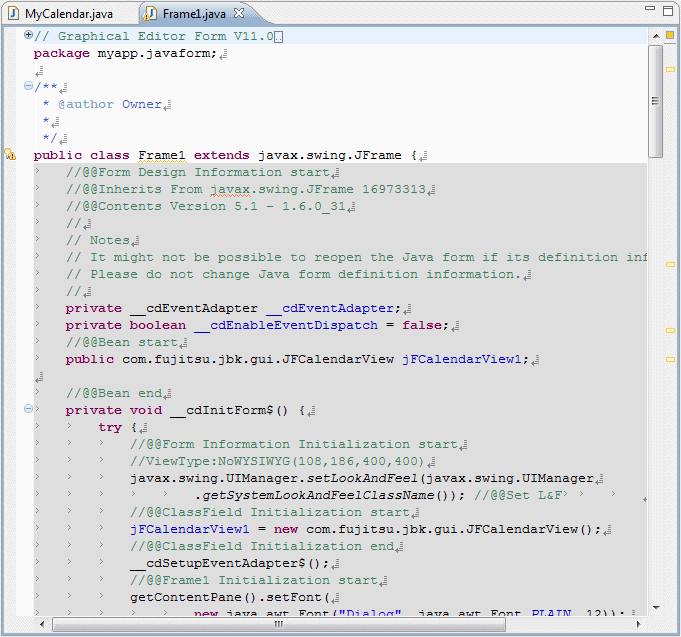
Code event processes in the Java editor.
To start the Java editor, select [View] > [Java Editor] from the Java Form Designer menu bar. You can also start the Java editor by double-clicking on a Java Form or pasted Bean.
Display the [Bean List] view to code a process in which a specific event occurs.
Select [Window] > [Show View] > [Other] from the menu bar. The [Show View] dialog is displayed. Select [Java] > [Bean List], then click [OK].
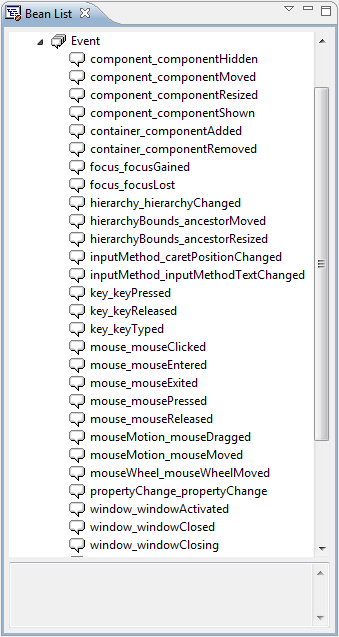
Code the process such that the application ends when the frame closes.
When the frame closes, a window event occurs. In the "window_windowClosing" event, code a process corresponding to the window event.
Double-click [Frame1] > [Event] > [window_windowClosing] in the [Bean List] view.
An event process creation confirmation dialog is displayed. Click [Yes].
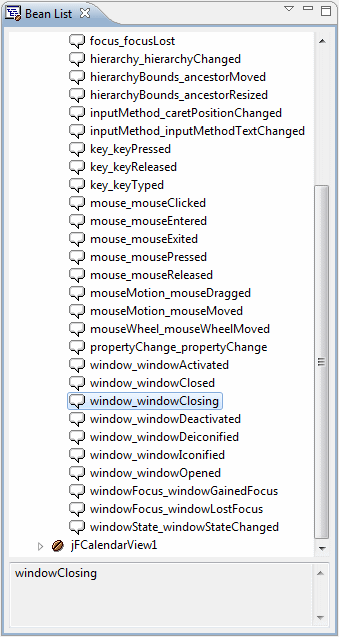
Code the text shown below in red in the "Frame1_window_windowClosed" event.
    public void Frame1_window_ windowClosing(java.awt.event.WindowEvent e) {
        if(!defaultEventProc(e)) {
            // The procedure when the event is generated is described below.
            System.exit(0);
        }
    }
Point
Change prohibition part which is managed by Java Form Designer
Java Forms include sources for calling screen (Bean) information and event processes. Because Java Form Designer is used to manage the sources, changing the sources is prohibited.
These sources that must not be changed are enclosed by comments in blue, as shown below.
public class Frame1 extends javax.swing.JFrame {
    //@@Form Design Information start

      - Sources that are managed with Java Form Designer and that must not be changed -

    //@@Form Design Information end
Save the Java Form.
Select [File] > [Save] from the workbench menu bar. Alternatively, select [File] > [Save] from the Java Form Designer menu bar.
Workbench or Java Form Designer can be used to save the file.
Select [File] > [Close] from the Java Form Designer menu bar, to close the Java Form.
Building
Building is executed automatically when resource files (such as the Java files) are saved if the [Build Automatically] item is enabled in the [Project] menu.
If [Build Automatically] is disabled, right-click on the project and select [Build Project] or select [Build Project] in the [Project] menu.
A JAR file is required so create it.
Use the export wizard to create the JAR file.
Select [File] > [Export] to start the export wizard.
Select [Java] > [JAR file] in the export wizard.
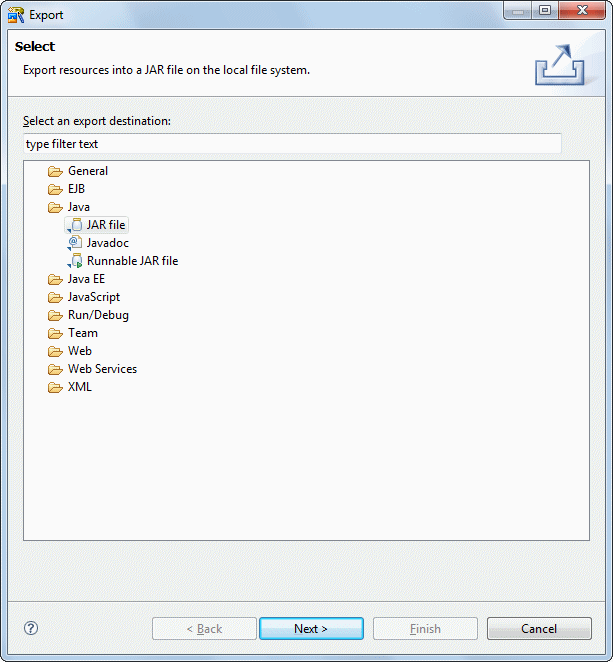
The JAR export wizard is displayed.
Select [MyCalendar] > [src] folder in [Select the resources to export] and enter the following settings.
After setting the information, click [Finish].
Setup Items | Setup Content |
|---|---|
Select the resources to export | src/ |
Export generated class files and resources | Checked |
JAR file | MyCalendar/MyCalendar.jar |
Compress the contents of the JAR file | Checked |
The following message is output when exporting JAR, but this does not indicate a problem.

Running
Select the file (class) to be executed. Click [MyCalendar] > [src] > [myapp.javaform] > [MyCalendar.java] in the [Package Explorer] view of workbench.
Select [Run] > [Run As] > [Java Application] from the menu bar. As a result, the application starts, and the Java Form is displayed.
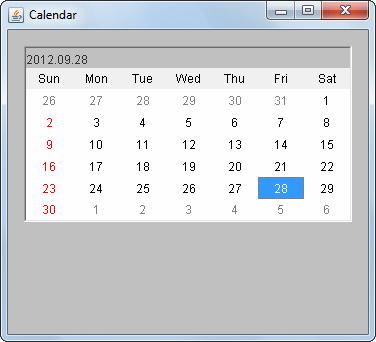
Check the calendar Bean operations.
The calendar Bean includes functions that you can use to display a calendar and select a date.
Click a date to select it.
You can use the cursor keys or the [Page Up] and [Page Down] keys to change the selected display for each day, week, or month.
To close an application, click the Close [X] button on the title bar.