This section explains the steps required to install the dashboard development environment.
Note
Use Interstage Business Process Manager Studio and Interstage Business Process Manager Analytics Studio bundled with this product when installing them. Studio bundled with Interstage Business Process Manager or Interstage Business Process Manager Analytics supplied as a standalone product cannot be used.
If a Linux version is used, a Windows client machine that has been arranged for the dashboard development environment must be used to perform the tasks.
Firstly, insert the following DVD-ROM (Disk 3) into the DVD-ROM drive of the computer.
Follow the steps below to install.
Install JRE 5.0
Install JRE 5.0 in advance when installing the dashboard development environment to a machine other than the admin Server.
Execute the following file:
[Windows Manager]
DVD-ROM drive:\DISK3\Studio\Windows\RCXCTMG\Disc1\en\autorun.exe
[Linux Manager]
DVD-ROM drive:\DISK3\Studio\Windows\RCXCTMG\Disc1\en\autorun.exe
Click Install.
Select Custom, and click Next.
To select an installation folder other than the default folder, select Destination Folder displayed and select the installation folder. Click Next.
To select installation functions, select the JRE-JBK Plugin and >> 5.0 checkboxes only. Clear all other checkboxes. Click Next.
Check the installation details and click Install.
Click Finish when installation is completed.
Install Interstage Business Process Manager Studio
Install BPM Studio.
Execute the following file:
[Windows Manager]
DVD-ROM drive:\DISK3\Studio\Windows\RCXCTMG\Disc2\setup.exe
[Linux Manager]
DVD-ROM drive:\DISK3\Studio\Windows\RCXCTMG\Disc2\setup.exe
The following dialog box will be displayed if exclusive software such as Systemwalker Runbook Automation Studio and Interstage BPM Studio for Systemwalker, or a standalone product such as Interstage BPM Studio has been installed.
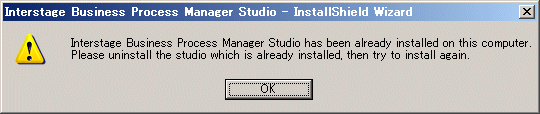
If exclusive software is installed, build the dashboard development environment after uninstalling the exclusive software or build the dashboard development environment on a separate Windows machine.
Click Next.
To change the installation folder, click Change and select the folder. Click Next.
Check if the JDK or JRE folder is set correctly. If it is not set properly, set either one of the following and click Next:
Installation folder\IAPS\JDK5 (*)
Installation folder specified when JRE5.0 was installed\JBKDI\jre5
*note: The following will be used if the dashboard development environment is deployed to the same machine as the admin server.
Installation folder\IAPS\JDK6
Do not enter anything in UDDI Search URL and click Next.
Click Next.
Click Finish when installation is completed.
Install Interstage BPM Analytics Studio
Install Analytics Studio.
Execute the following file:
[Windows Manager]
DVD-ROM drive:\DISK3\Manager_Extended\Windows\Install\RCXCTMG\Disc3\IBPMM\setup.exe
[Linux Manager]
DVD-ROM drive:\unified\Disc5\ibpma\Client\IBPMM\setup.exe
[Windows Manager]Specify Client, and install the Interstage Business Process Manager Analytics client.
Select the client when in the same environment as the admin server, then click Next.
Do not remove the selection in Server.
Confirm that [Install Location of Analytics Studio Plug-in] is <Interstage Business Process Manager Studio Installation_folder>\bin in the Check Installation settings window, and with Do not make any change selected click Next. Installation will start.
When the [Install Location of Analytics Studio Plug-in] is other than BPM Studio installation folder\bin, select Change and then click Next, and then select the correct installation folder.
The Check Installation settings window described above will not be displayed when in the same environment as the admin server. The window will be displayed when using the wizard, click Next.Installation will start.
Click Finish when installation is completed.