Install the AdvancedCopy Manager's agent with the following procedure.
Log on to the primary node.
Log on to the primary node as the administrator. Ignore "(Secondary node)" in the following explanation.
Insert the DVD-ROM "ETERNUS SF SC/ACM/Express Mediapack (Agent Program and Manual)" for this version into the DVD-ROM drive.
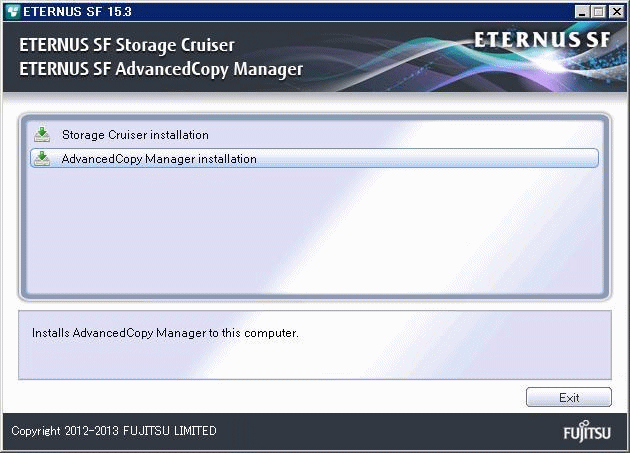
The following window will be displayed. Click AdvancedCopy Manager installation.
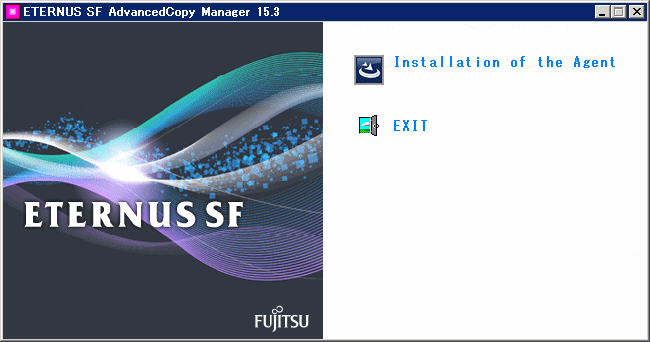
The following page will be displayed. Click Installation of the Agent.
The following page will be displayed if the server OS is Windows Server 2008 x64, Windows Server 2008 R2, or Windows Server 2012. Select the agent to be installed.
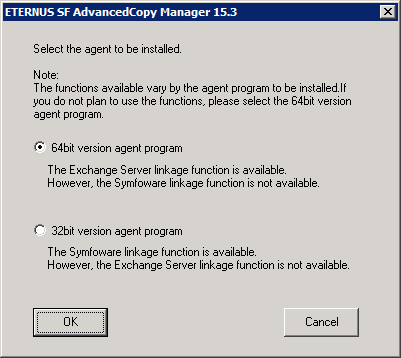
Make your selection according to the following reference criteria:
Function intended to be used | Explanation |
|---|---|
Exchange Server linkage online backup function | Select the "64bit version agent program". AdvancedCopy Manager (64bit) for Windows Server 2008 / 2012 (x64) will be installed. |
Symfoware linkage function | Select the "32bit version agent program". AdvancedCopy Manager (32bit) for Windows Server 2008 / 2012 (x86,x64) will be installed. |
Not intending to use any of the above | Select the "64bit version agent program". AdvancedCopy Manager (64bit) for Windows Server 2008 / 2012 (x64) will be installed. |
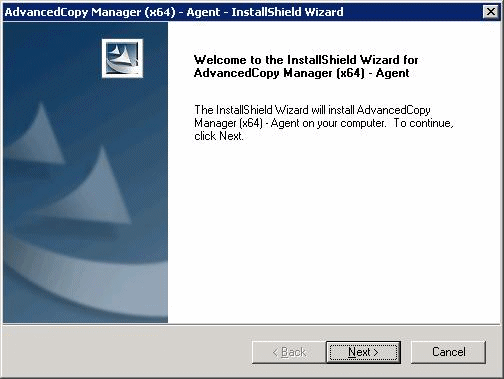
The installation wizard page will be displayed. Click Next.
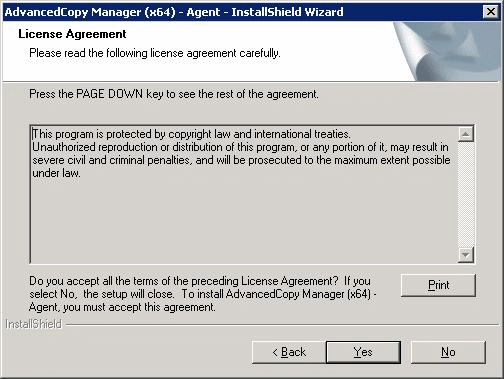
Read the terms and conditions of the License Agreement page.
If the conditions are agreeable, click Yes.
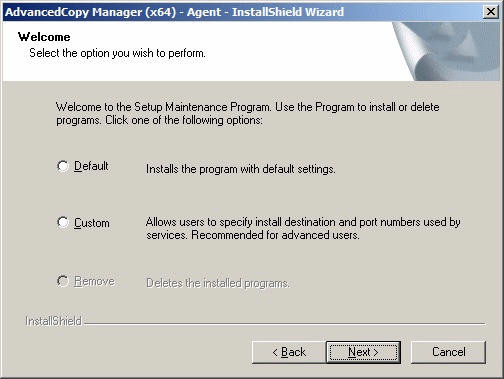
The following page will be displayed.
Select the desired options according to the following information.
Install option | Explanation |
|---|---|
Default | For this installation method, the following checks are automatically performed relating to the information provided by default:
Consequently, steps 8 and 9 are skipped. If an error is detected at this stage, a warning dialog box will be displayed. |
Custom | The installation information must be manually entered in the pages for step 8 and later. |
Specify the installation directory in the Install Destination page.
For the primary node
If this product is to be installed in directories other than those displayed (default directories), click Browse to select the desired directories. After all the proper directories have been selected, click Next.
Note: directories with spaces their names (e.g., Program Files) must not be specified. Do not install AdvancedCopy Manager on a shared disk.
For the secondary node
Specify the same drive and directories as those specified for the primary node.

Specify the port number for the service in the Port Registration page.
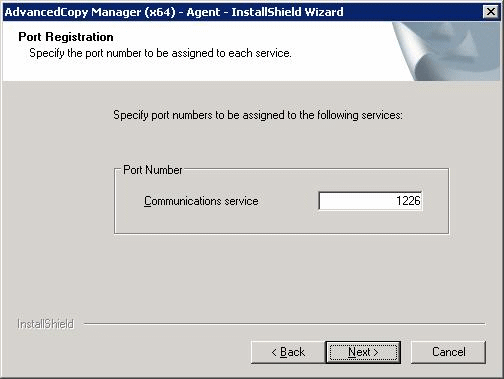
For the primary node
Enter the port number to be allocated to each service within the following range:
5001 to 32767
The first displayed value is a recommended value in a non-cluster environment and is not always unique.
To perform cluster operation with Windows Server 2003, change all port numbers so that they are within the range as indicated above.
After entering port numbers completely, click Next. If a port number that has already been assigned was entered, this window appears again.
For the secondary node
Specify the same value which is specified for the primary node.
If the AdvancedCopy Manager service name is defined with alias name, the following dialog will be displayed and the port number specified on the previous screen is ignored. However, processing for installation will continue.
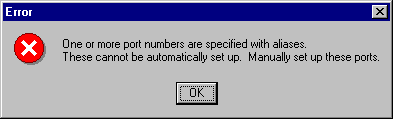
Point
For setting the port number manually, edit the %SystemRoot%\system32\drivers\etc\services file.
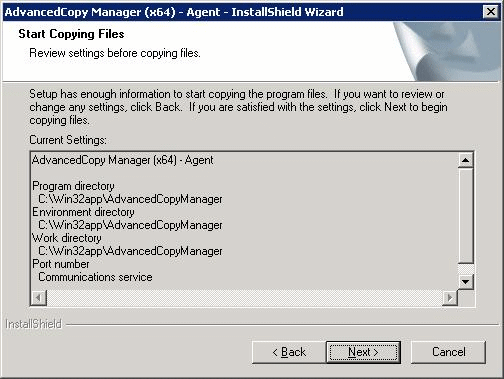
Check the settings information in the Start Copying Files page.
If the settings are correct, click Next. The copy processing starts.
To change a setting, click Back.
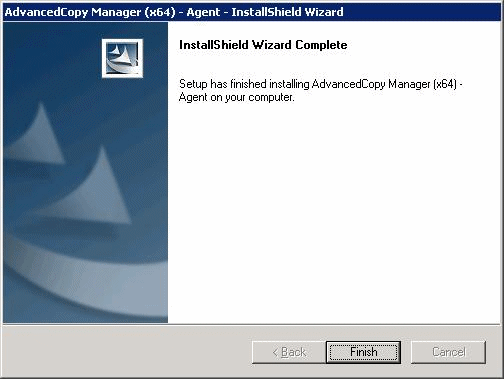
When the copying process is completed, the following installation wizard page will be displayed. Click Finish.
Click Exit in the window displayed in step 3 and step 4.
For the primary node
Next, start the installation on the secondary node by continuing with step 13.
For the secondary node
The installation on both nodes is completed. To set up a cluster environment, refer to "Chapter 7 Preparations for Customizing Managed Server Transactions".
Log on to the secondary node.
Log on to the secondary node as the administrator.
Go back to step 2.
Starting with step 2, perform the same installation procedure for the secondary node as for the primary node. Ignore (Primary node) in the following explanation.